Operating the Fan6
6
1. Place the fan on a firm, even surface. Make sure that it is standing securely so that it can
not tip or fall over. A safety distance of at least 50 cm from other objects must be observed.
2. Make sure that the fan is switched off. Push the power plug (5) into the power socket.
Insert the batteries into the remote control (7).
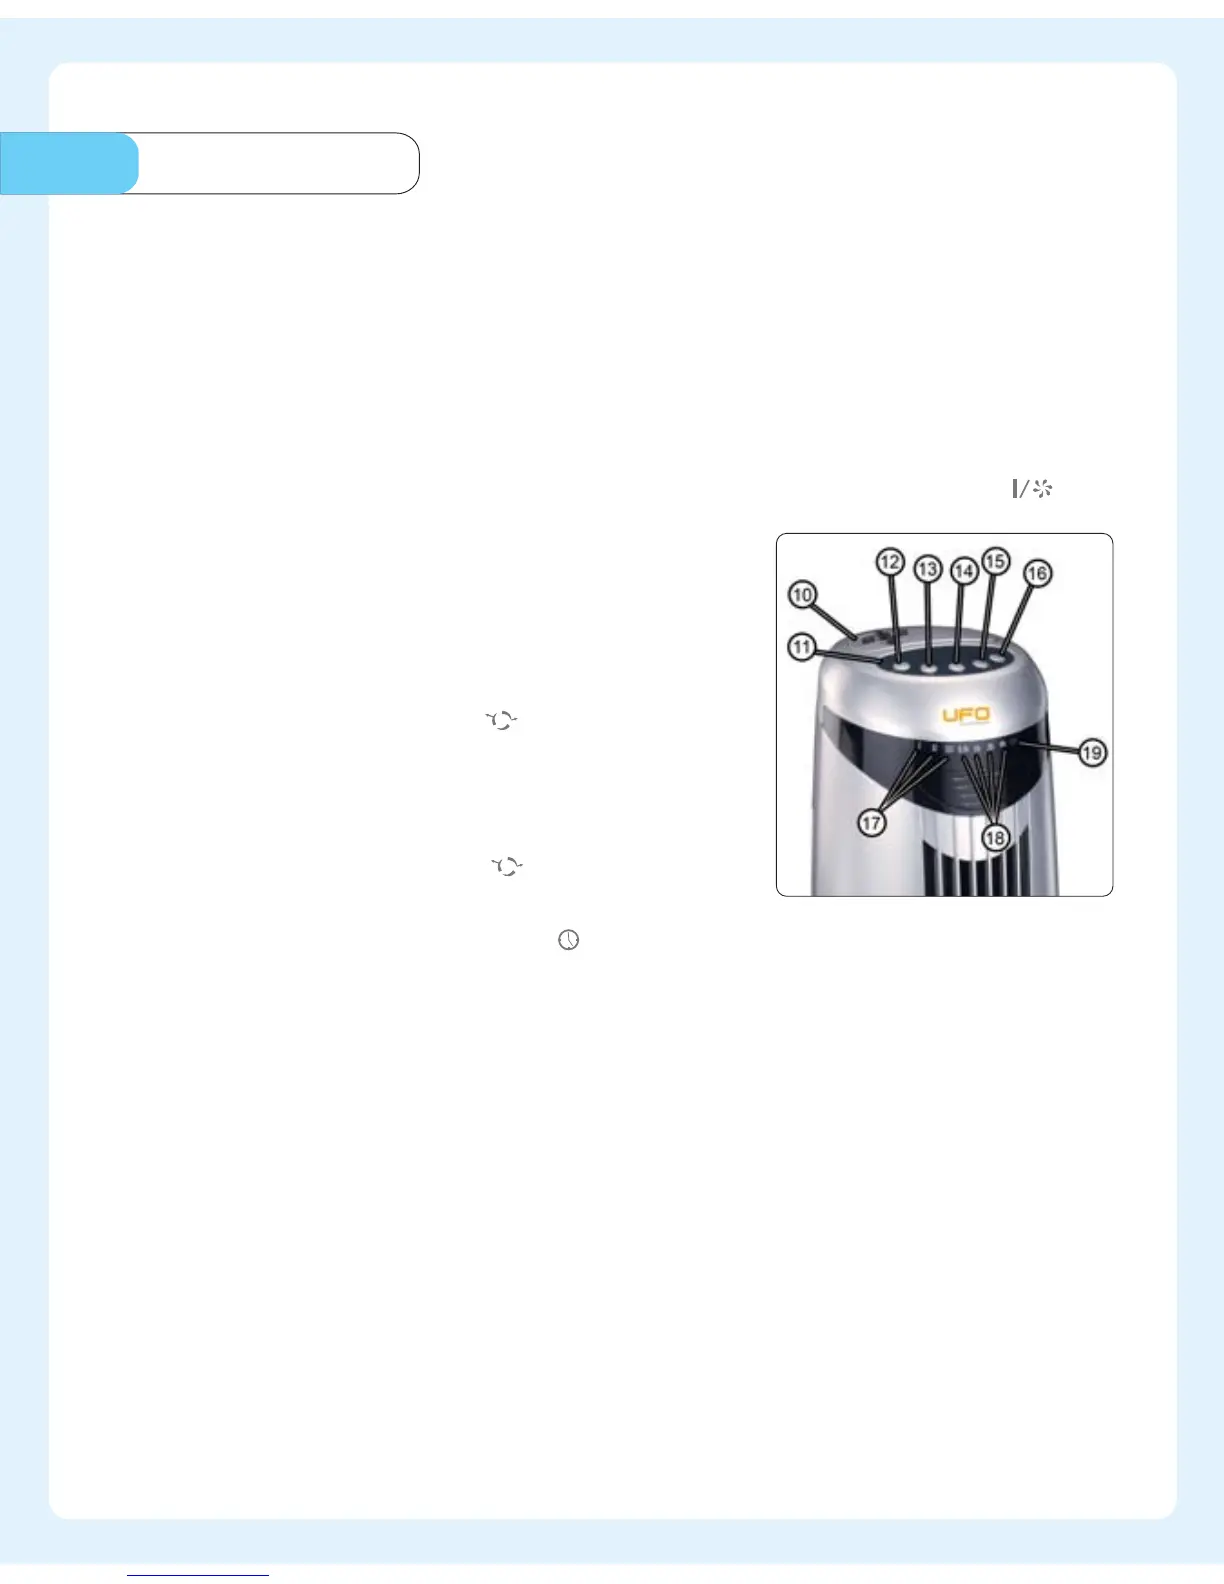
3. You can control the fan manually via the control panel (11) or with the remote control (7).
4. Switch on the fan. You can set the fan speed by pressing the key
(13):
,,I" = low
,,II" = medium
,,III" = high
The respective control light ,,I", ,,II", ,,III" (17) lights up. The
fan is operating with the normal fan function.
5. Press the oscillation key
(15) to start the fan
oscillating from left to right. To stop the oscillation, press
the same key.
6. Press (16) ion key to start ionizer function.
7. By pressing the oscillation key
(15) you can start the
fan oscillating from left to right on both operating modes.
8. The fan is equipped with a "TIMER"
function. This function switches the fan off after
the set time ends. The time period is at least 30 minutes and at the most 7.5 hours and can
be set at intervals of 0.5h by pressing the timer key.
The respective TIMER control lights (17) light up. Examples:
Press x 1:0.5 - control light ,,0,5h" lights up green
Press x 5:2.5 - control lights ,,2h" and ,,0.5h" light up green
Press x 10:5.0 - control lights ,,2h" and ,,0.5h" light up gree
Press x 15:7.5 - control lights ,,4h", ,,2h", ,,1h" and ,,0.5h" light up green
To deactivate the "TIMER" function, press Timer key repeatedly until all the timer control
lights (18) are off.
9. Use the transport grip (6) to transport the fan. Before transport, switch off the fan and
pull the power plug (5) out of the power socket.
10. When you have finished using the fan, switch it off and pull the power plug (5) out of the
power socket.
 Loading...