ENGLISH
10
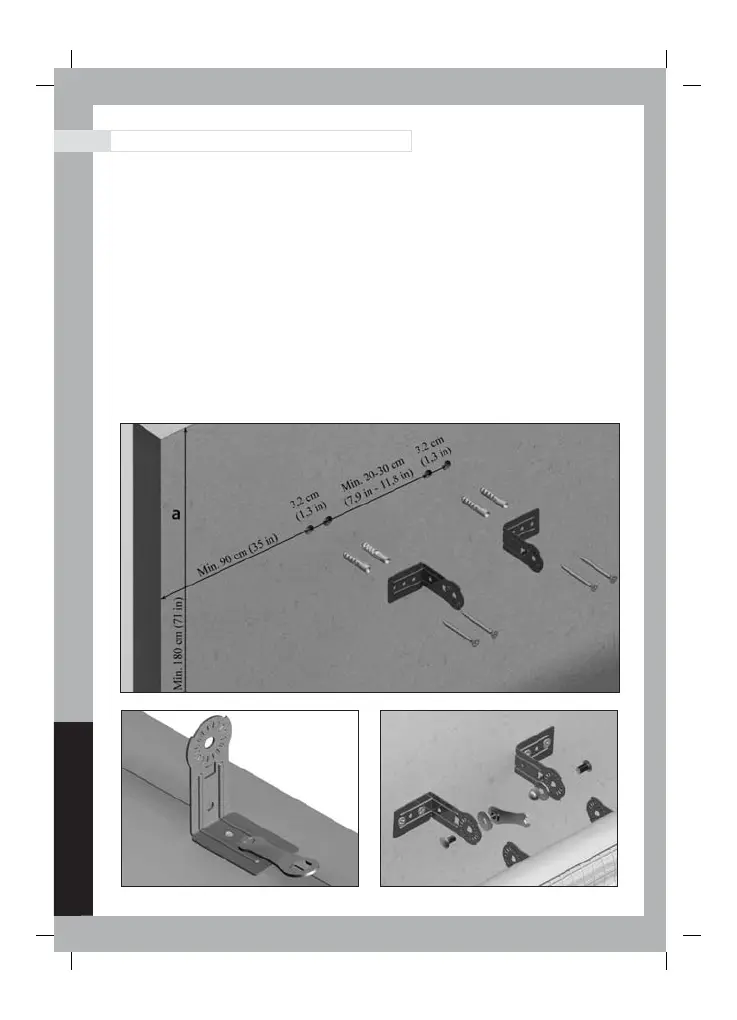
3.4 Installation Instructions – Mounting Your Heater
Figure 1
Figure 3
Figure 2
1- Determine the location where the brackets (Part #18) will be installed on the wall and drill
four 5/16” diameter holes according to the distances shown in Figure-1.
2- Insert the anchors (Part #29) into the holes.
3- Mount two of the L-shaped bracket legs on the wall using the supplied 40mm screws
(Part #28).
4- With the small (open end) wrench, attach the other L-shaped bracket legs to the heater
as shown in figure-2. Use the two 7.5mm screws (Part #21). The female threads are built
into the heater housing.
5- Attach the heater brackets to the wall brackets using the 8mm bolts (Part #25), the 8mm
cap nuts (Part #26) and the washers (Part #24) as shown in Figure-3. Tighten using the
large end (box end) of the supplied wrench. (Part #32)
 Loading...