1
1. Installation
1.1 Installation- Mounting the Amplifier
Step 1- Disconnect the negative (-) battery cable before mounting the
amplifier or making any connections. Check the battery and alternator
ground (-) connections. Make sure they are properly connected and free
of corrosion
Step 2- Choose a mounting location for your amplifier. Find a location
on a flat surface away from heat and moisture. Be sure the mounting
location and the drilling of pilot holes for mounting will not present a
hazard to any wires, control cables, fuel lines, fuel tanks, hydraulic lines,
or other vehicle systems or components. Common mounting locations are
under the front passenger seat, or in the trunk area. Choose a location
with unimpaired air circulation. The amplifier will dissipate heat more
efficiently if mounted vertically.
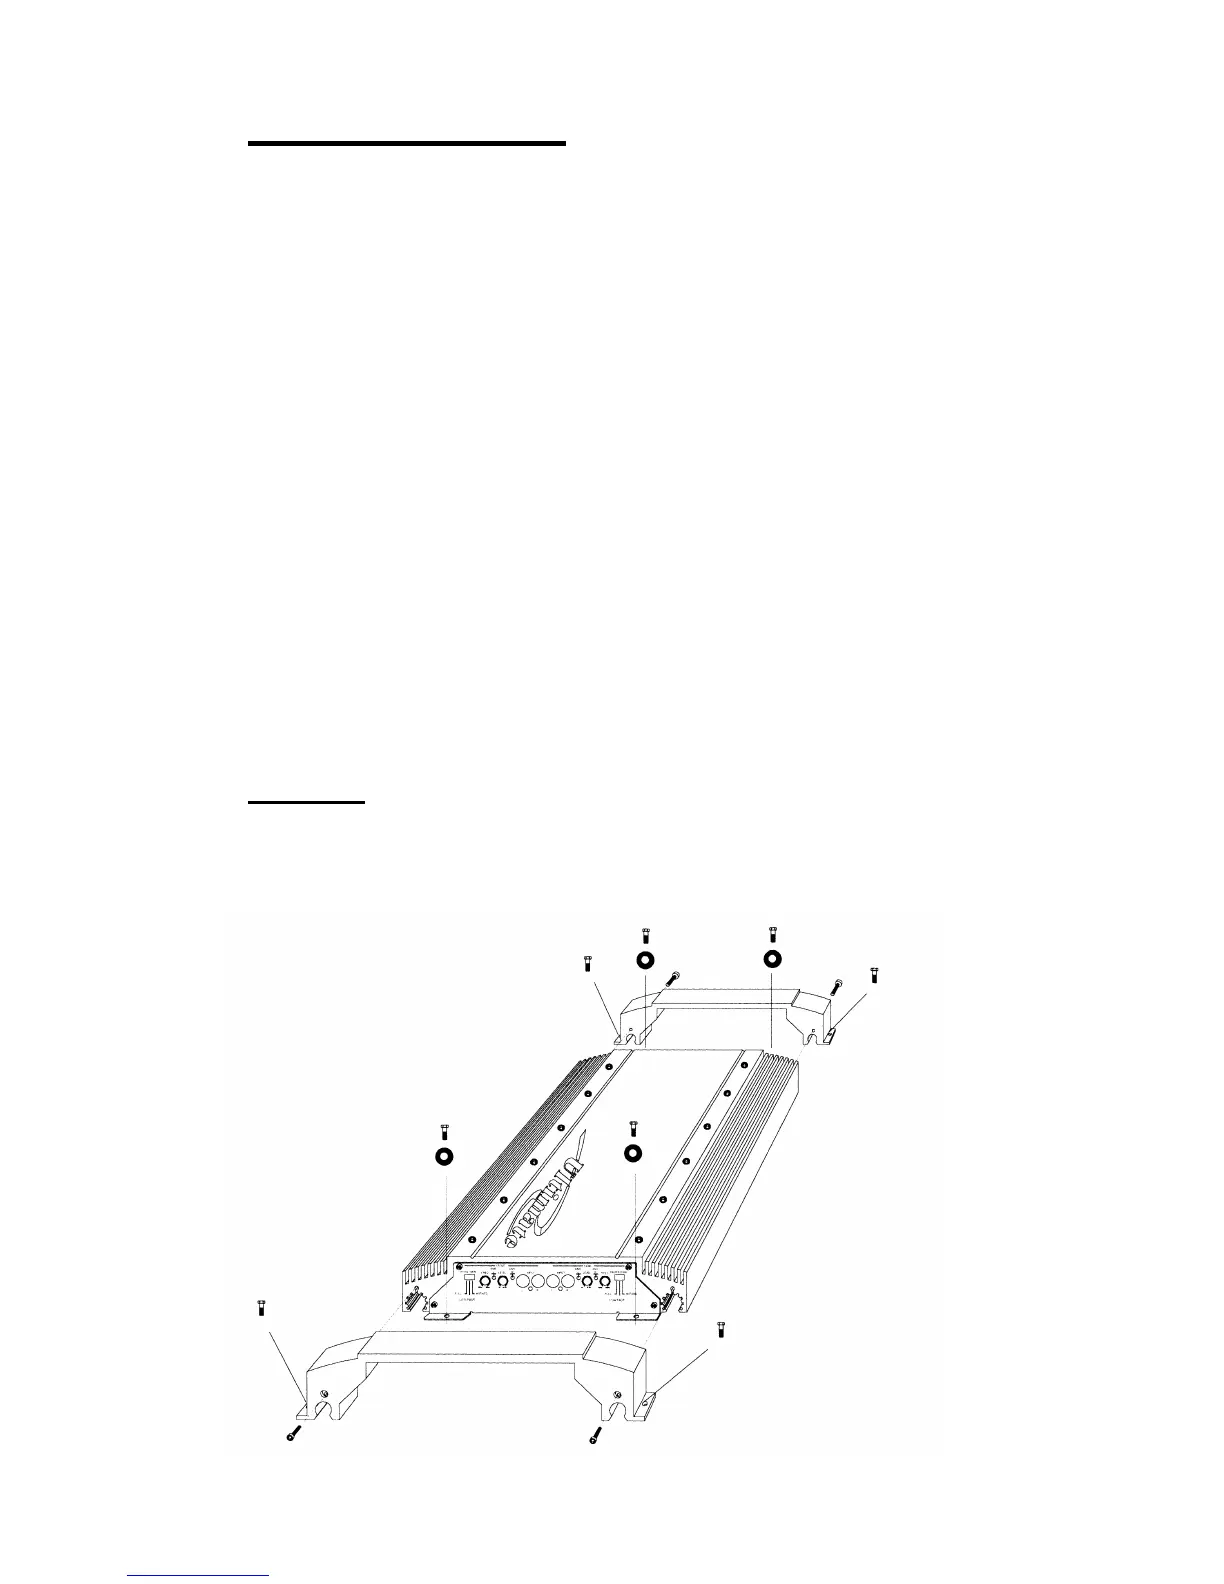
Step 3- Use the supplied screws and rubber bushings. Press the rubber
bushings into the mounting holes at each end of the amplifier. Place the
amplifier in the mounting location, and mark the positions of the holes
with a marker, pen or pencil. Carefully drill the mounting holes in the
marked positions.
Caution!
⇒ Check carefully before drilling any pilot holes.
Step 4- Use the supplied mounting screws to securely fasten the amplifier
to the mounting surface.