7.
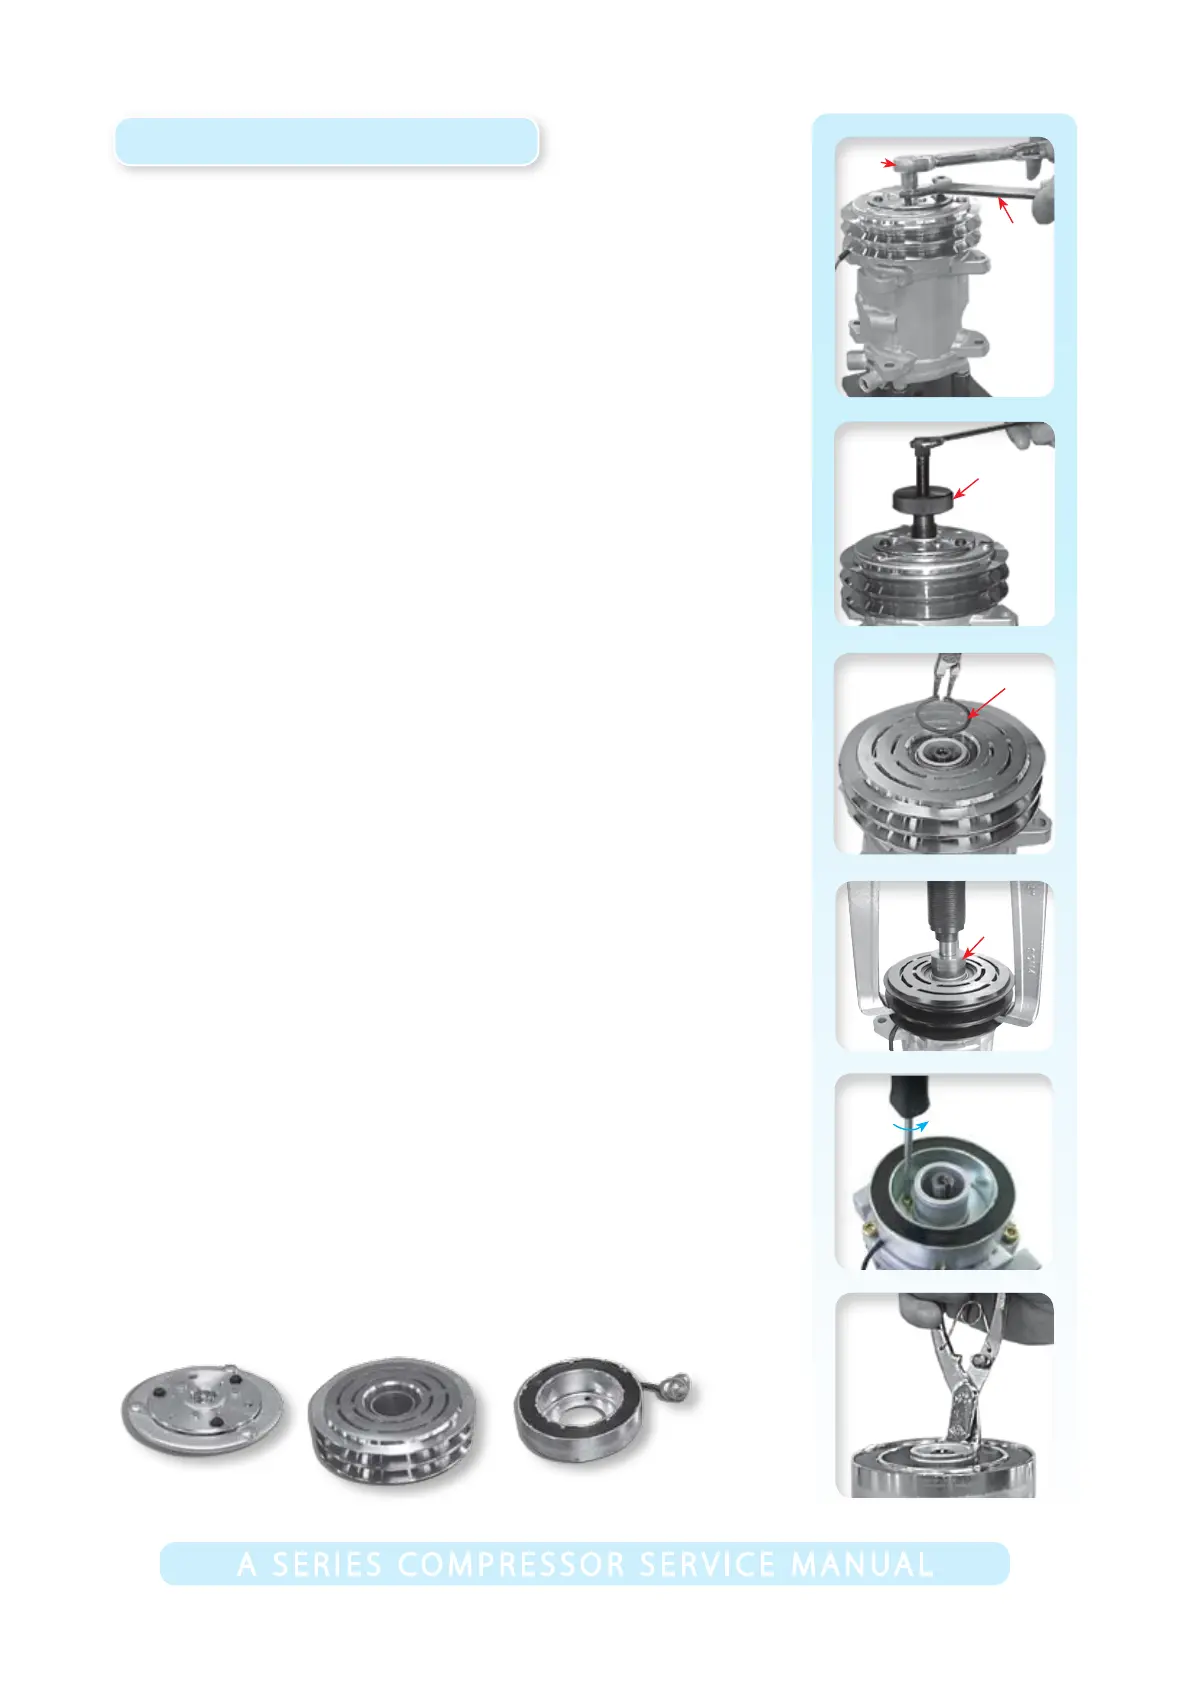
Removal of clutch assembly
I. Removal of xing screw on armature
Tools required: • Stand • Clutch wrench
• Wrench • 10mm Socket
Procedure: Place the compressor on the stand. Hold clutch by
inserting the claws of the clutch wrench into the holes on the
armature. Remove the centre bolt by using the wrench.
II. Removal of armature
Tools required: • Hub remover • Wrench
Procedure: Pull the armature upwards.
III. Removal of snap ring
Tools required: • Snap ring pliers (shaft)
Procedure: Remove the snap ring with the snap ring pliers.
IV. Removal of pulley assembly
Tools required: • Remover, pulley • Wrench • Pulley pad
Procedure: Remove the pulley assembly with the remover.
V. Removal of coil (3 bolt type)
Tools required: • Standard screwdriver
Procedure: Remove 3 M5 bolts with screwdriver.
Removal of coil (snap ring type)
Tools required: • Snap ring pliers (shaft)
Procedure: Remove the snap ring with pliers as shown.
VI. Inspection of clutch components
1. Armature - Contact surface must be clean, smooth and
unmarked, with no abnormal scoring.
2. Pulley - Contact surface must be clean, smooth and
unmarked, with no abnormal scoring.
3. Coil - Wiring harness must be in good condition.
Armature
Pulley
Coil
Hub remover
Wrench
Clutch
wrench
Snap ring
Pulley
pad
Snap ring pliers
(+) Driver