8.
Magnetic clutch installation
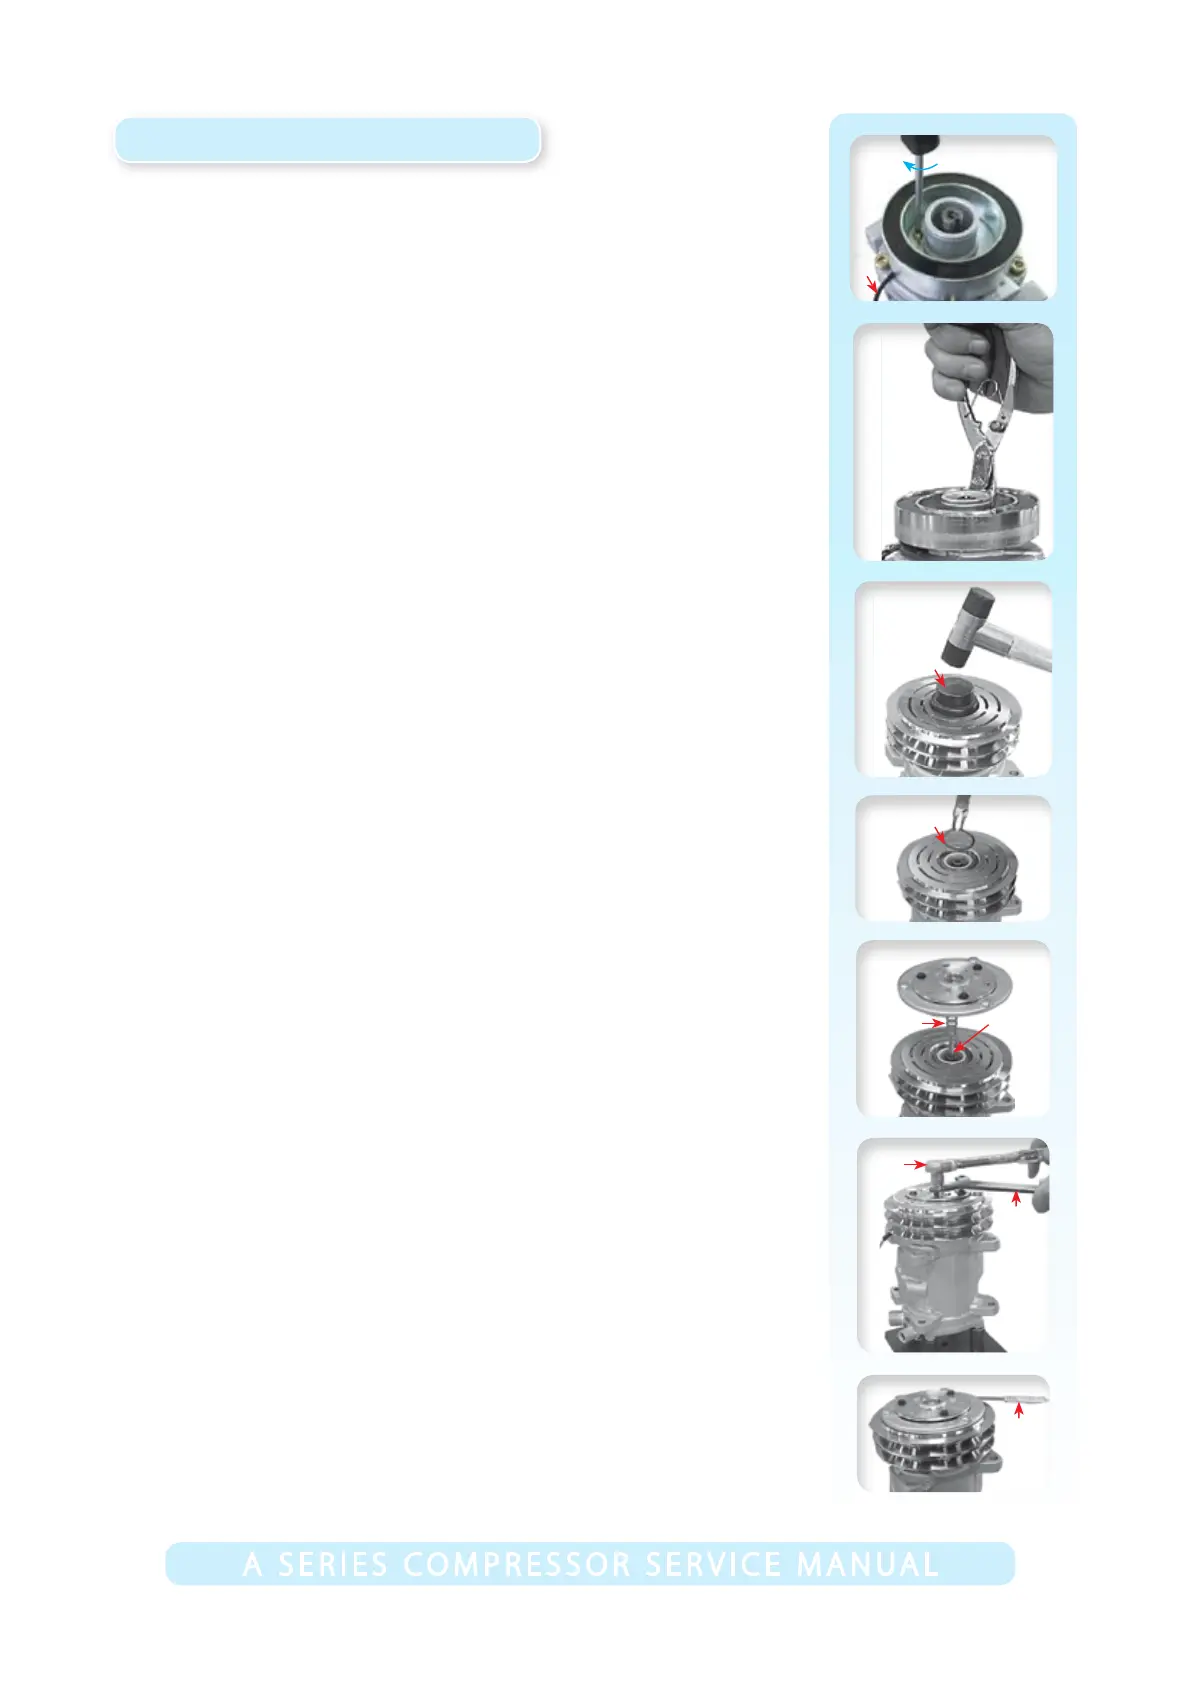
I. Installation of coil (3 bolt type)
Tools required: • Stand • Standard screwdriver
Procedure: Tighten 3 M5 bolts (wire must be visible at 3 o’clock
position, when viewed from the front).
Tightening torque: 4.9 ±1 N•m
Installation of coil (snap ring type)
Tools required: • Stand • Snap ring pliers (shaft)
Procedure: Install the snap ring into the groove.
II. Installation of pulley
Tools required: • Pulley installer • Plastic hammer
Procedure: Place the pulley on the nose top and install it by
tapping on the installer until it stops. Do not tap if the pulley is
not located correctly.
III. Installation of clutch snap ring
Tools required: • Snap ring pliers (shaft)
Procedure: Install the snap ring into groove (tapered side up).
IV. Installation of shims and armature
Tools required: • Guide pin
Procedure: Install the guide pin into the centre threaded hole
of the shaft and select shims (T=0.1, 0.3 and 0.5mm) to ensure
the clutch clearance as in gure.
V. Installation of armature
Tools required: • Clutch wrench • Torque wrench
• 10mm Socket
Procedure: Install the M6 bolt by holding the clutch wrench on
the holes (3 positions) on the armature.
Tightening torque: 13.7 ± 1 N•m
VI. Air gap
Tools required: • Thickness guage
Procedure: Ensure clutch clearance is correct all around.
(0.3mm≤ Gap ≤0.6mm)
(+) Driver
Wire
0.3≤ Gap ≤0.6
Snap ring pliers
Hammer
Pulley installer
Snap ring
Shims
Torque
wrench
Clutch
wrench
Thickness
gauge
Guide pin