+ 1 step forward in setting Fast advance
C/ F/Search Toggle degree C & F Search for remote sensor
LIGHT ON/OFF Turn on/off continuous backlight when adapter is connected
In the event that the AC/DC adaptor power is disconnected or a power failure or other interruptions
occur, the back-up batteries will maintain the weather forecast, time and alarm set-tings.
Clock, wake-by-Buzzer and LCD backlight still functions by battery back-up. Continuous backlight
resume working when AC power is restored.
1. Remove the battery cover at the bottom of the unit.
2. Insert 3 pieces batteries AA type (alkaline batteries preferred) by observing the +/- polarity signs.
3. Replace the battery cover, making sure the cover locks into place.
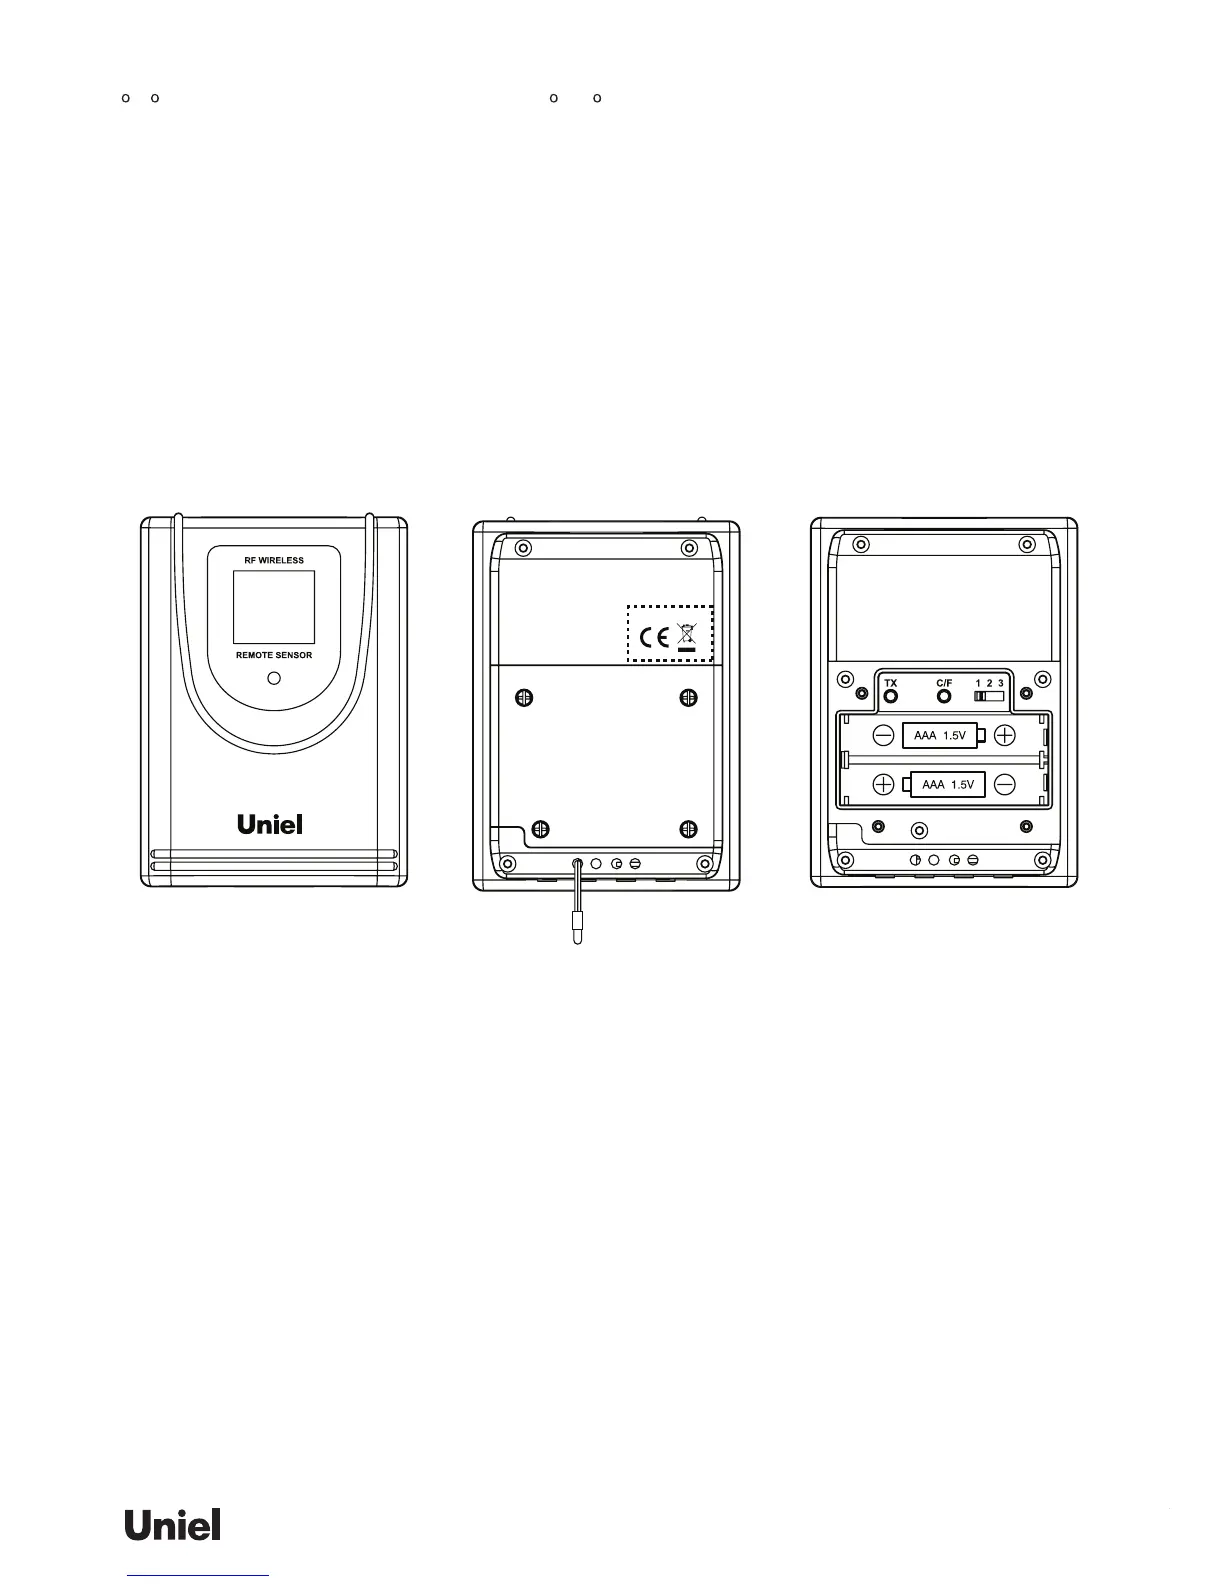
1. Loosen the four screws on the battery door with small screwdriver.
2. Insert 2 pieces AAA type batteries (alkaline batteries preferred) by observing the +/- polarity signs.
3. Replace the battery cover, making sure the cover locks into place and then tighten the screws.
1) For the rst installation, always turn on the home unit and then the remote sensor. Set Channel 1 for
the rst remote sensor. Set channel 2 and channel 3 for the 2nd and 3rd sen-sor.
2) Press and hold [SEARCH] button for 3 seconds to search for remote unit. The outdoor reading (“----“
or temperature digits) in the OUTDOOR display mode will ash indicating it is in the searching mode
3) Press the [Tx] button on the back of remote sensor to transmit RF signal.
4) When RF connection is established, the respective temperature & humidity of the selected channel
will appear on the OUTDOOR display mode.
The unit predicts weather condition of the next 12 – 24 hours based on the change of atmospheric
pressure. The coverage area is around 30 – 50 km. The weather forecast is based on atmospheric
pressure change and is about 70-75% correct. As weather conditions cannot be 100% correctly fore-
casted, we cannot be responsible for any loss caused by an incorrect forecast.
To obtain an accurate weather forecast, you need to input your current weather condition as initial
setting. After the powering on the main unit, Press [+] or [-] to select the local weather condition as initial
weather forecast setting. Press [CLOCK] to conrm and exit.
You may also set the weather forecast by holding [CLOCK] button to enter the setting mode. Press
[CLOCK] repeatedly to skip the clock & calendar setting until the weather icon ashes. Press [+] or [-] to
select local weather condition. Press [CLOCK] to conrm and exit.
12/24hr format > Hr > Min > Yr > D/M or M/D format > Month > Date > Weather Forecast > EXIT