EasyManua.ls Logo

Union 62983 - User Manual

Union 62983
8 pages
Print Icon
To Next Page IconTo Next Page
Loading...
Visit our website at: http://www.harborfreight.com
Email our technical support at: productsupport@harborfreight.com
ELECTRONIC WALL SAFE
62983
Batteries sold separately.
To ensure security of your safe, Union Safe Company does NOT provide replacement keys.
Owners Manual & Safety Instructions
Save This Manual Keep this manual for the safety warnings and precautions, assembly,
operating, inspection, maintenance and cleaning procedures. Write the product’s serial number in the
back of the manual (or month and year of purchase if product has no number). Keep this manual and the
receipt in a safe and dry place for future reference. 23c
When unpacking, make sure that the product is intact
and undamaged. If any parts are missing or broken,
please call 1-888-866-5797 as soon as possible.
Copyright
©
2022 by Harbor Freight Tools
®
. All rights reserved.
No portion of this manual or any artwork contained herein may be reproduced in
any shape or form without the express written consent of Harbor Freight Tools.
Diagrams within this manual may not be drawn proportionally. Due to continuing
improvements, actual product may differ slightly from the product described herein.
Tools required for assembly and service may not be included.
Read this material before using this product.
Failure to do so can result in serious injury.
SAVE THIS MANUAL.
Question and Answer IconNeed help?

Do you have a question about the Union 62983 and is the answer not in the manual?

Overview

This document describes the Union Safe Company Electronic Wall Safe, a security device designed to be installed within a wall.

Function Description

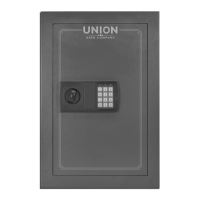
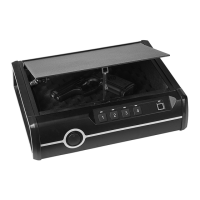
The Electronic Wall Safe is intended for securing valuables and documents. It features an electronic keypad for access, supplemented by a keyhole for manual override. The safe is designed to be installed into a wall, providing a discreet and secure storage solution. It operates with an electronic locking mechanism, allowing users to set and reset both a Master Code and a User Code for access. In case of forgotten codes or depleted batteries, a physical key can be used to open the safe.

Important Technical Specifications

  • External Dimensions: 3-1/2" L x 13-3/4" W x 22-3/4" H
  • Batteries: 4 AA (sold separately)
  • Weight: 29 lb
  • Locking Mechanism: Electronic keypad with manual key override.
  • Code Length: Up to 8 digits for both Master and User Entry Codes.
  • Security Features: Keypad disables for 20 seconds after one incorrect entry, and for 5 minutes after three consecutive incorrect entries.
  • Construction: Steel body, designed for in-wall installation between studs.
  • Fire Resistance: The safe is explicitly stated as not fireproof.

Usage Features

Opening the Safe:

  • With Key: Remove the keyhole cover, insert the key, turn counterclockwise, then turn the knob clockwise to open the door. Remove the key and replace the cover.
  • With Entry Code: Enter the Master or User Entry Code on the keypad. The safe will beep twice, and a green light will illuminate. Turn the knob clockwise to open the door. The safe will automatically lock if not opened within a few seconds of accepting the Entry Code.

Setting/Resetting Entry Codes (Master and User):

  • Important: Keep the door open while setting codes and store codes in a secure location outside the safe.
  • Master Code: Press "00" on the keypad, then press and hold the Entry Code Button until the safe beeps and a yellow light illuminates. Within 15 seconds, enter an Entry Code (up to 8 digits) on the keypad, followed by either "A" or "B". A beep confirms acceptance; if the yellow light turns off without beeping, the code was not accepted.
  • User Code: Press and hold the Entry Code Button until the safe beeps and a yellow light illuminates. Within 15 seconds, enter an Entry Code (up to 8 digits) on the keypad, followed by either "A" or "B". A beep confirms acceptance; if the yellow light turns off without beeping, the code was not accepted.

Battery Installation/Replacement:

  • Remove the battery cover.
  • Install 4 AA batteries (sold separately), ensuring correct polarity.
  • Do not mix old and new batteries, or different types (alkaline, carbon-zinc, nickel-cadmium).
  • Do not use swollen or leaking batteries.
  • A red light will illuminate when batteries need replacement. Dispose of used batteries according to local regulations.
  • Note: Opening with the key may be necessary if batteries are depleted or the Entry Code is forgotten.

Closing/Locking the Safe:

  • Close the door, then turn the knob counterclockwise to lock.
  • Important: Always keep the safe closed and locked when unattended. Check inside before closing to prevent child entrapment. Keep keys and codes away from children.

Installation:

  • Preparation: Verify the installation surface has no hidden utility lines. Wear ANSI-approved safety goggles. Keep the area clean and well lit, and keep bystanders away.
  • Location: Choose a location, then use a stud finder (not included) to locate studs 16" apart. Mark stud locations.
  • Wall Opening: Cut out a small section of drywall next to a stud, then check inside for electrical wiring or plumbing interference. Measure the back of the safe and transfer measurements to the wall. Cut along marked lines and remove drywall.
  • Placement: Place the safe into the hole, using shims if necessary.
  • Securing: Locate two mounting holes on each side. Secure the safe with fasteners rated to support the weight of the safe and its contents.
  • Warning: Do not cut or alter load-bearing studs to fit the safe, as this can cause structural damage or collapse. Professional installation is required if the wall is load-bearing.

Maintenance Features

  • Protection from Moisture: Protect the safe from moist or wet conditions to prevent electronic damage or steel corrosion.
  • Cleaning: Occasionally wipe the safe and keypad clean with a soft, dry cloth or brush.
  • Electronic Mechanism: Do not apply oil or other liquids on or near the electronic mechanism.
  • Key Lock Lubrication: If the key lock sticks, use graphite lubricant (e.g., pencil lead). Rub pencil lead over the key, insert it, and turn back and forth until the lock moves freely.
  • Replacement Parts: Replacement parts are not available for this item.
  • Serial Number: Record the serial number (or month and year of purchase if no serial number) in the manual for future reference.

Union 62983 Specifications

General IconGeneral
BrandUnion
Model62983
CategorySafes
LanguageEnglish

Related product manuals