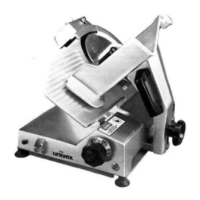
7510/7512
REPAIR INSTRUCTIONS
(including disassembly, replacement and reassembly.)
Always turn off slicer and disconnect electrical cord before doing any maintenance or repair on the slicer. Keep
guards on all times. Keep slice adjustment fully closed so knife edge is not exposed. Keep sharpener assembly also
in place so top of knife edge is not exposed.
DRIVE BELT
1. Disconnect electrical power cord.
2. Remove four rubber suction feet (Figure 3 [37]) that secure bottom cover (Figure 3 [36]) to slicer.
3. Remove nuts (Figure 9 [18]) from tensioning take-up rod (Figure 9 [24]) so motor can be pivoted to give belt
slack. Be careful not to lose tensioning spring (Figure 9 [19]).
4. Note the position of the belt on the pulley to insure proper installation of new belt.
5. Unwrap belt from motor pulley.
6. Reinstall rubber feet (Figure 3 [37]) and place slicer upright (operating position).
7. Loosen sharpener lock pin (Figure 3 [4]). Lift and remove sharpening unit. Set aside.
8. Remove knife guard knob (Figure 3 [2]) and carefully remove knife guard (Figure 3 [14]).
9. Using caution to avoid the sharp knife edge, remove the four screws (Figure 3 [12]) that secure the knife
Carefully remove knife and set aside with its flat side down, flush on a bench so the edge is not exposed.
10. Note the position of the belt on the pulley to insure proper installation of new belt.
11. Unwrap and remove drive belt from the knife pulley (Figure 3 [10]).
12. Wrap replacement belt on knife pulley and motor pulley. Do not reinstall knife at this time.
13. Reinstall spring and nuts on tensioning take up rod (Figure 9 [24]) and tighten. It is important to make sure
that the belt is aligned on both pulleys.
14. Belt tension is correct when the spring is compressed to an overall length of 7/8".
15. Connect electrical power and operate slicer to check that belt and pulleys are running true.
16. Disconnect electrical power cord.
17. Reinstall bottom cover and secure with the four suction feet.
18. Using caution, reinstall knife and secure with four screws.
19. Reinstall knife guard and secure with knife guard knob.
20. Reinstall sharpener and secure with lock pin.
PAGE 10
 Loading...