Do you have a question about the USCutter LaserPoint3 and is the answer not in the manual?
Essential safety guidelines covering electrical, operational, and handling procedures to prevent injury and equipment damage.
Details requirements for electrical outlets, clean environments, stable surfaces, and computer proximity for optimal cutter performance.
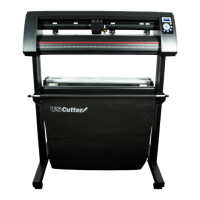
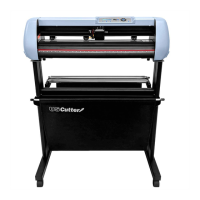
Lists all items included in the package, including the cutter, accessories, and parts for assembling the stand.
Instructions for attaching the feet (A) and wheels (K) to the legs (F) of the stand using screws.
Details on correctly orienting the leg feet and using screw guides for assembling the stand's legs.
Guidance on attaching the cross beam (D) and mounting roller brackets (H) to the stand legs (F).
Steps to attach mounting brackets (E), catchbasket, and securely mount the cutter onto the stand.
Identifies and describes key parts like the control panel, carriage arm, pinch rollers, feed rollers, and positioning laser.
Details the right and left side views of the cutter, focusing on power, USB, serial ports, and carriage locking mechanisms.
Guides on connecting the cutter via USB or serial, and instructions for installing the VinylMaster Cut software.
Instructions for downloading, installing, and configuring the Sure Cuts A Lot software with the Laserpoint3 cutter.
Step-by-step guide on placing the vinyl roll onto the stand rollers and releasing the pinch roller levers.
Instructions for adjusting pinch roller height and engaging them to secure the media for cutting.
Detailed steps and screenshots for installing vinyl cutter drivers through the Vinyl Master Spooler interface.
Steps to add the USCutter maker and select the Laserpoint3 model within the Vinyl Spooler's cutter management.
Guides on verifying the COM port and using the connection wizard to establish communication between the cutter and computer.
Confirmation of successful device detection, indicated by a green checkmark, signifies driver installation completion.
Instructions on setting the correct blade depth and force for various materials to achieve optimal cutting results.
Explains the functions of the control panel buttons (Enter, Navigation, Copy, Test, Origin, Reset, Local/Pause) and cutter states.
Guides on setting the cutter's origin point and manually adjusting speed and force settings for different materials.
Provides guidance on selecting the appropriate blade (45° or 60°) and loading vinyl material for a test cut.
Explains how to adjust cut speed and force settings based on material and design complexity for optimal results.
Details on calibrating the cutter and preparing the artwork with registration marks for contour cutting.
Step-by-step process for using the cutter's laser to align registration marks on printed artwork for precise contour cutting.
Provides solutions for common problems such as erratic cutting, incorrect cut placement, jagged lines, and feeding issues.
Offers solutions for issues like perforated cuts, tapered lines, blade skipping, and incorrect corner cutting due to offset settings.
Instructions on how and when to replace cutting strips and blades to maintain optimal cutter performance and cut quality.
Provides examples of vinyl applications and recommends specific materials, blades, and application tapes for each.