13
ASSEMBLY INSTRUCTIONS
Final Installation
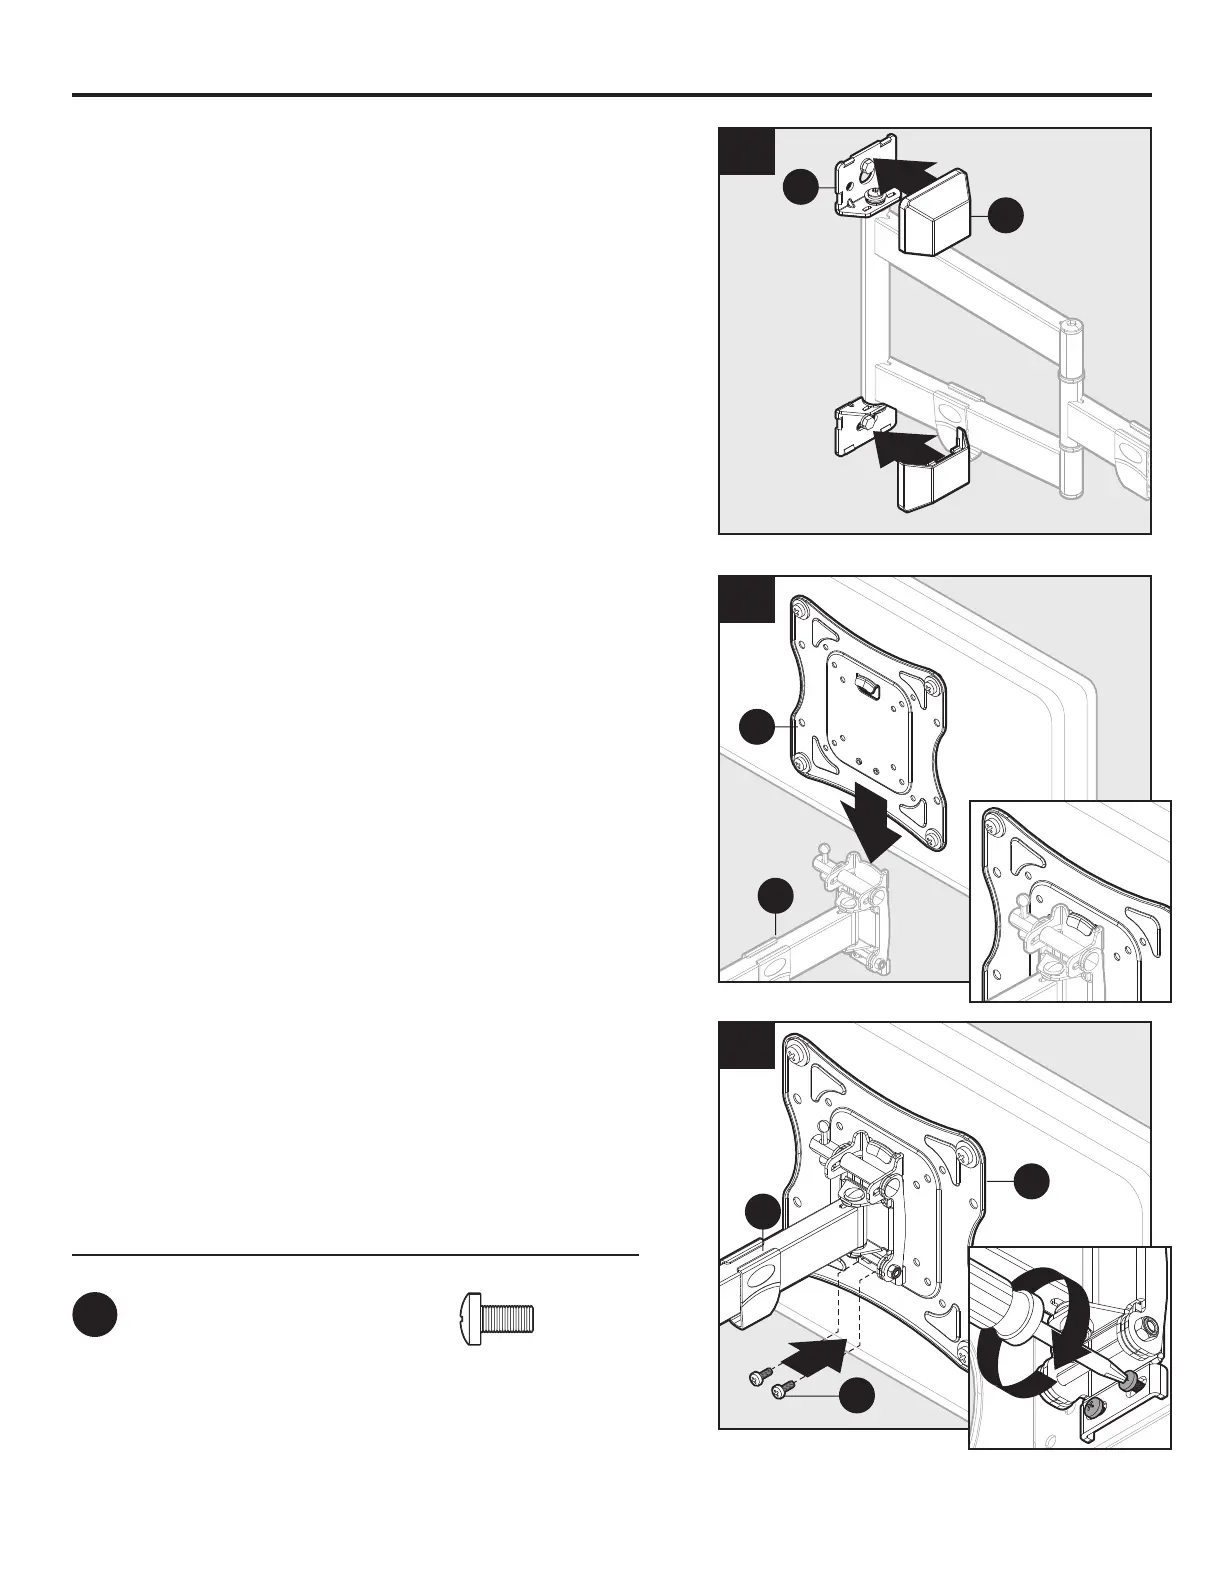
17. Snap end caps (B) onto top and bottom of
mounting arm (A).
18. Place mounting plate (E) onto mounting arm (A).
17
B
A
18
E
A
1
2
19
E
A
PP
Hardware Used
PP
x 2
Mounting arm screw
M4 x 12
Screw
Qty. 4
AA
M6 x 15
Screw
Qty. 4
CC
M8 x 15
Screw
Qty. 4
8 mm Lag bolt
Qty. 2
Anchor
Qty. 2
DD
M4 x 30
Screw
Qty. 4
EE
M6 x 30
Screw
Qty. 4
GG
M8 x 30
Screw
Qty. 4
HH
KK
5 mm
Spacer
Qty. 4
Mounting arm screw
(preassembled to
Mounting arm (A))
Qty. 2
LL
RR
PP
10 mm
Spacer
Qty. 4
MM
8 mm
Steel
washer
Qty. 8
NN
M6 x 12
Carriage Screw
Qty. 8
OO
II
JJ
FF
M8 x 50
Screw
Qty. 4
M6 Nut
Qty. 8
Wrench
Qty. 1
QQ
6 mm
Steel
washer
Qty. 4
19. Secure mounting plate (E) to mounting arm (A) with
the two previously removed mounting arm
screws (PP).
Note: DO NOT fully tighten mounting arm screws (PP).
Tighten ONLY to snug tension.