-14-
UNLOCK Indicator:ON
TALK Indicator:ON
Buzzer
Beep+, Beep
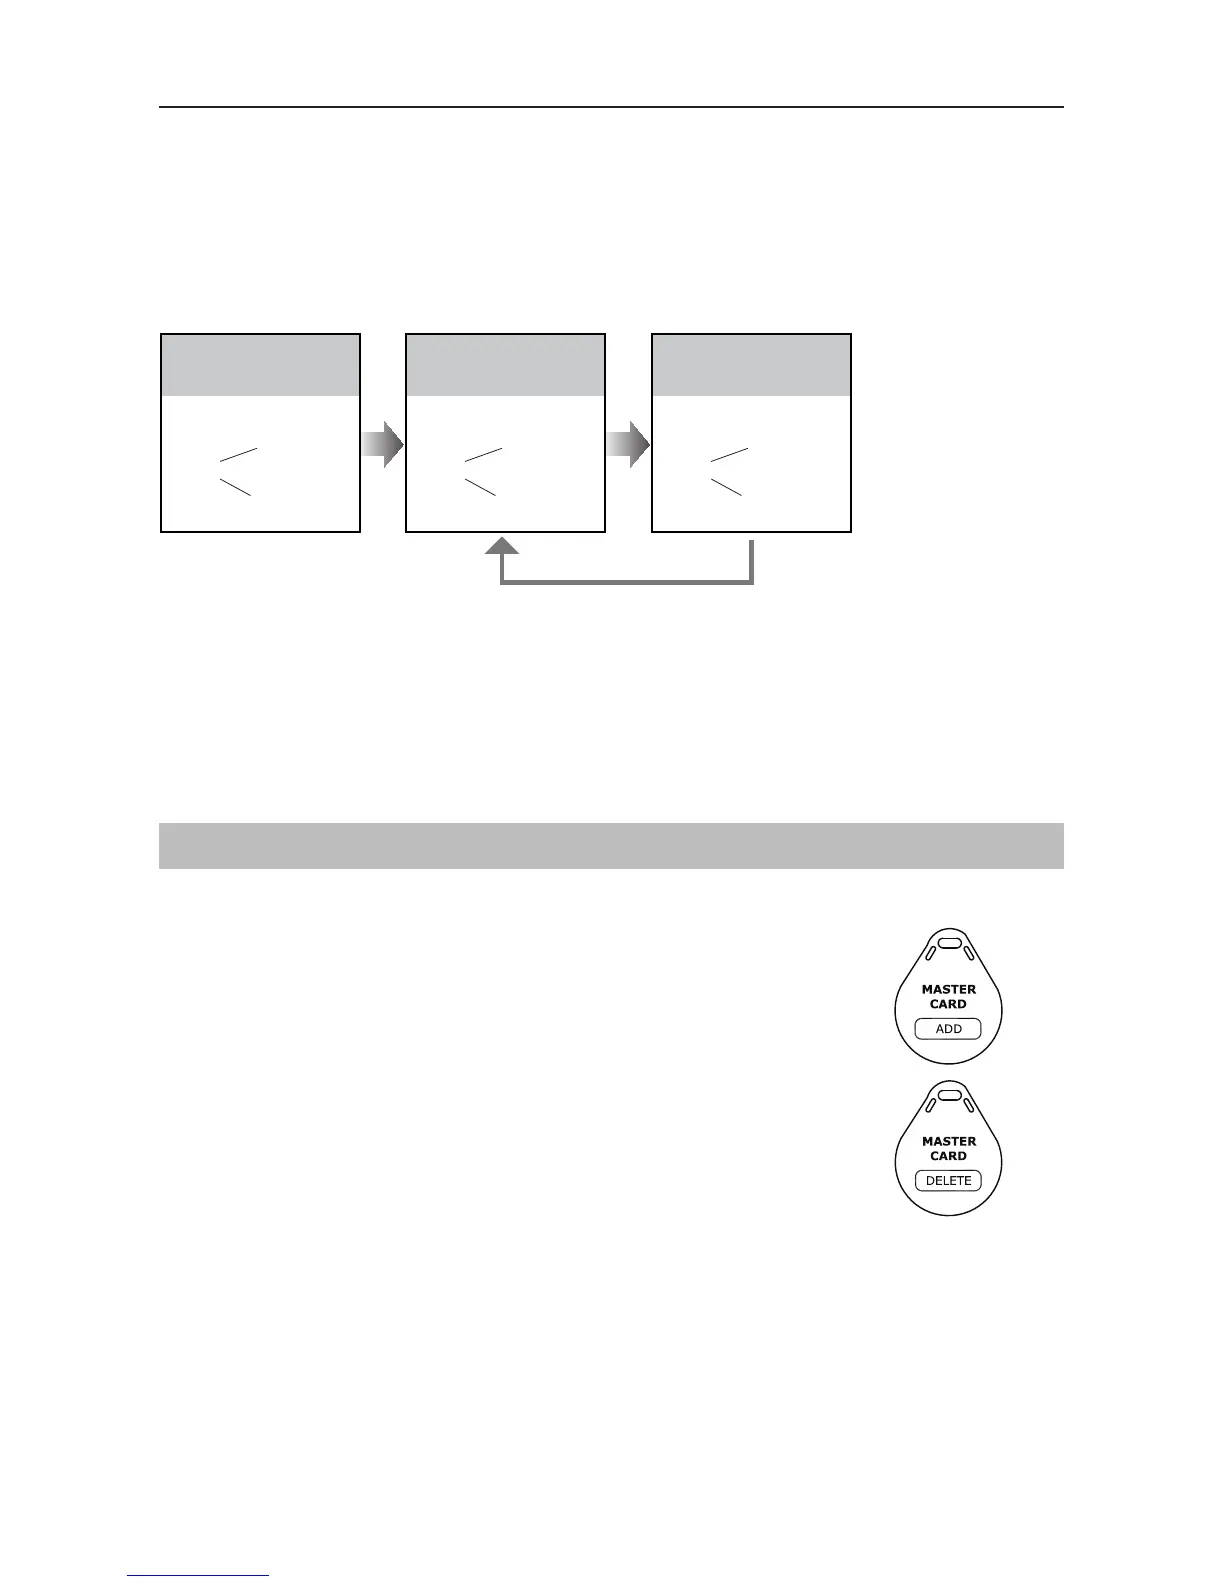
In standby mode, press
KEY_SET button four
times.
UNLOCK Indicator:ON
TALK Indicator:ON
Buzzer
Beep+
Press KEY_3 button to
activate image switching
when answering the call.
UNLOCK Indicator:ON
TALK Indicator:ON
Buzzer
Beep, Beep
Press KEY_3 button again
to forbid image switching
when answering the call.
Press KEY_3
Registering ID Card
• Up to 320 user cards can be registered by the door station.
• Easy management with LED status and sound hints.
• There are two master cards, one MASTER CARD ADD card
and one MASTER CARD DELETE card, When registered new
master cards, the old master cards are invalid automatically.
• Card reading distance is less than 3cm.
• The master cards are necessary when you add or delete user
cards. Please keep it well for future use.
• EM card, 125kHz.
Authorizing master cards:
By default,there are two master cards marked MASTER CARD ADD and MASTER CARD
DELETE ,but you should know that the master card can be authorized by users at any time.
That means any two user cards can be authorized to master cards,When registered new master
cards, the old master cards will be invalid automatically.
SETUP INSTRUCTIONS
• If setting mode has not been exited, you can change the image display mode by pressing KEY3 circularly.
• The LED_NAME indicator will blink all the time until exit out the setting mode.
• If without any operation in 10 seconds, it will exit out setting mode automatically.
• In this step,press KEY_SET button once to exit out the setting mode manually.
Full screen mode: When answering the call, the image will be displayed on Zoom mode for 5
seconds, then switch to Full screen to remind to enter talking status.
If set to forbidden mode, there is no image switching reminder at any image display mode.
Activated is default, to change the setting, please follow the steps: