6 7
Removing the Cartridge
1. Remove handle assemblies and faceplate allowing access to
the isolation points on the valve.
2. Screw down the isolation screws clockwise until you
feel resistance (taking care not to over tighten). Ensure the
thermostatic valve has been successfully isolated.
See page 9 for correct procedure.
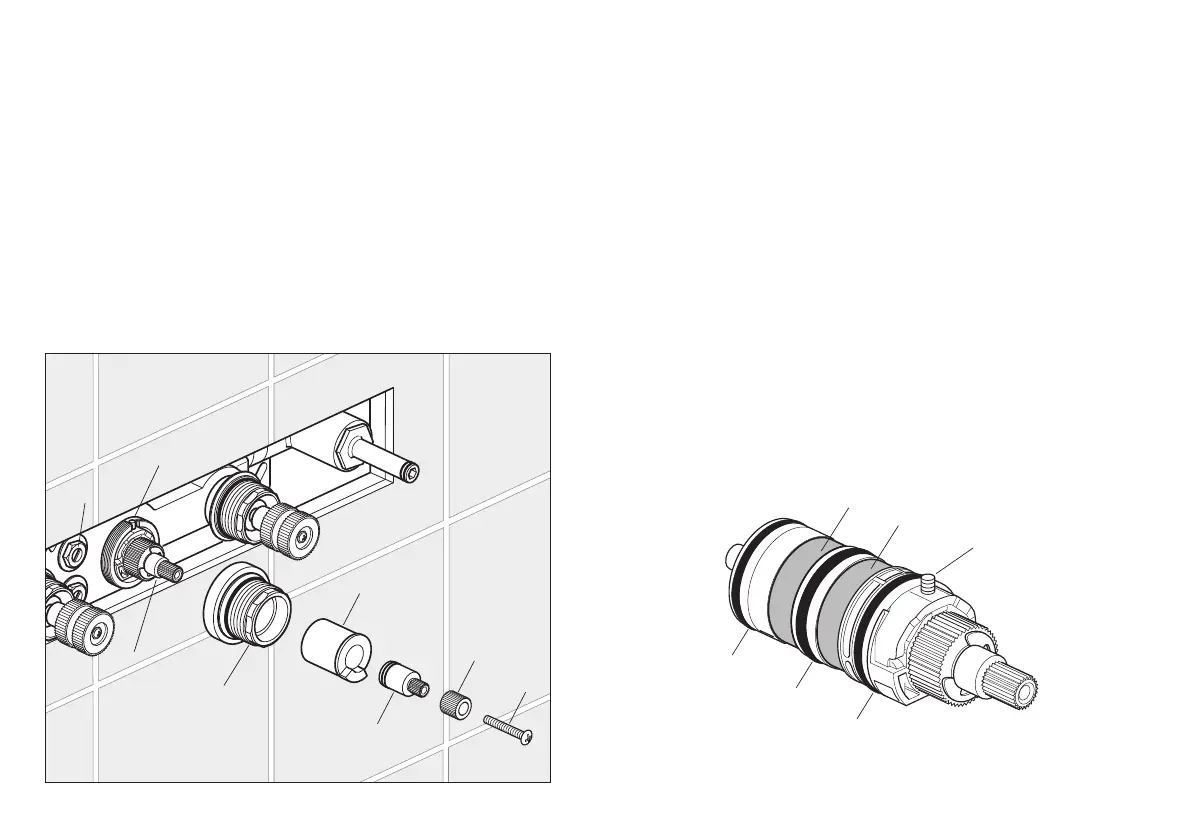
3. Remove the screw, spline adaptor, connecting rod and stop
ring.
4. Unscrew and remove the securing nut.
5. Carefully pull out the thermostatic cartridge.
6. Clean filters by rinsing them under running water to remove
any debris.
7. If there is limescale deposits then it is recommended to
immerse the cartridge for a few minutes in 50% white vinegar
+ 50% hot water, brush the filters gently and then rinse under
running water to clean all particles. If this is not effective, a
replacement cartridge should be fitted.
Maintenance Maintenance
We advise that the below is carried out annually as failure to do
so may result in invalidation of warranty.
Shut off the water supply to both hot and cold inlets, before
commencing any maintenance work below.
See isolation procedure on page 9.
Thermostatic cartridge
This thermostatic valve is fitted with a single filtering facility.
Filters are fitted on the thermostatic cartridge. Depending on
the water quality, filters may become dirty, causing reduced
flow and inefficient working of the valve. To clean the filters, you
must first remove the cartridge from the housing.
Securing
nut
Stop ring
Connecting
rod
Screw
Spline
adaptor
Cartridge
Isolation
screws
Grub screw
O-ring
O-ring
O-ring
Filter
Filter
Locating
slot