6 Operation
18 Installation instructions Heat pump control interface module 0020291573_00
5.5 Connecting the circulation pump
1. Guide the circulation pump's 230 V connection cable
from the bottom left-hand side and into the electronics
box.
2. Connect the 230 V connection cable to the plug from
slot MO2 and plug it into the slot.
3. Connect the connection cable for the external button
using terminals 1 (0) and 2 (FB) on the MI edge con-
nector, which is supplied with the control.
4. Plug the edge connector into the MI slot.
5. Set the circulation pump in the system control.
5.6 Connecting a limit thermostat for the
underfloor heating
▶ Connect the limit thermostat to plug S20 for the outdoor
unit, → aroTHERM plus operating and installation instruc-
tions.
5.7 Connecting the outdoor temperature sensor
Condition: No system control connected
▶ Connect a DCF/AF outdoor temperature sensor to the
terminals for plug DCF/AF and plug it into the slot.
5.8 Connecting the external prioritising diverter
valve (optional)
▶ Connect the external prioritising diverter valve to the UV1
plug terminal and plug it into the slot.
– The connection to a permanently live phase "L" with
230 V and to a switched phase "S" is available.
Phase "S" is actuated by an internal relay and
releases 230 V.
5.9 Connecting the VR 70/VR 71 mixer module
1. Connect the power supply for the VR 70/VR 71 mixer
module to X4 on the PCB.
2. Connect the VR 70/VR 71 mixer module to the eBUS.
6 Operation
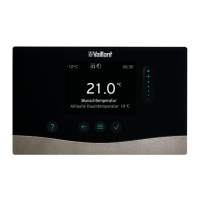
6.1 Operating concept of the product
The operating concept and the display and setting options of
the end user level are described in the operating instructions.
7 Start-up
7.1 Starting up the product
1. Ensure that the casing is closed when starting up the
product.
2. Start up the product together with the controller (→ In-
stallation instructions for the controller).
7.2 Switching on the product
Note
The product does not have an on/off switch. The
product is switched on as soon as it is connected
to the power grid.
1. Use the partition that is installed on-site to switch the
product on.
◁ The display shows the basic display.
◁ The basic display appears on the system control
display.
◁ The system's products start up.
◁ The heating and domestic hot water demand are
activated by default.
2. When you start up the heat pump system for the first
time after electrical installation, the installation assist-
ants for the system components will start automatic-
ally. Set the required values on the control panel of the
control module first, then on the optional system control
and the other system components.
7.3 Running the installation assistants
The installation assistant is launched when the product is
switched on for the first time. It provides direct access to
the most important check programmes and configuration
settings for starting up the product.
Confirm the launch of the installation assistant. All heating
and domestic hot water demands are blocked whilst the in-
stallation assistant is active.
Set the following parameters:
– Language
– System control present
– Cooling technology
– Compressor current limit
– Relay multi-function output
– Intermediate heat exchanger present
– Check programme: Purge building circuit
– Contact details, Telephone number
To access the next item, confirm by pressing Next in each
case.
If you do not confirm the launch of the installation assistant,
it is closed 10 seconds after you switch on the unit and the
basic display then appears. If the installation assistant does
not run through completely, it restarts the next time the unit
is switched on.
 Loading...