ll
2
Remove the fuel
cap
and insert a handy suc-
tion
pump
into the
fuel
tank.
Watch the fuel
gauge
while
refueling.
When the
gauge
reaches the maximum
level,
stop
refueling.
I
Connecting
the
Power
Supply
Make sure that
the
operating
switch is "OFF",
then
plug
the
heater's
power plug
into
approved,
grounded,
three-wire extension
cord.
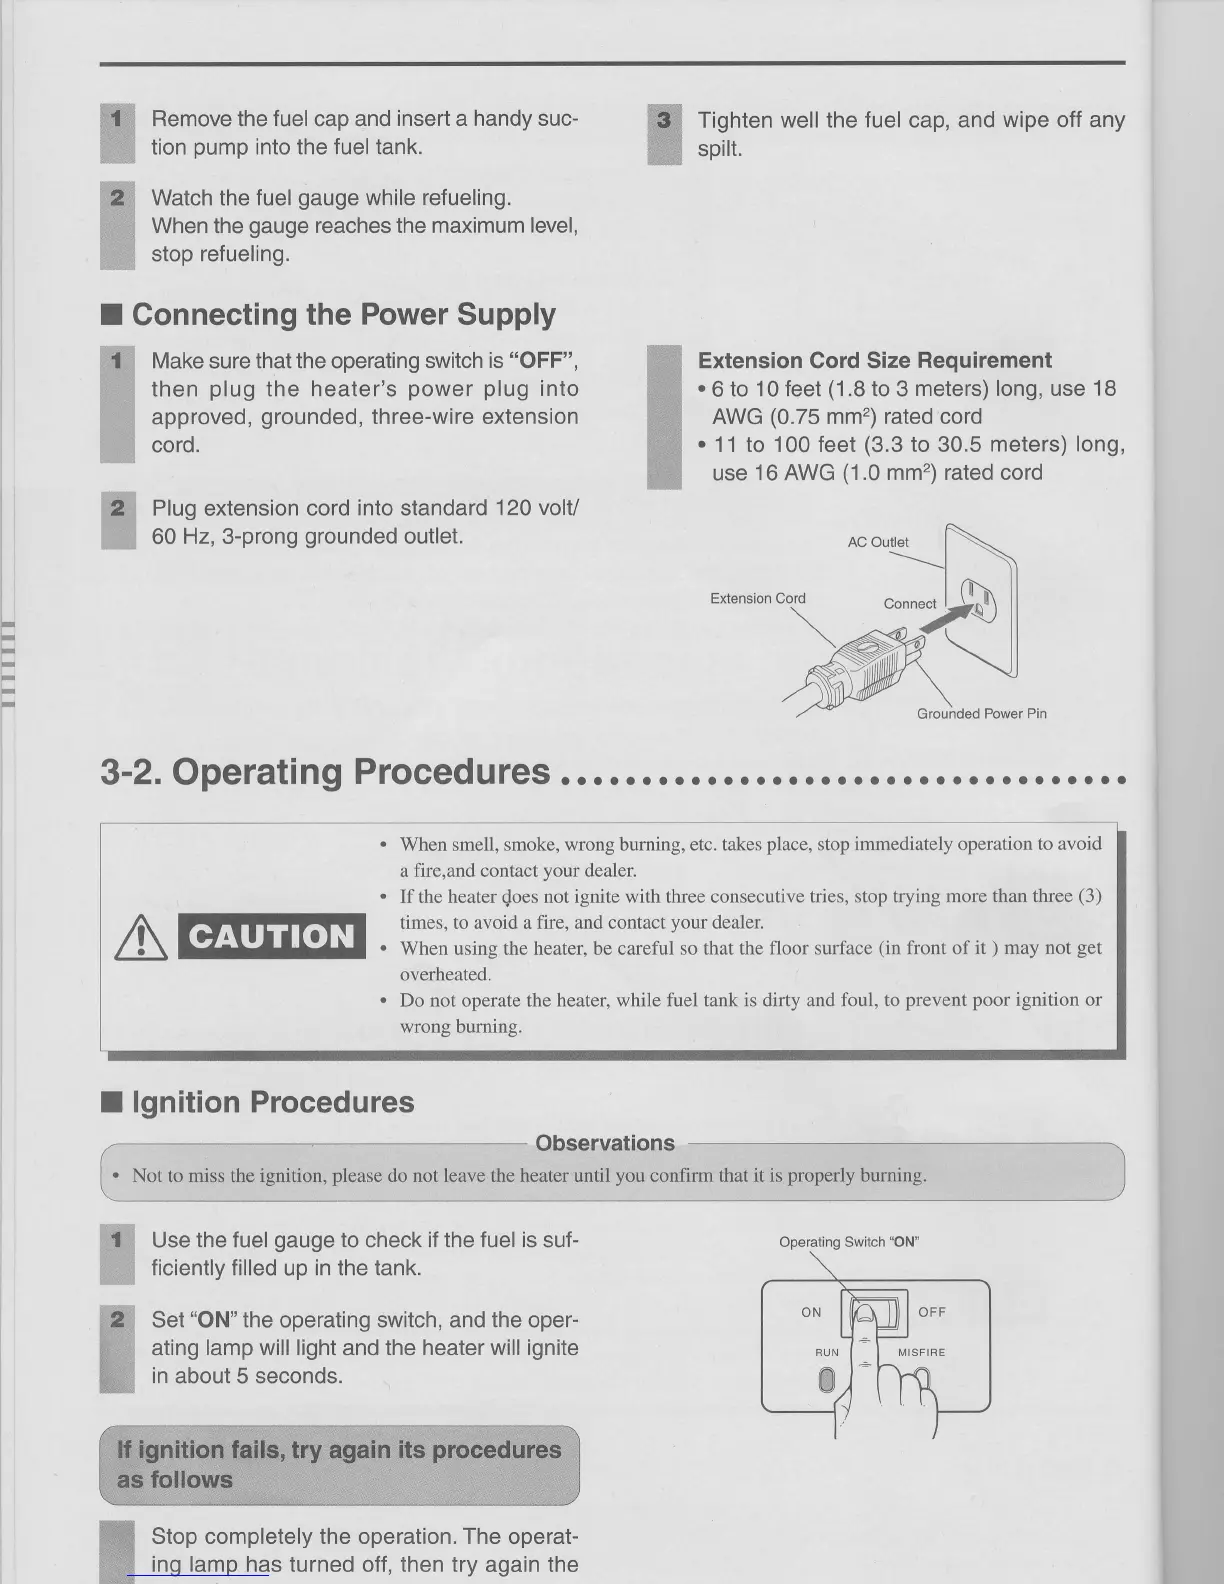
Plug
extension
cord into standard
120 volt/
60 Hz, 3-prong
grounded
outlet.
Tighten well the fuel cap, and
wipe
off
any
spilt.
Extension Cord Size
Requirement
.
6
to 10 feet
(1
.8 to
3
meters) long, use
18
AWG
(0.75
mm2) rated
cord
.
11 to 100 feet
(3.3
to 30.5
meters) long,
use
16 AWG
(1
.0 mm2) rated cord
Extension
l
2
Cord
3'2.
Operating
Procedures
. o o o...... o........
o..... o o........
When smell, smoke, wrong
burning, etc. takes
place,
stop
immediately operation to avoid
a
fire,and
contact
your
dealer.
If the heater
does
not
ignite
with
three consecutive tries. stop trying
more than three
(3)
times, to avoid a
fire,
and
contact
your
dealer.
When using the
heater,
be careful
so that the floor surface
(in
front
of
it
)
may not
get
overheated.
Do not operate the heater, while fuel tank
is
dirty
and fbul, to
prevent poor ignition or
wrong burning.
I lgnition Procedures
Observations
Not
to miss the
ignition,
please
do not
leave
the heater until
you
confirm that it
is properly
burning.
2
Use
the fuel
gauge
to
check
if the fuel is
suf-
ficiently filled
up in the
tank.
Set
"ON"
the operating switch, and
the
oper-
ating lamp will light and the heater will ignite
in
about 5 seconds.
Stop completely the
ing lamp has turned
operation. The operat-
off,
then try
again
the