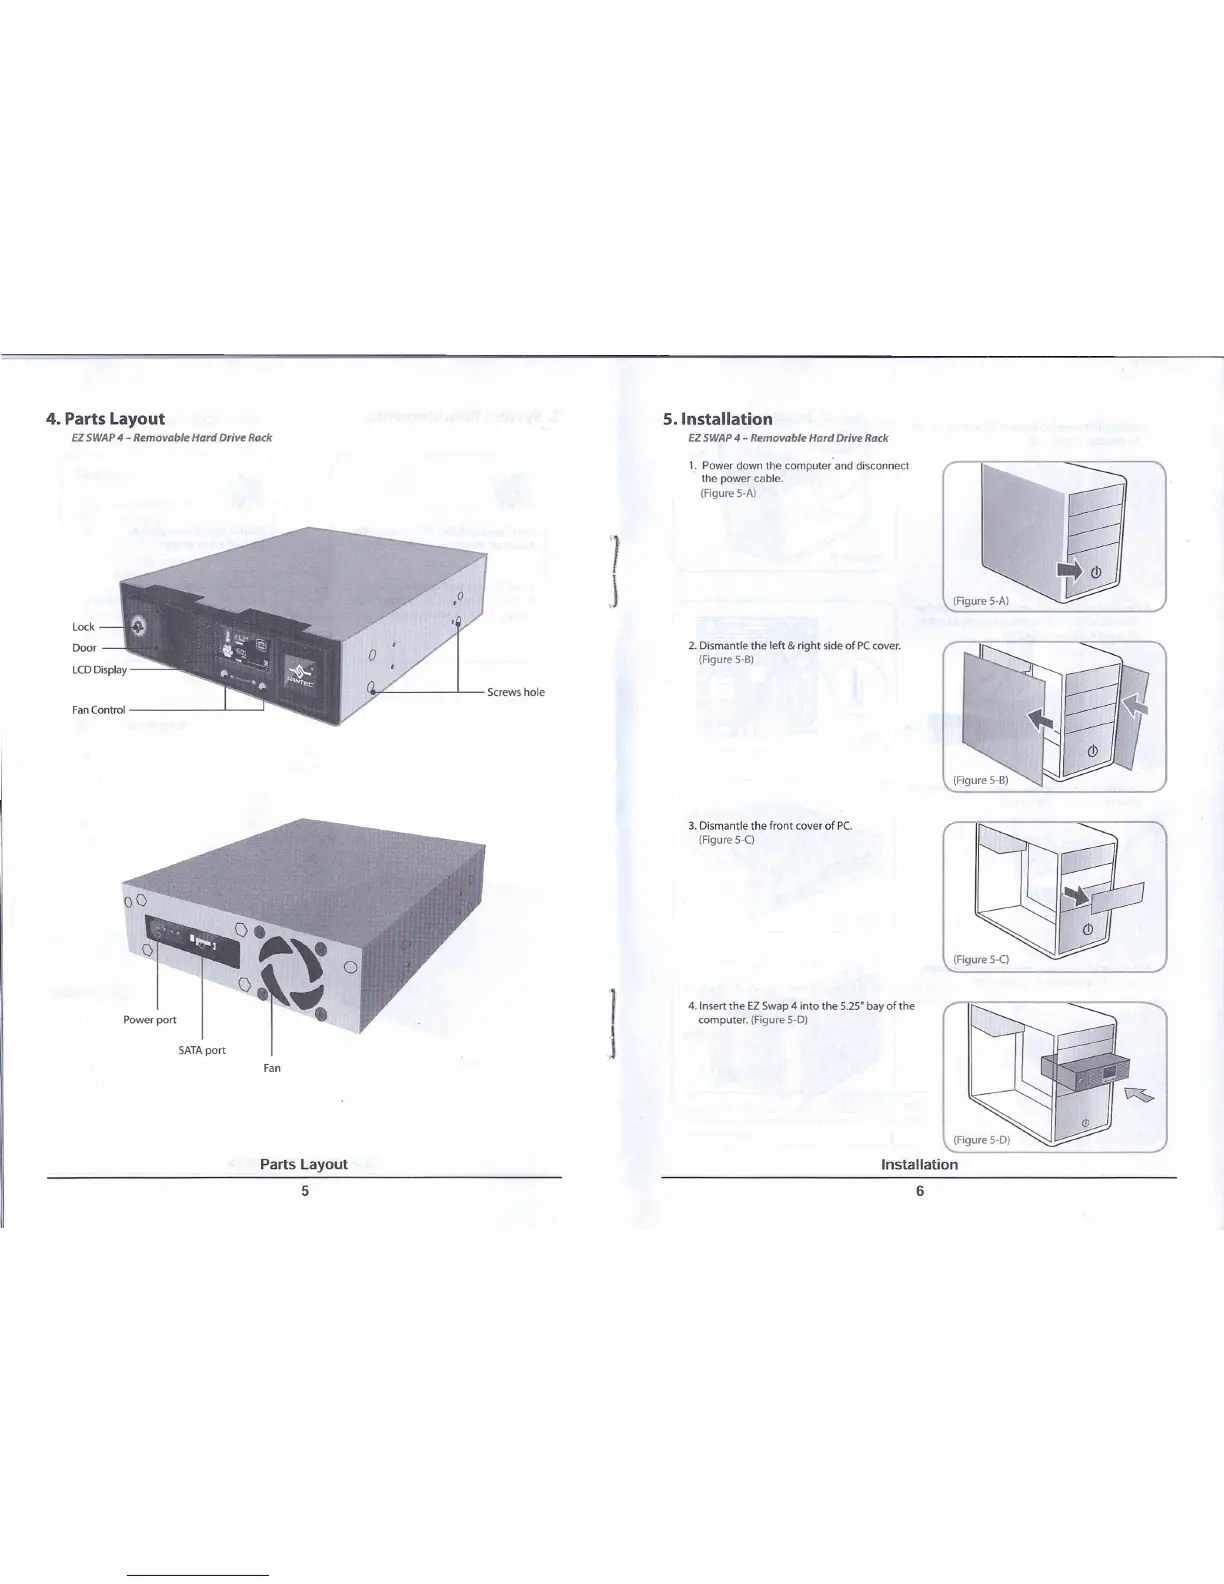
4. Parts Layout
EZ SWAP
4 -
Removable Hard Drive Rack
Lock
Door
~«-
.L--_
Screws hole
Fan
Parts Layout
5
5. Installation
EZ SWAP
4 -
Removable Hard Drive Rack
1. Power down the computer and disconnect
the power cable.
(Figure S-A)
l
J
2. Dismantle the left & right side of PC cover.
(Figure 5-6)
3. Dismantle the front cover of
Pc.
(Figure S-C)
J
(
.I
4. Insert the EZ Swap 4 into the 5.25" bay of the
computer. (Figure S-D)
(Figure S-A)
Installation
6



 To Next Page