11
Note: Once the camera is linked with your mobile phone via Wi-Fi, it allows for several
functionalities without needing an internet connection. These include real-time video
preview, adjustments to camera settings, and video playback. Note that GPS tracking
and video sharing will require an active internet or a telecom service subscription. To
utilize these internet-dependent features, ensure that the camera’s Wi-Fi is
disconnected.
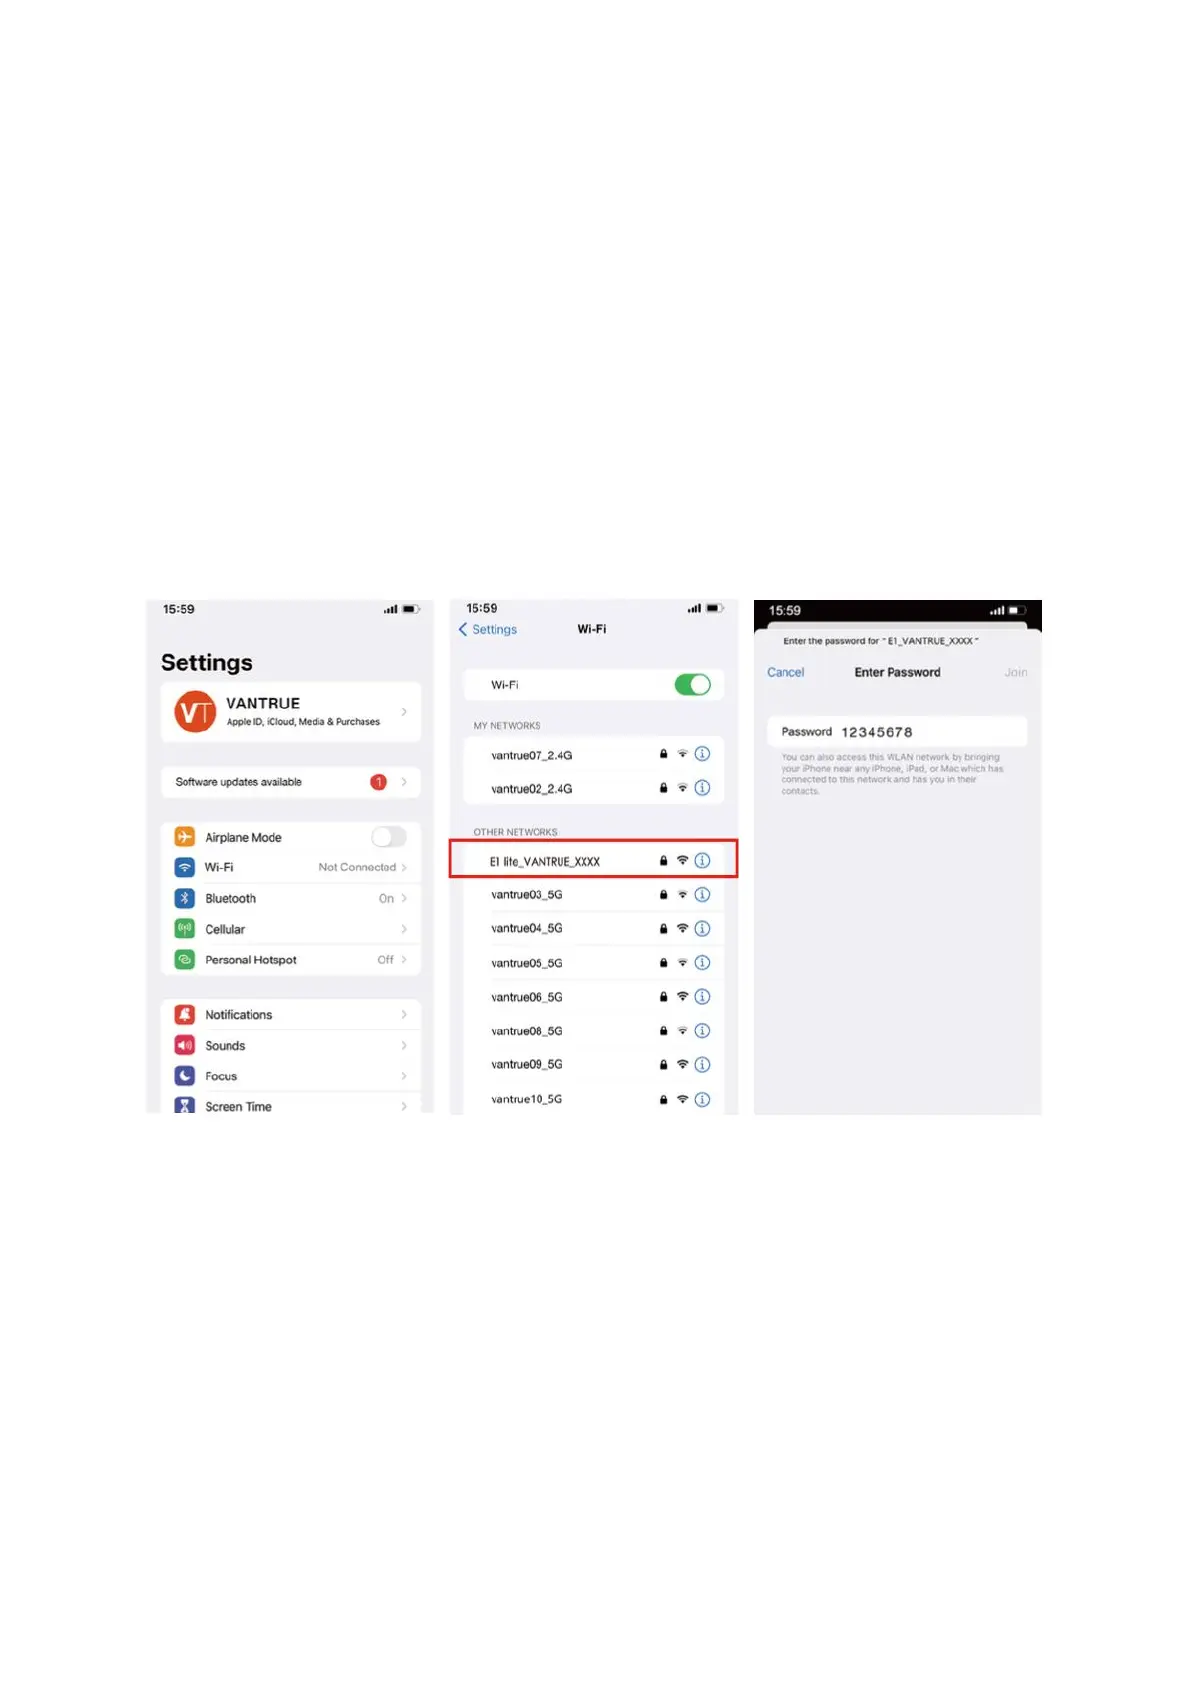
Step 3: Establishing Wi-Fi Connection
Activate the Wi-Fi feature on the camera, then go to the Wi-Fi settings on your mobile
phone. Look for the camera's Wi-Fi network, which will be named something like 'E1
Lite_VANTRUE_XXXX'. Connect to this network by entering the default Wi-Fi password:
'12345678'.
Step 4: Connecting to the Application
Once you have successfully established a Wi-Fi connection, open the application, and tap
the "+" symbol to add your camera model. The app will then sync with your camera,
displaying the live feed currently being recorded.