www.vax.co.uk
8
getting ready to wash / assembly
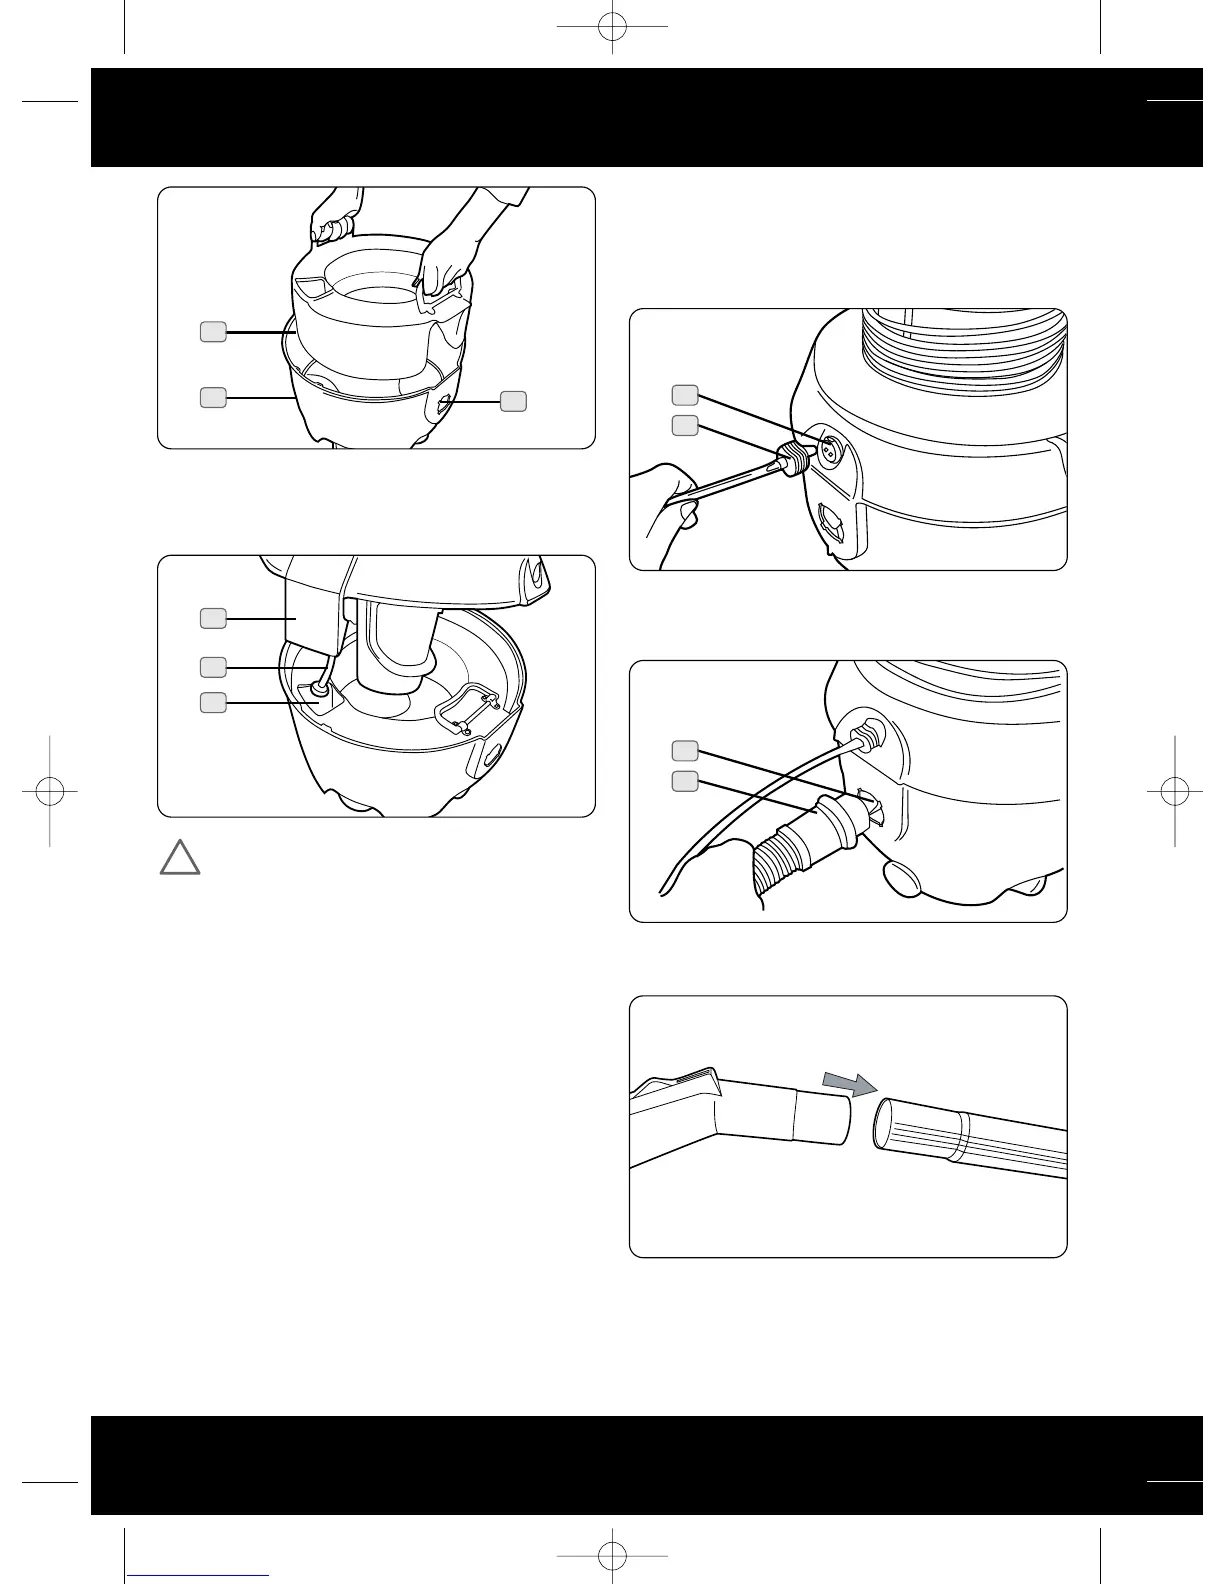
5. Replace Motor Container (A) ensuring that the Solution
Pump Hose (B) is aligned with the hole in the Clean Water
Tank (C) so that it goes inside when the Motor Container is
clipped back into position (Fig.6/5).
WARNING: Machine must not be plugged in
during this stage.
7. Assembly
1. Push solution tube to machine connector (A) firmly into
Solution Port (A1). Twist solution tube connector (A1) a
quarter turn to the right to lock into place (Fig.7/1).
2. Push hose connector (B) firmly into Hose Connection
Port (B1). Twist to the right until hose connector locks
into place (Fig.7/2).
3. Push one end of the extension tube into the handle of
the hose (Fig.7/3).
4. Wrap Solution Tube (A) around Hose (B). Ensure that
the solution tube is wrapped loosely enough to allow the
solution to flow freely through the tube (Fig.7/4).
Fig.6/5
Fig.6/4
A
B
C
A
B
C
Fig.7/1
Fig.7/2
Fig.7/3
A
A1
B
B1