2、 Timing Control software can’t control LedSync820C
1) Make sure RS232 cable supplied with the machine is
properly connected, one end connects COM port of PC, the
other end connects RS232 IN of LedSync820C;
2) Eject SW button on the rear of LedSync820C case, select
the RS232 communication mode through COM port of PC;
3) Identify the No. of the PC’s COM port to be connected, e.g.
COM1 or COM2, select appropriate COM port on
control software;
4) Select appropriate COM port, and ensure this COM port
not yet occupied by other applications, e.g. the common
LedStudio software;
5) If after the above steps LedSync820C still can’t be
controlled, please have supplier repair it.
3、 When the Ethernet cable is directly connected to the RJ45 port of
built-in LED transmission card, there are images appearing on
LED screen; however, when it is connected via internal RJ45
Bridge Module of LedSync820C, there are no images appearing on
LED screen
1) Make sure internal RJ45 Bridge Module of LedSync820C is
properly connected;
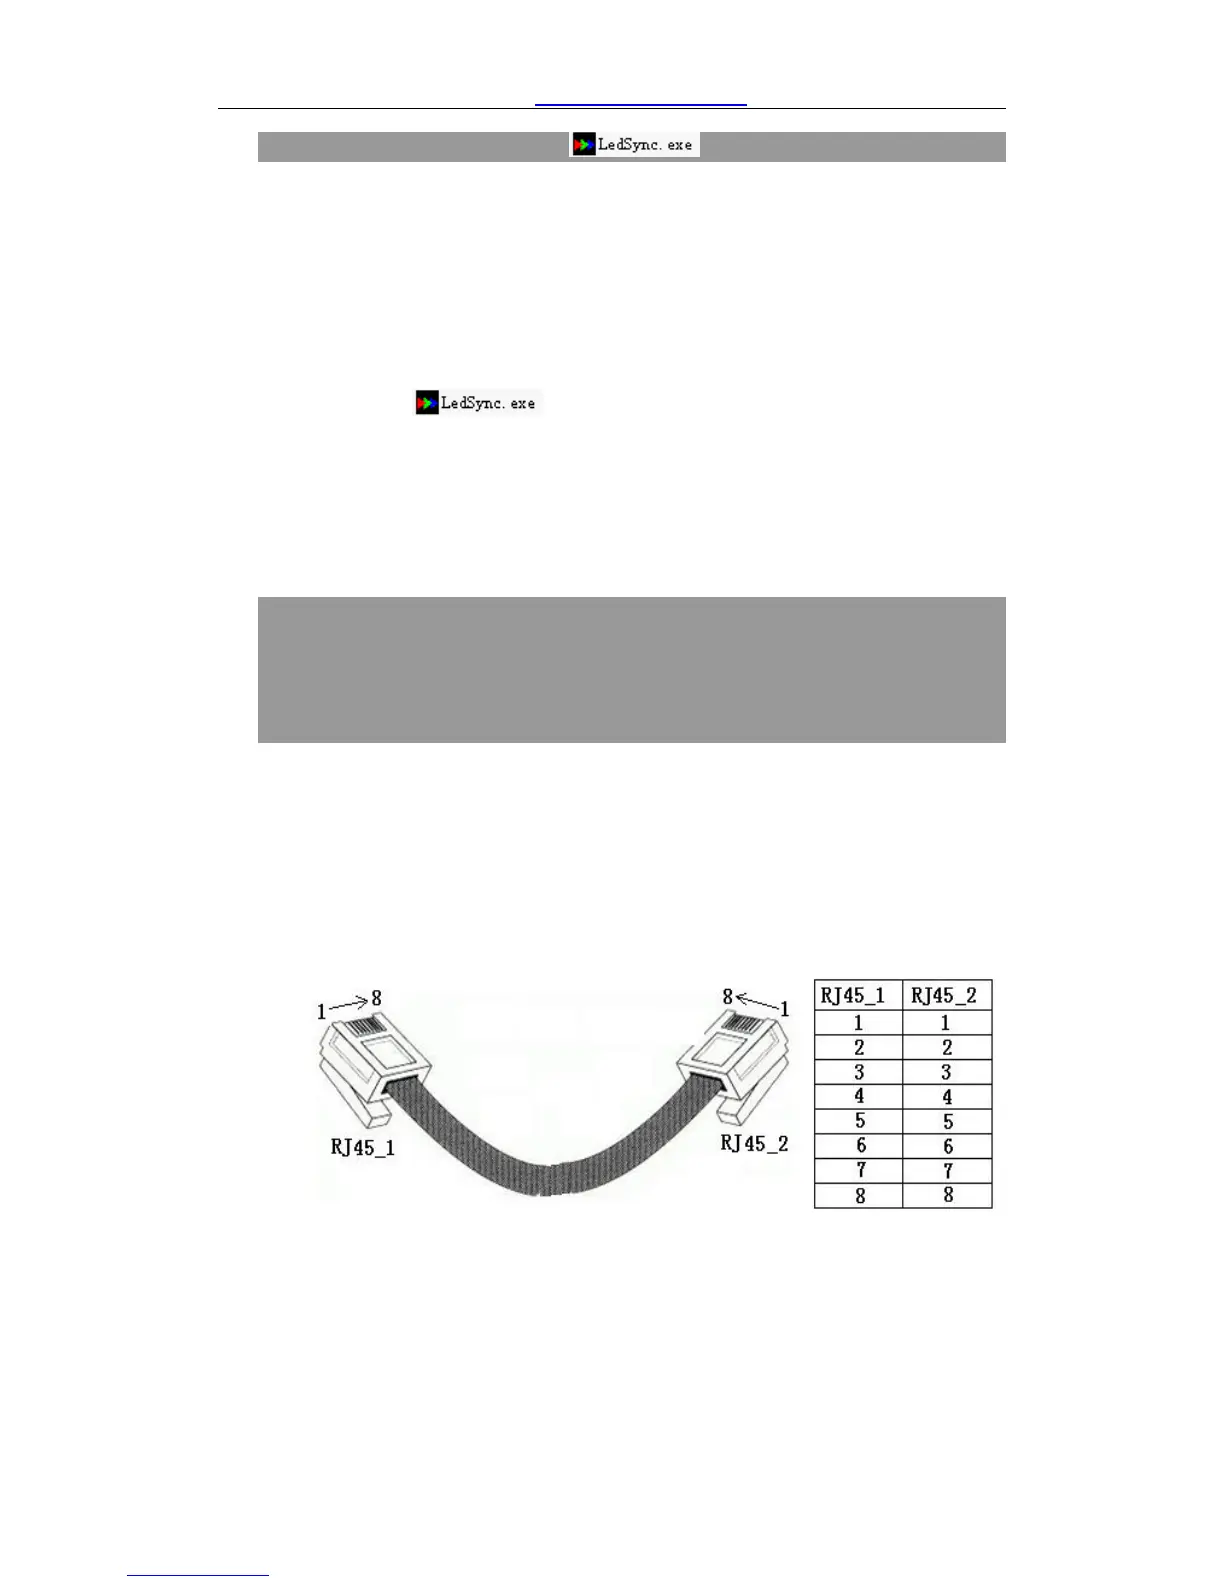
2) Make sure the 8 wires of internal short Ethernet cable of
LedSync820C are in correct sequence, and the 8 wires are
connected to RJ45 connector in both ends in sequence, and are
free of cross. See the figure below:
Figure 5
3) The image transfer from LED transmission card to LED display
screen is made through Ethernet cable. The signal has been
weakened a lot and imposed high risk of interference from outside