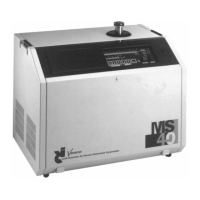
Vacuum Instrument Corp.
2099 Ninth Avenue
Ronkonkoma, NY 11779
631.737.0900
Setting the Accept/Reject Point
The Accept/Reject set point is the designated leak rate value that indicates
whether or not the leak rate of the test object meets or fails a predefined
maximum leak rate standard. For example, if the accept/reject set point
has been set to 5 x 10
-5
std cc/sec, any test object that has a leak rate of
less than 5 x 10
-5
std cc/sec would fall below the set point (into the
accept area). Conversely, any test object that has a leak rate of 5 x 10
-5
std cc/sec or greater falls into the predefined reject leak rate area.
To set the Accept/Reject set point:
1 On the Service Panel, press either “Select” momentary switch
until the green indicator next to the Reject Point is lit.
2 The Service Mode alphanumeric display will display the current
Accept/Reject set point.
3 To alter the Accept/Reject set point, press either of the “SET”
momentary switches. The alphanumeric display will change
either down or up in correspondence with the number of
key presses of the left or right switches. If a user tries to alter a
setting outside of its available range, the piezoelectric beeper
within the unit will emit a short sound. Once the Accept/Reject
entry has been altered, it will remain at the new setting until it is
altered once again.
Delay Settings (Valve Timing Settings)
The MS-40 provides the user with the capability to set time intervals
between the opening and closing of certain vacuum system valves. This
allows the user to customize testing cycles to the unique requirements of
any test object. In order to properly optimize testing procedures, we
recommend that the MS-40 operator review the third chapter of this
manual, Theory of Operation, prior to altering the default valve timing
settings.
The Valve Timing Schematic (illustrated in Figure 2-4) displays the
relationship between the opening and closing of the internal vacuum.
1109-186-00 Rev. C 2-27