3
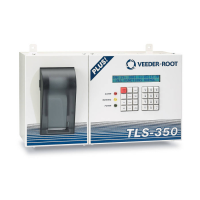
Installation
Module/Connector Positions
Installing interface modules in a TLS-350 Series Console is a simple process. However, there are important points
to remember:
1. For each module, a corresponding expansion slot with connector must be available.
2. ALL unused expansion slots MUST be covered with blank face plates.
MODULE POSITION
• Record in the circuit directory (inside front panel), the type of module, sensor locations, etc., beside the slot
number.
• Once a particular type of module has been installed in that slot, the system will always look for that type of
module in that slot.
CONNECTOR POSITION
• Identify all connectors according to their slot location using the self-adhesive numbering labels supplied with
each module.
• Once a device has been wired to certain terminals on the connector and the system has been programmed,
terminal positions may not be changed without reprogramming the system.
Installing Modules
The steps below apply for any of the sensor modules discussed in this manual. Additional information regarding
the below steps can be found in the Veeder-Root TLS-3XX Series Consoles Site Preparation and Installation
manual.
1. Open the right-hand door of the console by unscrewing the right-top and right-bottom locking bolts.
2. To retain current programming, be sure that the CPU (for TLS-350) or ECPU (for TLS-350R) battery backup
switch is in the On position (see Figure 1 on page 4). If you have to set the battery backup switch to the On
position, avoid touching any circuit components with your hand or any conductive tool.
WARNING
You are working with a device in which potentially lethal voltages may be
present.
If high voltage is shorted across any barrier terminal, explosion and fire could
result.
Turn Off, tag and lockout power to the console before installing/wiring any
module.
OFF

 Loading...