EasyManua.ls Logo

Velleman-Kit K4305 User Manual

Velleman-Kit K4305
14 pages
To Next Page IconTo Next Page
Page #1 background imageLoading...
Page #1 background image
Total solder points: 186
Difficulty level:
Beginner 1o 2þ 3o 4o 5o Advanced
PARTLIST H4305P-ED1
K4305
2 x 10 LED STEREO VU METER
For instant visualization of audio signal levels.
Easy hook up to a LINE level ( LOW input) signal source.
For use with mixing panels, amplifiers, CD players, radio’s, ...
A special input (HIGH INPUT) is provided, which allows direct con-
nection to a SPEAKER* output .
DOT or BAR display mode selectable to suit your application.
Attractive display window supplied, which can be used both horizontal
as vertical.
If wanted, the unit can be calibrated by means of a trim potentiometer.
*NOT SUITED FOR CONNECTION TO HIGH POWER CAR STEREO
SYSTEM
Specifications:
2 X 10 LED’s
BAR OR DOT MODE
INDICATION RANGE: 0dB = 0.775mVrms.
-20dB, -10dB, -7dB, -5dB, -3dB, -1dB, 0dB, +1dB, +2dB, +3dB
FREQUENCY RANGE: 20Hz tot 30KHz
LOW INPUT FOR 0dB: 150mV to 6Vrms (47K)
HIGH INPUT FOR 0dB: 1.5V to 60Vrms (470K).
POWER SUPPLY: 10 to 15VDC / 250mA max.
PCB DIMENSIONS 2X: 68X37mm
modifications reserved
Question and Answer IconNeed help?

Do you have a question about the Velleman-Kit K4305 and is the answer not in the manual?

Velleman-Kit K4305 Specifications

General IconGeneral
CategoryMeasuring Instruments
ModelK4305
Display3.5 digit LCD
Diode TestYes
Transistor TestYes
TypeDigital Multimeter
Measurement FunctionsDC Voltage, AC Voltage, DC Current, AC Current, Resistance, Diode Test, Transistor Test
AC Voltage Range200V
DC Current Range200µA to 10A
Resistance Range200Ω to 2MΩ
Battery9V (not included)
Power Supply9V battery
Temperature Range0°C to 40°C

Summary

2 x 10 LED STEREO VU METER

Assembly Instructions

1. JUMPERS

Component installation for jumper settings on the PCB.

2. DIODES (Check the polarity)

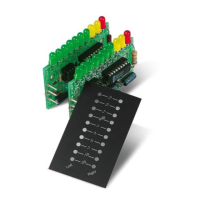
Mounting light-emitting diodes, ensuring correct orientation.

3. ZENER DIODES (Check the polarity)

Installing Zener diodes, paying attention to polarity.

4. 1/4W RESISTORS

Installing quarter-watt resistors with specified values.

5. IC SOCKETS

Placing IC sockets, noting the notch position.

6. RESISTOR TRIMMERS

Mounting adjustable resistors for calibration.

7. CAPACITORS

Installing non-electrolytic capacitors.

8. ELECTROLYTIC CAPACITOR

Mounting electrolytic capacitors, observing polarity.

9. 1W RESISTORS

Installing one-watt resistors.

10. MOUNT THE LEDs, BEND THE LEADS CAREFULLY

Installing LEDs, carefully bending their leads.

11. Insert the IC's in the socket

Inserting integrated circuits into their sockets.

12. Mounting possibility

Options for housing or panel mounting the unit.

Connecting the VU Meter

Connecting to a line level output

Hooking up to LOW input from audio sources like tuners or CD players.

Connecting to a speaker level output

Connecting to HIGH input from amplifier speaker outputs.

Connecting to a car radio

Integrating with a car radio's speaker output.