EasyManua.ls Logo

Venstar ColorTouch - Connecting Wires

Venstar ColorTouch
24 pages
Print Icon
To Next Page IconTo Next Page
To Previous Page IconTo Previous Page
Loading...
10
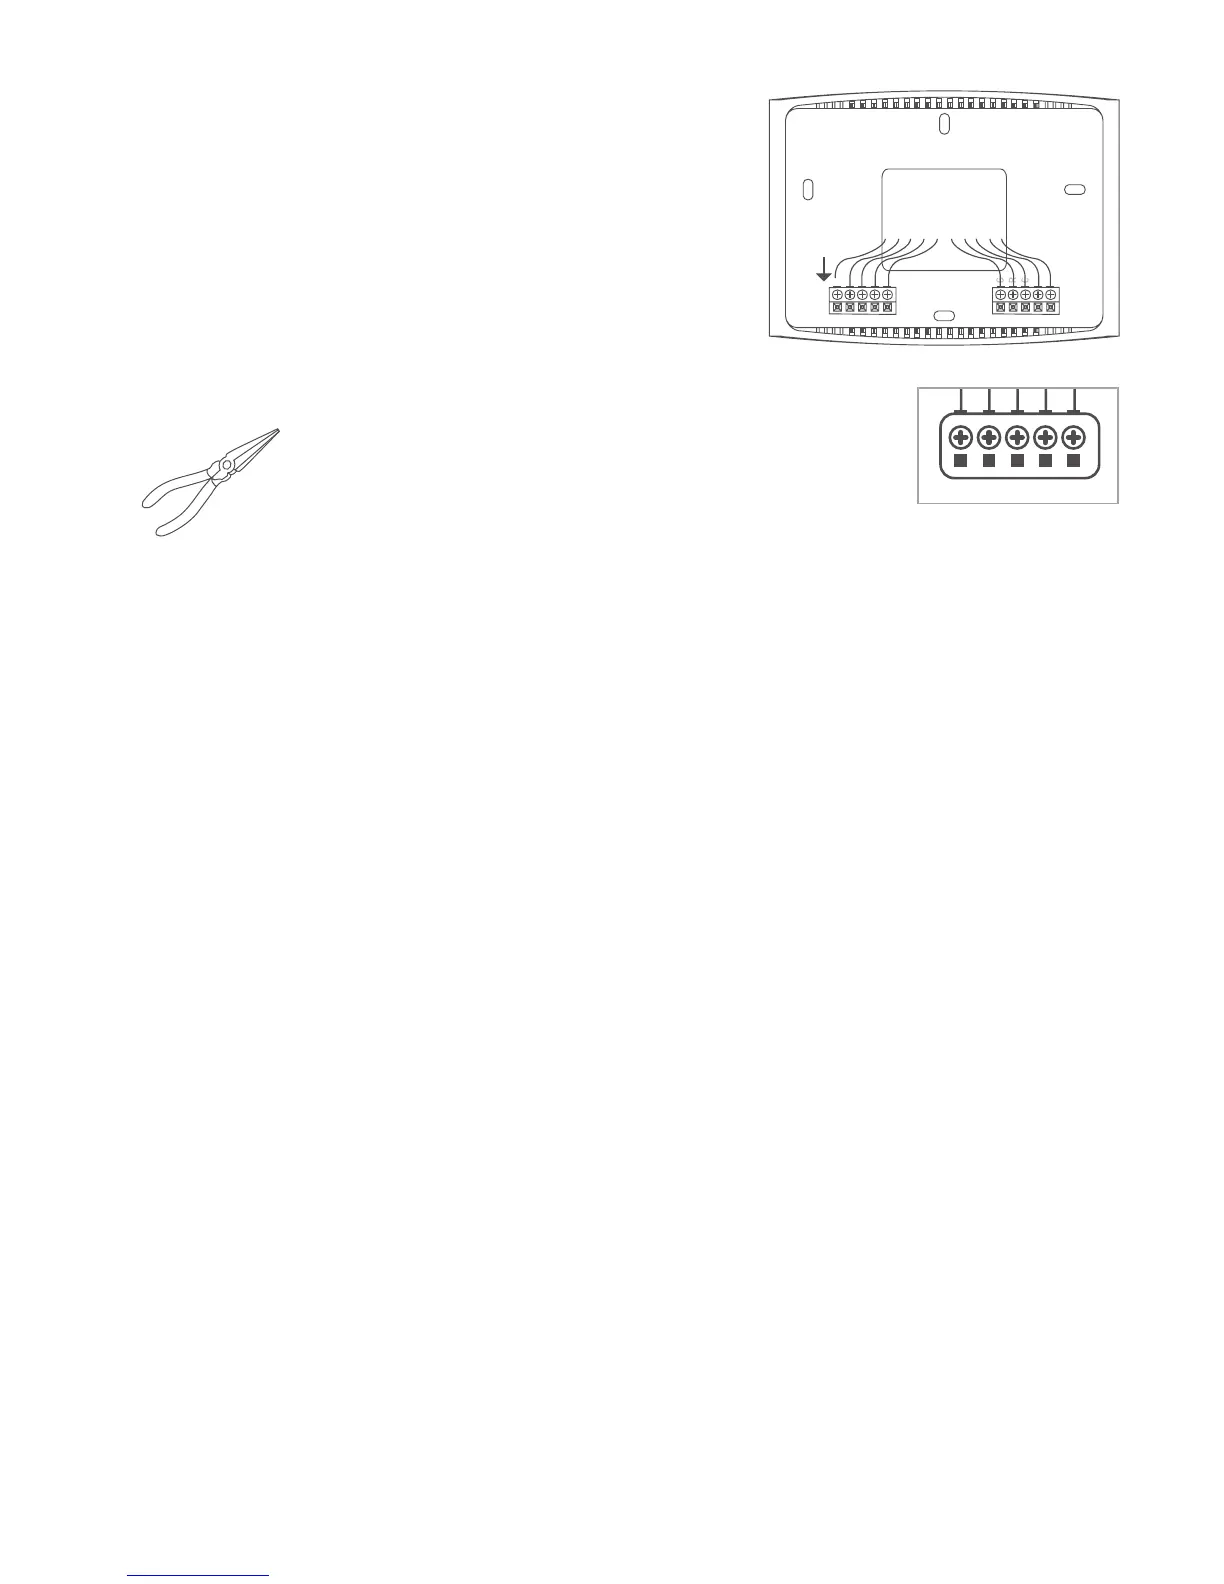
Step 7 - Connect Wires
1) Matchyourpreviouswireconfiguration
tothenewbase.Onebyone,connect
each wire by inserting the metal end into
the corresponding slot and tightening
the screw.
W3/AUX
W2
W1/O/B
Y2
Y1
SENSOR
TIP: Useplierstostraightenwirebeforeinserting
intonewbase.Besuretocutanyexcesswiresothat
theinsulationextendstotheterminalblock.When
the wire is installed properly to the terminal block,
thereshouldbenocopperexposed.
WiFi Network
& Password
Screw Driver
Pencil
LevelPliers
Hammer or Drill
(3/16" or 7/ 32" drill bits)
Thermostat
Thermostat
Base
Drywall Anchors
and Screws
This Quick Start
Manual
W3/AUX
W2
W1/O/B
Y2
Y1
SENSOR

Related product manuals