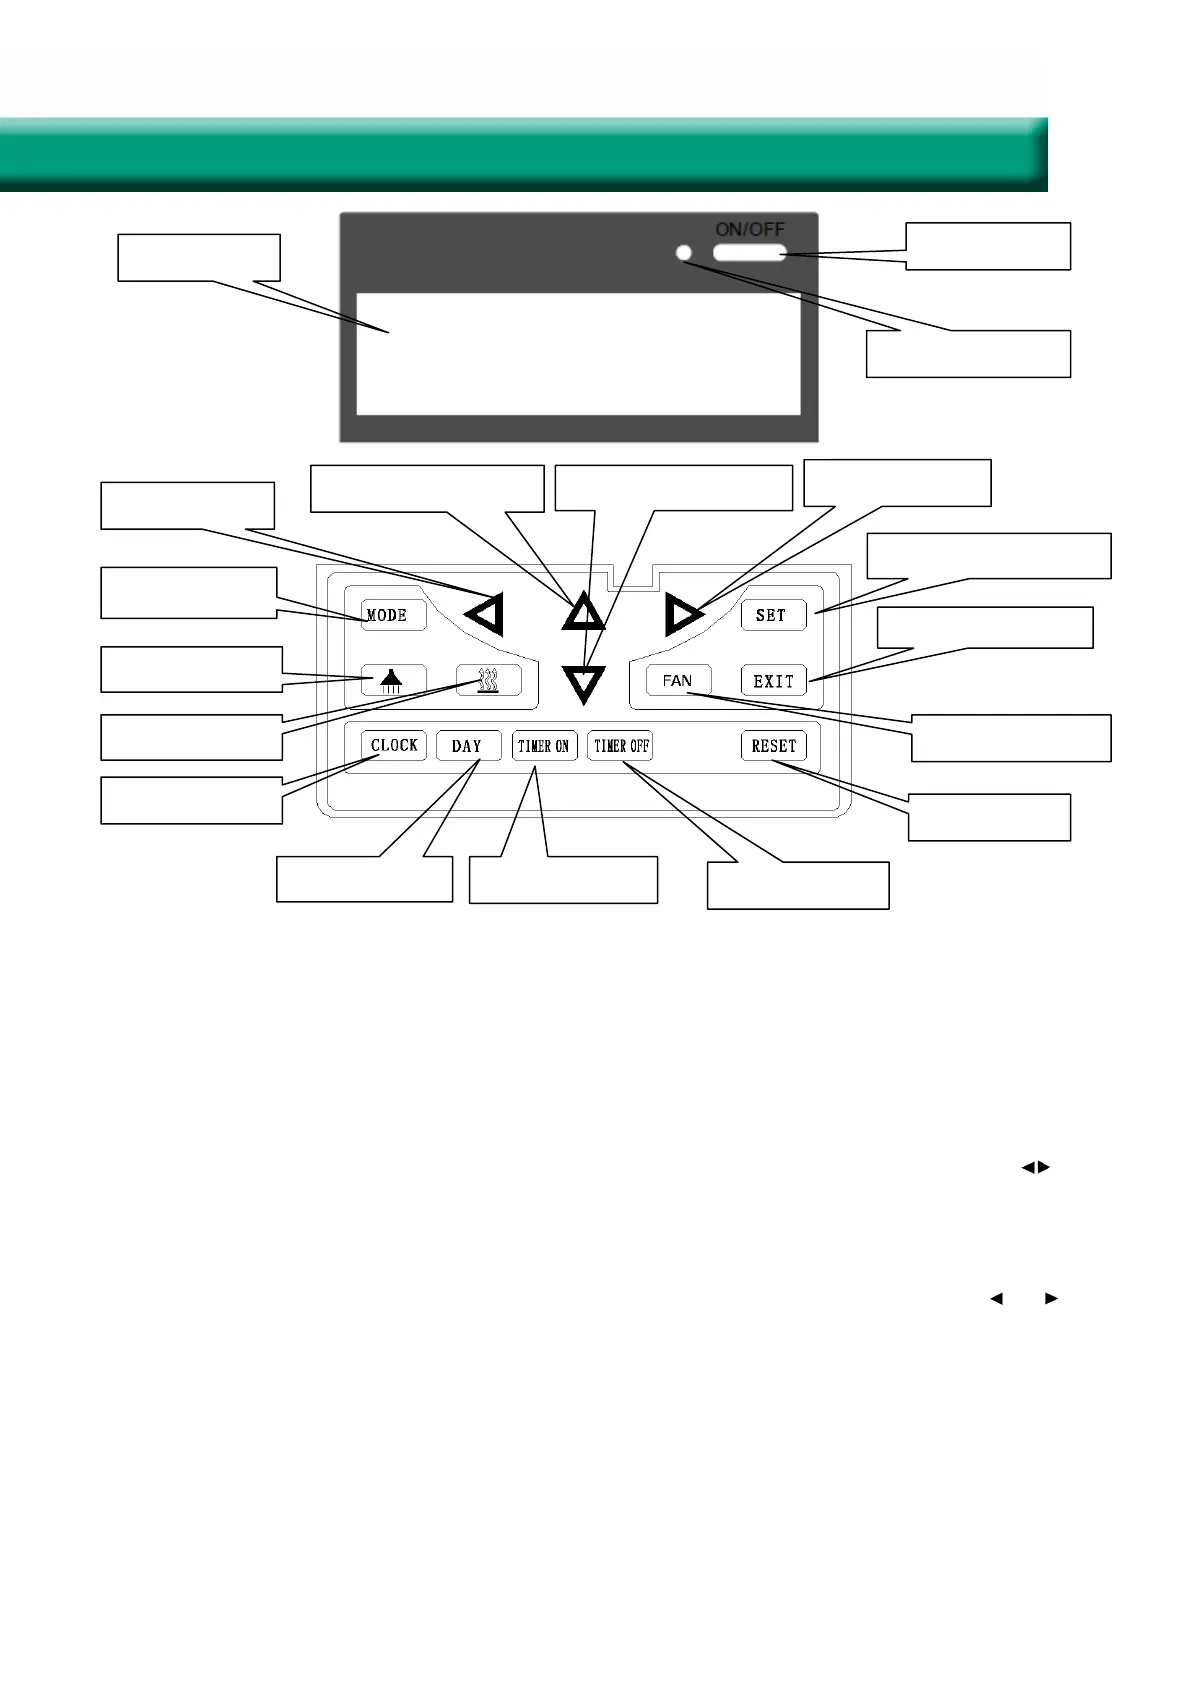
Time decrease
Time increase
Temperature increase Temperature decrease
Leave the operation
Mode switch
Useless
Useless Air velocity setting
Useless
Time setting
Choose a day Weekly timer on
Weekly timer off
Data save and function
Operation Instructions
1. ON/OFF: press ON/OFF button once for starting; twice for closing. In ON status, the light of power
indicator is on, and the ventilator begins to run. In OFF status, the light is off and the ventilator stops.
2. Mode switch: press MODE to choose to display the oA/rA/SA/Fr status.
3. Air velocity setting: press FAN button to adjust the air velocity. Users can set the return air velocity
in “rA” status, and set the supply air velocity in “SA” status.
4. Time setting: time records if power off. If user need to reset the time, please press the CLOCK but-
ton, when the colon of the clock stills, press it again, then the hour flashes, users can press button to
adjust the hour; then press the CLOCK button again to adjust the minute in the same way, the interval
is 10 minutes. After setting, please press SET button to save the data or press EXIT to leave the opera-
tion without saving the data. If no operation in 8 seconds, display will disappear and all setting is inva-
lid.
5. Day setting: press DAY button, when the day code flashes, select the day by pressing button and .
After setting, please press SET button to save the data or press EXIT to exit without saving the data.
If no operation in 8 seconds, display will disappear and all setting is invalid.
6. Weekly timer on: press TIMER ON button, all the days display, then press this button to switch the
hour->minute->invalidation of timer. Users can set the hour and minute when flashing. When it shows
“--:--”; it means timer is invalid. Besides, users can press DAY button to switch the day, the day flashed
when chosen. After setting, please press SET button to save the data or press EXIT to leave the opera-
tion without saving the data. In the status of TIMER ON, code “1” “2” stands for the first or second peri-
od of timer. User can choose the period of timer by pressing the button of “MODE”. If no operation in 8
seconds, display will disappear and all setting is invalid.
Display screen
Power on/off
Power on indicator
17
Intelligent Controller Instruction
 Loading...