5
www.ventilation-system.com
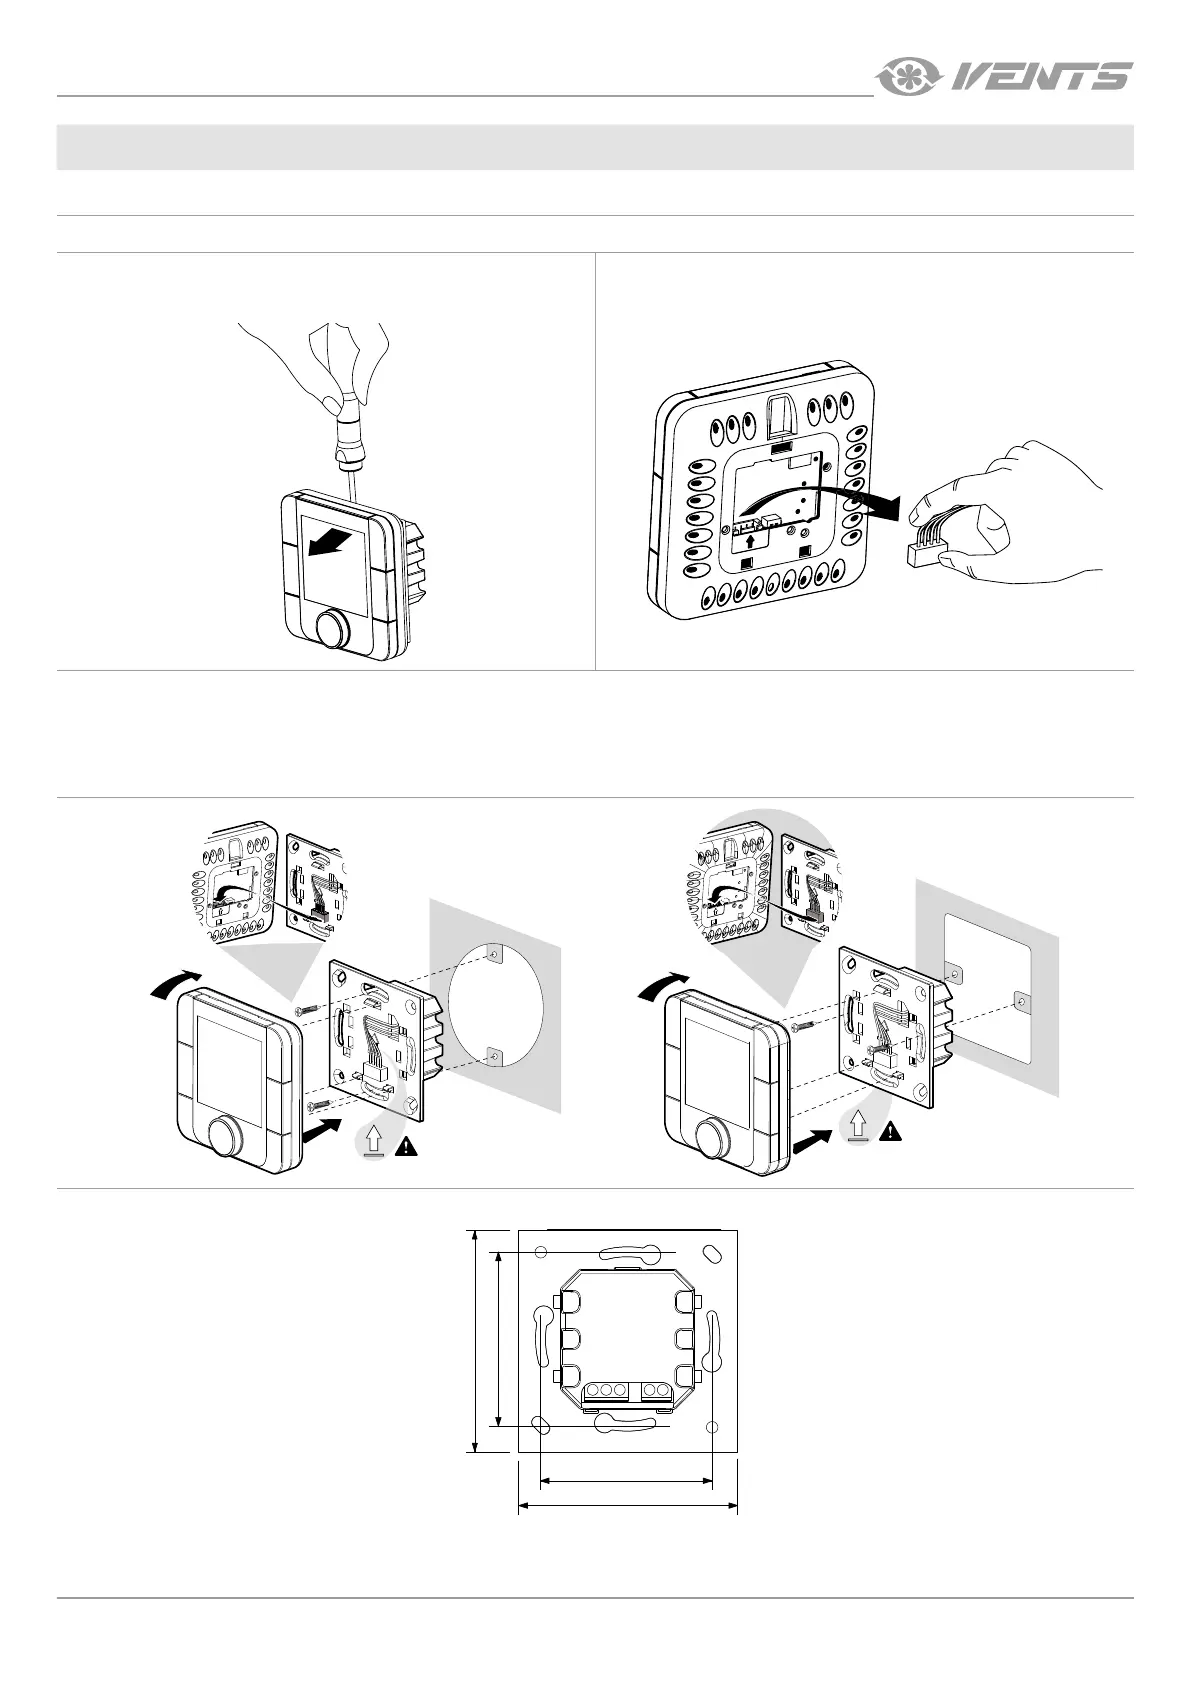
INSTALLATION OF THE THTUNE A17 CONTROL PANEL
To install the rear part of the control panel, use a suitable mounting box (minimum diameter of 65 mm and minimum depth of 31 mm).
1. Use a screwdriver to pull the front and the rear sides of the
control panel apart.
2. Disconnect the 4-pin socket from the front part of the control
panel.
3. Complete the electrical connections as shown in the external wiring diagram.
4. Secure the rear part of the control panel in the mounting box using the screws supplied.
5. Re-attach the four-pin socket.
6. Lay all the cables inside the control panel and install the control panel starting from the bottom. Make sure that none of the internal
wires prevent closing with a click.
4
5
6
4
5
6
Overall dimensions of the control panel rear part [mm]
74
60
74
60
INSTALLATION AND SETUP
 Loading...