EasyManua.ls Logo

Verbatim Vi3000 - User Manual

Verbatim Vi3000
3 pages
Print Icon
To Next Page IconTo Next Page
Loading...
This guide is intended as a general outline of the key steps involved in installing a Solid State Drive (SSD) into
a laptop or desktop computer, and is not intended to provide specic details pertaining to a particular PC
hardware or Operating System (OS) conguration. Check with your motherboard documentation to conrm
that there is a PCIe NVMe M.2 slot available and it can accept the M.2 2280 form factor. If, after reading this
outline, you do not feel condent you can carry out the necessary steps to perform the installation, it is highly
recommended that you contact a qualied service technician for the installation of your SSD.
To reduce the risk of damage to sensitive electronics by electrostatic discharge, touch an unpainted metal
surface (such as your computer case) with your ngers before touching the SSD to your computer.
Ensure your working environment is clean, dry, and static-safe.
Handle your SSD with care and do not touch the gold connectors on the end of the SSD.
Do not alter, modify, or disassemble the device.
1. Verbatim Vi3000 PCIe NVMe M.2 2280 SSD
2. Host laptop or desktop computer*
3. A non-magnetic tip screwdriver suitable for opening the case, cover, and/or access panel(s) of your
desktop computer or laptop*
4. A non-magnetic tip screwdriver suitable for fastening the M.2 SSD device to the motherboard*
5. A suitable screw to fasten the Vi3000 SSD to your motherboard (typically included with your
motherboard)*
Not included*
Note for those users replacing an existing Hard Disk Drive (HDD) or SSD: If you intend to replace an
existing drive on your computer with this SSD by way of cloning or data migration, you will need to procure
data cloning/migration software and complete this process before installing the Vi3000 SSD. There are many
types of data cloning/migration software available online at little or no cost to you.
Verbatim suggests fully backing up your system before performing any hardware or software
modications. Verbatim is not liable for any damage caused by you in the installation of your SSD or
any 3rd party warranty voided during installation.
How to Install the Verbatim Vi3000 PCIe NVMe M.2 2280 SSD
Introduction
For Your Safety and that of the SSD:
You Will Need the Following:
Question and Answer IconNeed help?

Do you have a question about the Verbatim Vi3000 and is the answer not in the manual?

Summary

Introduction and Preparation

Installation Overview and User Notes

General guide to SSD installation, advice for drive replacement, and backup recommendations.

Safety and Handling Precautions

Essential safety measures to prevent static discharge and physical damage to the SSD during installation.

Required Installation Items

List of necessary tools, components, and the Verbatim Vi3000 SSD for the installation process.

Connecting the SSD to a Desktop Computer

Desktop Preparation and Access

Steps to safely power down the desktop and open the case to access the motherboard.

SSD Installation in Desktop

Instructions for inserting and fastening the Vi3000 SSD into the M.2 slot on the motherboard.

Desktop Post-Installation Steps

Actions after installing the SSD, including drive formatting or OS setup.

Connecting the SSD to a Laptop Computer

Laptop Preparation and Access

Steps to safely power down the laptop, remove the battery, and access the motherboard.

SSD Installation in Laptop

Instructions for inserting and fastening the Vi3000 SSD into the M.2 slot on the laptop motherboard.

Laptop Post-Installation Steps

Actions after installing the SSD, including OS installation or preparing the drive.

Overview

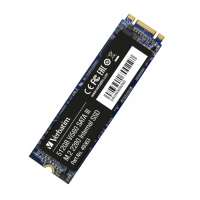
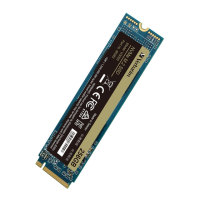
The Verbatim Vi3000 PCIe NVMe M.2 2280 SSD is a solid-state drive designed for installation into compatible laptop and desktop computers. Its primary function is to provide high-speed data storage and retrieval, serving as either a replacement for an existing hard disk drive (HDD) or solid-state drive (SSD), or as an additional storage device alongside an existing drive setup. The drive utilizes the PCIe NVMe M.2 interface, which offers significantly faster performance compared to traditional SATA interfaces. The "2280" in its name refers to its physical dimensions, indicating a length of 80mm and a width of 22mm, a common form factor for M.2 SSDs.

Technical Specifications and Compatibility:

The Vi3000 SSD is designed to fit into a PCIe NVMe M.2 slot. Users must confirm that their motherboard documentation indicates the availability of such a slot and its compatibility with the M.2 2280 form factor. This is a crucial step before purchase and installation to ensure proper fit and functionality. The drive is intended for use with both laptop and desktop computers, provided they meet the interface and form factor requirements.

Installation Process (General Outline):

The installation guide provides a general outline rather than specific, detailed instructions for every possible PC hardware or operating system configuration. It emphasizes the importance of consulting the computer's user manual or motherboard documentation for precise details.

For Desktop Computers:

  1. Preparation: Power off the desktop, unplug the power cable, and discharge any residual electricity by holding the power button for a few seconds.
  2. Access: Locate and open the computer's cover or case and any associated access panels to reach the motherboard.
  3. Installation Scenarios:
    • Replacing an existing SSD: Consult motherboard documentation to find the PCIe NVMe M.2 interface connector. Remove the current SSD, then insert the Vi3000 SSD, aligning its eyelet with the motherboard screw. Secure the Vi3000 SSD with a screw.
    • Installing alongside an existing SSD: Consult motherboard documentation for an available PCIe NVMe M.2 interface connector. Insert the Vi3000 SSD, aligning its eyelet with the motherboard screw. Secure the Vi3000 SSD with a screw.
  4. Reassembly: Replace all covers and access panels.
  5. Power On: Power on the desktop computer.
  6. Post-Installation Configuration:
    • If the previous drive was cloned to the new SSD, it should be ready for use.
    • If installed alongside an existing drive, the user will need to use the operating system's disk management tool to format the drive, assign partitions, and assign a drive letter.
    • If no cloning was performed and the SSD is the sole drive, the user must install the operating system, drivers, firmware, applications, and user data onto the new SSD.

For Laptop Computers:

  1. Preparation: Power off the laptop, unplug the power cable, and remove the laptop battery. Discharge residual electricity by holding the power button for a few seconds.
  2. Access: Locate and open the laptop's cover and/or access panel(s) to reach the motherboard, using the computer's user manual as a guide.
  3. Installation:
    • Remove any internal HDD or SSD by unplugging it from its SATA III 2.5" or M.2 interface connector.
    • Insert the Vi3000 PCIe NVMe M.2 2280 SSD into the PCIe NVMe M.2 interface connector, ensuring the SSD screw eyelet aligns with the motherboard screw.
    • Fasten the Vi3000 SSD to the motherboard with a screw.
  4. Reassembly: Replace all covers and access panels. Reinsert the laptop battery and power on the laptop.
  5. Post-Installation Configuration:
    • If the previous drive was cloned to the new SSD, it should be ready for use.
    • If no cloning was performed, the user must install the operating system, drivers, firmware, applications, and user data onto the new SSD.

Usage Features:

The Vi3000 SSD is designed for high-performance computing, offering faster boot times, quicker application loading, and improved overall system responsiveness compared to traditional HDDs. When installed as a primary drive, it can significantly enhance the user experience. When installed as a secondary drive, it provides fast storage for frequently accessed files, games, or applications.

Maintenance Features:

The guide emphasizes several safety and maintenance precautions:

  • Electrostatic Discharge (ESD) Prevention: Before handling the SSD, users should touch an unpainted metal surface (like the computer case) to discharge static electricity, reducing the risk of damage to sensitive electronic components.
  • Clean Environment: The working environment should be clean, dry, and static-safe to prevent contamination or damage.
  • Careful Handling: The SSD should be handled with care, and users should avoid touching the gold connectors on the end of the device to prevent damage or signal integrity issues.
  • No Alteration: Users are explicitly warned not to alter, modify, or disassemble the device, as this could void warranties and potentially damage the SSD.
  • Data Backup: Verbatim strongly recommends fully backing up the system before performing any hardware or software modifications to prevent data loss.

Important Considerations:

  • Cloning/Data Migration: For users replacing an existing drive, data cloning/migration software is required to transfer data from the old drive to the new Vi3000 SSD before physical installation. Many such software options are available online, some at no cost.
  • Professional Installation: If a user is not confident in performing the installation steps, it is highly recommended to contact a qualified service technician.
  • Warranty: Verbatim is not liable for any damage caused by the user during installation or for any third-party warranty voided as a result.
  • Required Tools (Not Included):
    • A non-magnetic tip screwdriver suitable for opening the computer case/cover/access panel(s).
    • A non-magnetic tip screwdriver suitable for fastening the M.2 SSD to the motherboard.
    • A suitable screw to fasten the Vi3000 SSD to the motherboard (typically included with the motherboard).

The manual includes visual aids (Exhibit A and Exhibit B) to illustrate the insertion and fastening of the M.2 SSD, showing the correct alignment and securing process. Exhibit A depicts the insertion of the SSD into the slot (steps 1 and 2), while Exhibit B shows the SSD fastened with a screw (step 3). These visual cues help clarify the physical installation steps.

Verbatim Vi3000 Specifications

General IconGeneral
BrandVerbatim
ModelVi3000
CategoryStorage
LanguageEnglish

Related product manuals