This document outlines the process for connecting a Windows PC to a Verizon Jetpack Hotspot, detailing the steps from powering on the hotspot to establishing an internet connection on a Windows 10 laptop.
Function Description:
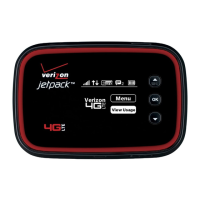
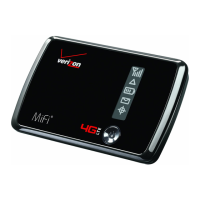
The Verizon Jetpack Hotspot serves as a portable wireless internet access point, allowing multiple devices, such as Windows PCs, to connect to the internet via Verizon's 4G LTE network. It acts as a bridge, converting the cellular signal into a Wi-Fi signal that nearby devices can utilize. This enables internet connectivity in locations where traditional wired internet is unavailable or inconvenient, making it ideal for mobile work, remote learning, or travel. The hotspot's primary function is to provide on-demand internet access, ensuring users can stay connected for various online activities, including browsing, email, and accessing cloud-based applications. The document focuses specifically on integrating this mobile internet solution with a Windows 10 operating system, guiding users through the necessary configuration steps to achieve a secure and functional connection.
Important Technical Specifications (Inferred from the document):
- Network Compatibility: Verizon 4G LTE. This indicates the device operates on Verizon's fourth-generation long-term evolution network, providing high-speed mobile broadband.
- Wireless Standard: Wi-Fi (implied by the connection process). The hotspot broadcasts a Wi-Fi signal that Windows 10 laptops can detect and connect to.
- Security: WPA2 (implied by "Secured" and "Enter the network security key"). The hotspot utilizes robust encryption protocols to secure the wireless connection, requiring a password for access.
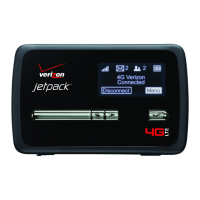
- Boot Time: The device displays an "Ellipsis screen booting" message, indicating a brief startup sequence before becoming operational.
- Display: The hotspot features a small screen that displays status information, such as "Verizon 4G LTE" when ready and "GOODBYE" upon shutdown.
- Power Button: A physical power button is present, requiring a 3-second press and hold for power on/off.
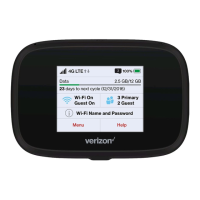
- Password Retrieval: The Wi-Fi password (network security key) is an 8-character string, accessible by pressing the front button on the hotspot three times.
Usage Features:
- Simple Power On/Off: The device is easily turned on by pressing and holding the power button for three seconds. Similarly, it's turned off by holding the front button for 3-4 seconds until "GOODBYE" appears. This straightforward mechanism ensures ease of use for all skill levels.
- Visual Status Indicators: The hotspot's screen provides clear visual cues regarding its operational status. The "Ellipsis screen booting" confirms startup, "Verizon 4G LTE" indicates readiness for connection, and "GOODBYE" signals shutdown. These indicators help users understand the device's current state without needing to guess.
- On-Demand Password Retrieval: A unique feature allows users to retrieve the 8-character Wi-Fi password directly from the hotspot's display by pressing its front button three times. This eliminates the need to remember or store the password separately, enhancing convenience, especially when connecting new devices or sharing access.
- Automatic Connection Option: When connecting a Windows 10 PC, users have the option to "Connect automatically" to the hotspot. This feature streamlines future connections, as the PC will automatically join the network whenever it's in range and the hotspot is active, reducing manual intervention.
- Secure Connection: The hotspot enforces a secure connection by requiring a network security key (password). This protects the user's internet traffic from unauthorized access, ensuring privacy and data integrity. The document explicitly mentions "Connected, secured" as a confirmation of a successful and protected link.
- Multi-Device Capability (Implied): While the document focuses on a single Windows PC, hotspots are inherently designed to support multiple simultaneous connections, allowing several devices (laptops, tablets, smartphones) to share the internet connection.
- Portability: The "Jetpack" designation and the nature of a "hotspot" imply a compact and portable design, allowing users to carry it easily and establish internet access wherever cellular service is available.
Maintenance Features (Inferred):
- Charging (Implied): The instruction to "check to ensure the Jetpack is turned on and is fully charged" indicates that the device is battery-powered and requires charging. While the document doesn't detail the charging method (e.g., USB-C, micro-USB), it highlights the importance of maintaining a charged battery for continuous operation.
- Firmware Updates (Not explicitly mentioned but common for such devices): Hotspots often receive firmware updates to improve performance, enhance security, and add new features. While not covered in this connection guide, it's a typical maintenance aspect for network devices.
- Reset Function (Not explicitly mentioned but common): Many hotspots include a reset option (e.g., a pinhole button) to restore factory settings, which can be useful for troubleshooting connectivity issues or preparing the device for a new user.
- Troubleshooting Guidance: The document provides a basic troubleshooting tip: if the Jetpack doesn't appear in the network options, users should verify it's turned on and fully charged. This simple guidance helps users resolve common initial connection problems.
- Physical Care: Although not detailed, general maintenance for electronic devices, such as keeping it dry, avoiding extreme temperatures, and protecting it from physical impact, would apply to ensure the longevity and reliable operation of the Jetpack Hotspot.