1. 2.
3. 4.
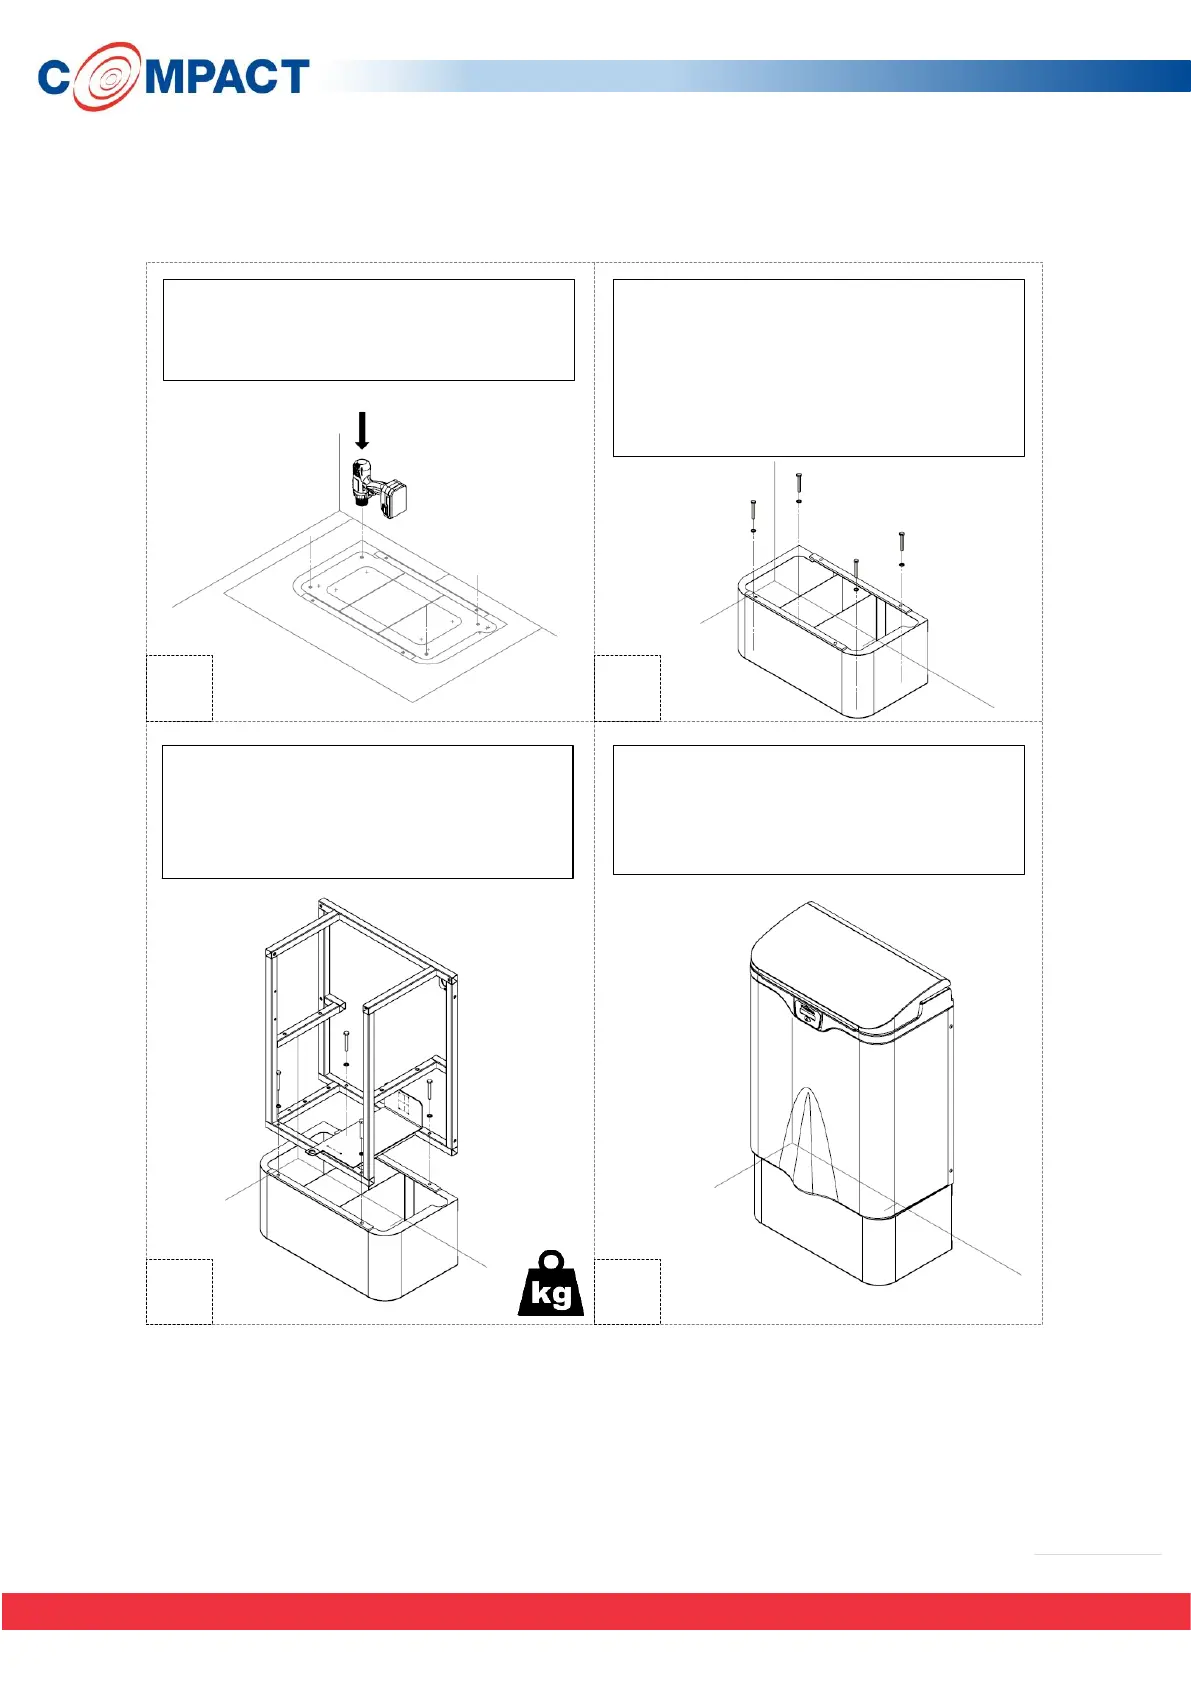
· Place the provided template on the floor in the desired
Compact location.
· Drill the floor mounting holes marked out on the
template as shown.
· These holes accommodate M8 size bolts.
· Remove the template and place the plinth onto the
floor ensuring the mounting holes line-up with those
on the plinth.
· Fasten the plinth to the floor. The fasteners are not
supplied or specified by Vernacare as building
materials vary upon location.
· Add the 2 rubber strips to the plinth as highlighted (A)
(These may already be fitted to the base of the
machine, in this case proceed to stage 3)
· Remove the front cover from the machine and place it
onto the plinth.
· Note that the Compact exceeds 50Kg in weight and is
too heavy for a single person to lift without an aid.
· Use the provided M6 x 40 bolts and washers to fasten
the frame to the plinth as shown below.
· The machine is now installed and the front cover can
be fitted.
· Please note that Vernacare recommends bolting the
plinth to the floor, if this and other mounting options
are not possible please ensure the unit is secured to
the wall to prevent tipping.
A
A