Do you have a question about the Vertex Standard VX-824 and is the answer not in the manual?
Covers FCC limits, standards, and guidelines for occupational RF exposure environments.
Details critical warnings and cautions regarding RF energy generation and safe operating practices.
Instructions for battery installation, removal, and how to identify a low battery status.
Guides users through initial setup and basic operational commands.
The VX-820/870 series is a two-way radio designed for occupational use, ensuring compliance with Federal Communications Commission (FCC) RF exposure limits for controlled environments. This radio is intended for individuals who are aware of the potential hazards of RF electromagnetic energy and know how to minimize them. It is not suitable for general population use in uncontrolled environments.
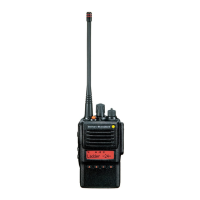
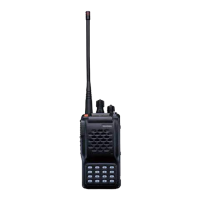
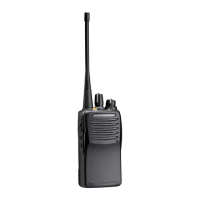
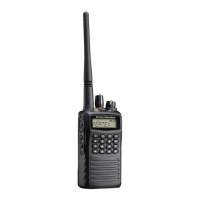
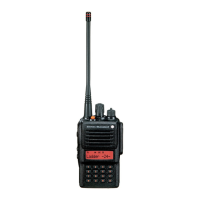
The radio operates by generating RF electromagnetic energy during transmit mode. It is designed to facilitate communication in work-related operations where the operator has the knowledge to control RF exposure conditions. The device features a Push-to-Talk (PTT) switch for transmitting, a Channel Selector for choosing operating channels, and a Volume/Power knob for adjusting audio levels and turning the radio on/off. An LED indicator provides visual feedback on the radio's status, such as scan activity, busy channels, transmission, and low battery voltage.
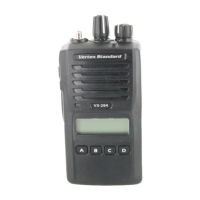
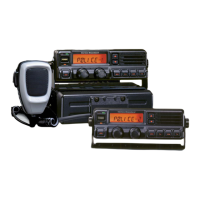
For enhanced communication, the radio can be equipped with a Speaker/Microphone, which connects to the MIC/SP Jack. Some versions of the radio (VX-824/829/874/879) include a 16-Button DTMF Keypad or a 4-Button DTMF Keypad for sending DTMF tones, which can be used for various functions like speed dial or emergency calls, depending on programming.
The radio's key functions, including [SEL], [MON], [LAMP] Key, and additional keys ([A], [B], [C], [D] Key on specific versions), are customizable by a Vertex Standard dealer to meet specific communication requirements. These customizable functions can include Monitor, Lamp, Channel Scan, Dual Watch, High/Low Power, Talk Around, TX Save Disable, Encryption Disable (with optional DTMF/Encryption Unit), Follow-Me DW, Group Up/Down, Channel Up/Down, SET Mode, Call/Reset (with optional DTMF/Encryption Unit), Speed Dial (with optional DTMF/Encryption Unit), and Emergency (with optional DTMF/Encryption Unit).
To operate the radio, a charged battery pack must be installed, and the supplied antenna screwed onto the Antenna jack. The radio should never be operated without an antenna connected. For initial setup, the VOL/PWR knob is turned clockwise to power on the radio. The CH selector knob is then used to select the desired operating channel, which may display a channel number or name on the LCD (for VX-824/829/874/879 versions). The VOL/PWR knob adjusts the volume level. To set the audio level when no signal is present, the Monitor button can be pressed and held for more than 2 seconds to hear background noise. Releasing or pressing the Monitor button twice will quiet the noise and resume normal monitoring.
For transmission, the PTT switch is pressed and held, and the user speaks into the microphone area of the front panel grille. Releasing the PTT switch returns the radio to Receive mode. The red LED on the top of the radio illuminates during transmission.
When using the radio in a body-worn configuration, it is crucial to maintain a distance of 4 cm from the body during transmission. The radio is intended for monitoring purposes using the speaker only and for carrying purposes in such configurations. It is explicitly stated that the radio should not be transmitted when used in a body-worn configuration with a belt-clip accessory.
The radio is designed to operate with a maximum duty cycle not exceeding 50% in typical Push-to-Talk (PTT) configurations. Transmitting for more than 50% of the total radio use time can lead to exceeding FCC RF exposure compliance requirements.
Battery pack installation involves holding the transceiver with the palm over the speaker and thumb on the top of the belt clip, then inserting the battery pack into the compartment while tilting the Belt Clip outward, and finally closing the Battery Pack Latch until it locks. To remove the battery, the radio must be turned off, protective cases removed, the Battery Pack latch opened, and the battery slid downward while unfolding the Belt Clip. Users are cautioned against opening rechargeable Li-ion packs due to the risk of explosion from accidental short-circuiting.
The radio provides a low battery indication: when the battery voltage drops to 6.0 volts, the TX/BUSY indicator on top of the radio will blink red. At this point, a freshly charged battery should be substituted, and the depleted pack recharged. To promote better long-term battery capacity, it is recommended to avoid frequent recharging of Li-ion batteries with little use between charges. Instead, users are advised to carry an extra, fully charged pack and use the operational battery until depletion, a technique known as "deep cycling."
For external accessories like a Speaker/Microphone, the plastic cap and its two mounting screws on the right side of the transceiver should be removed. The Speaker/Microphone connector is then secured using the supplied screw. The original plastic cap and screws should be saved and re-installed when the Speaker/Microphone is not in use.
The device complies with Part 15 of the FCC Rules, and its operation is subject to the condition that it does not cause harmful interference. Any changes or modifications to the device not expressly approved by Vertex Standard could void the user's authorization to operate the device.
| Frequency Range | 136-174 MHz |
|---|---|
| IP Rating | IP54 |
| Power Output | 5W |
| Battery | Li-Ion |
| Display | Alphanumeric |
| Signaling | 5-Tone, DTMF |
| Operating Temperature | -30°C to +60°C |