38
37
36
30
31
39
35
33
34
32
-8-
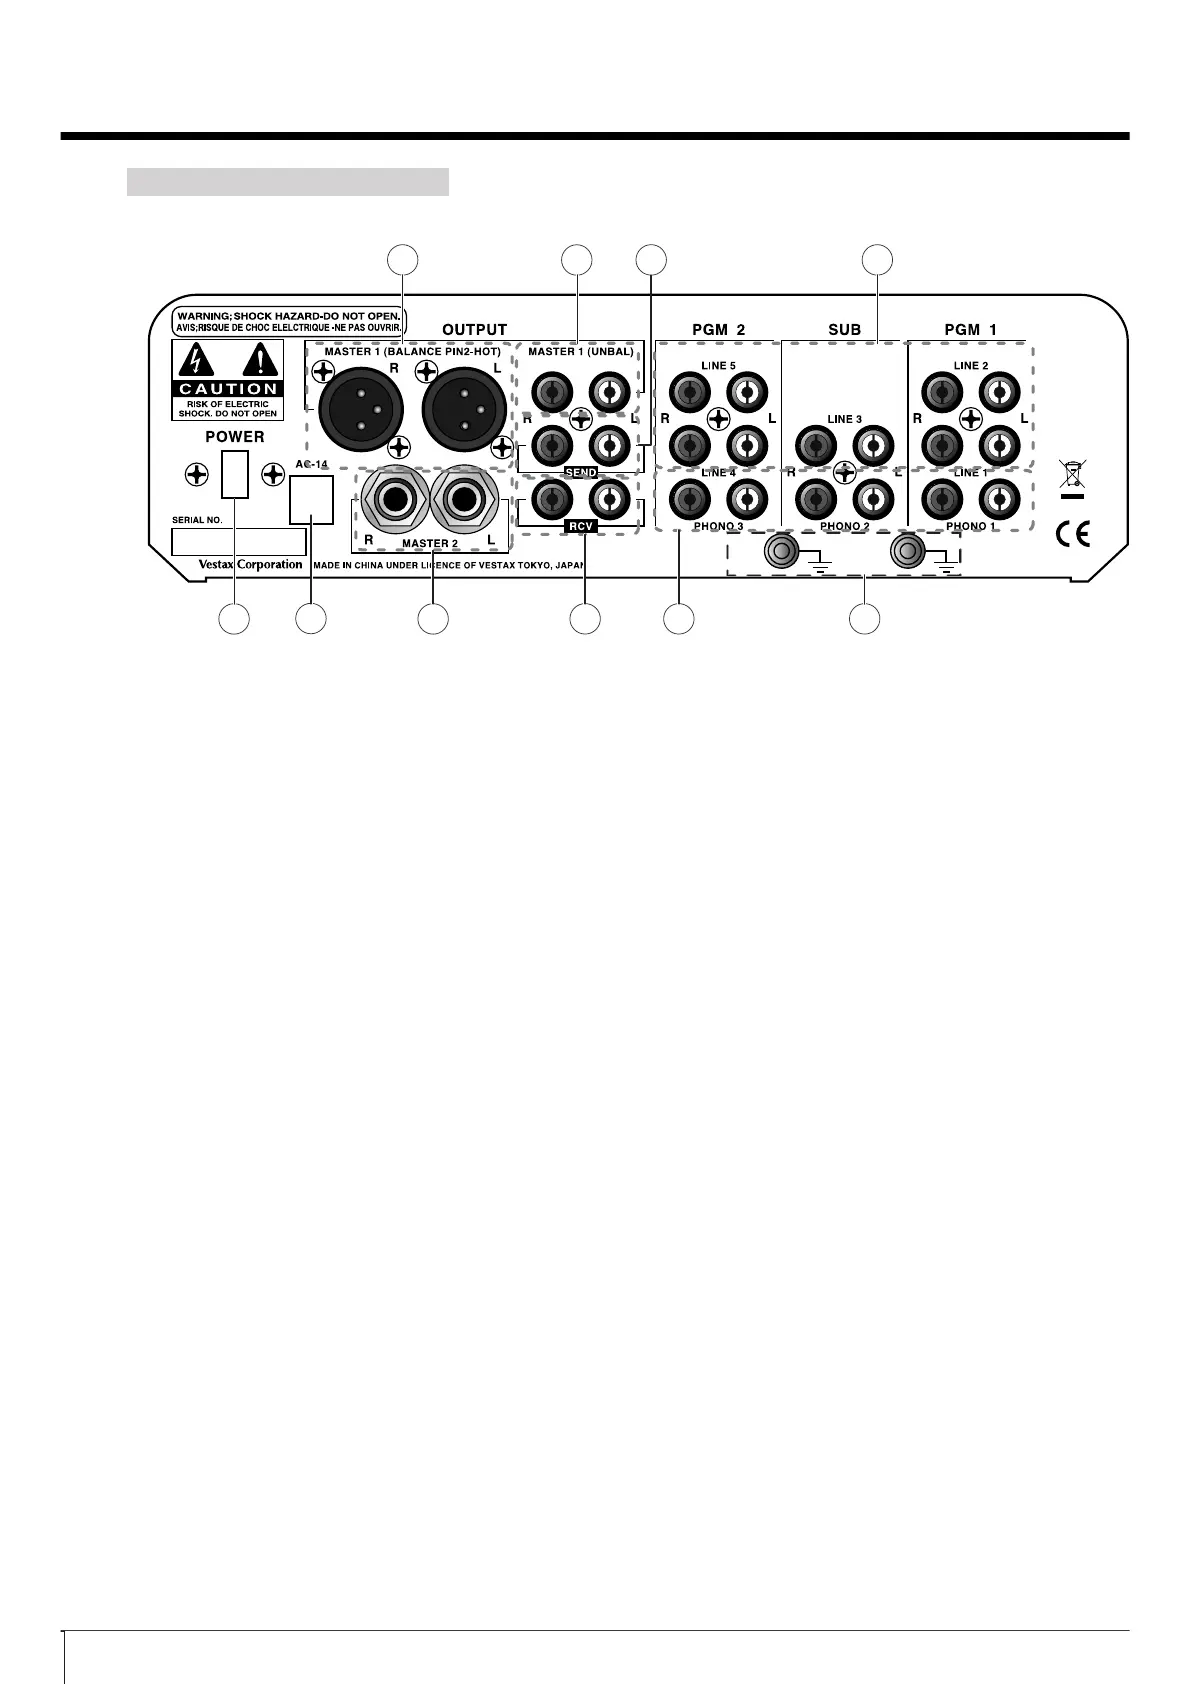
REAR PANEL SECTION
#0 POWER SWITCH
Use to turn power on
#1 POWER INPUT JACK
Connect the Vestax , AC adaptor (12V
AC, mA).
#2 GROUND TERMINAL
Connect this terminal to the ground lead of the
turntables.
#3 PHONO INPUT JACK [RCA PIN JACK]
Connect turntables equipped with MM (Moving
Magnet type) cartridge. The signal from the
turntable is fed to the PGM channels when Phono
input is selected.
#4 LINE INPUT JACK [RCA PIN JACK]
Connect the equipment with line level output (-
10dB or 0dB), such as CD players, tape decks,
DATs, MDs, etc. The signal from line level
equipment is fed to the PGM channels when Line
input is selected.
#5 AUX RECEIVE JACK
Connect to the output of the external effects
#6 AUX SEND JACK
Connect to the input of the external effects.
(Delay, Reverb etc)
#7 MASTER 1 OUTPUT JACK [BALANCED XL
JACK:PIN2-HOT]
Connect to the input of power amp
#8 MASTER 1 OUTPUT JACK [RCA PIN JACK]
The MASTER 1 jack is an unbalanced R
output. The signal is same with master.
#9 MASTER 2 OUTPUT JACK [UNBALANCED
PHONE JACK]
Connect to input of power amp as monitor in
booth or as a separate sound zone for entra
foyer etc.
#%
 Loading...