Falcon Service Manual
___________________________________
22
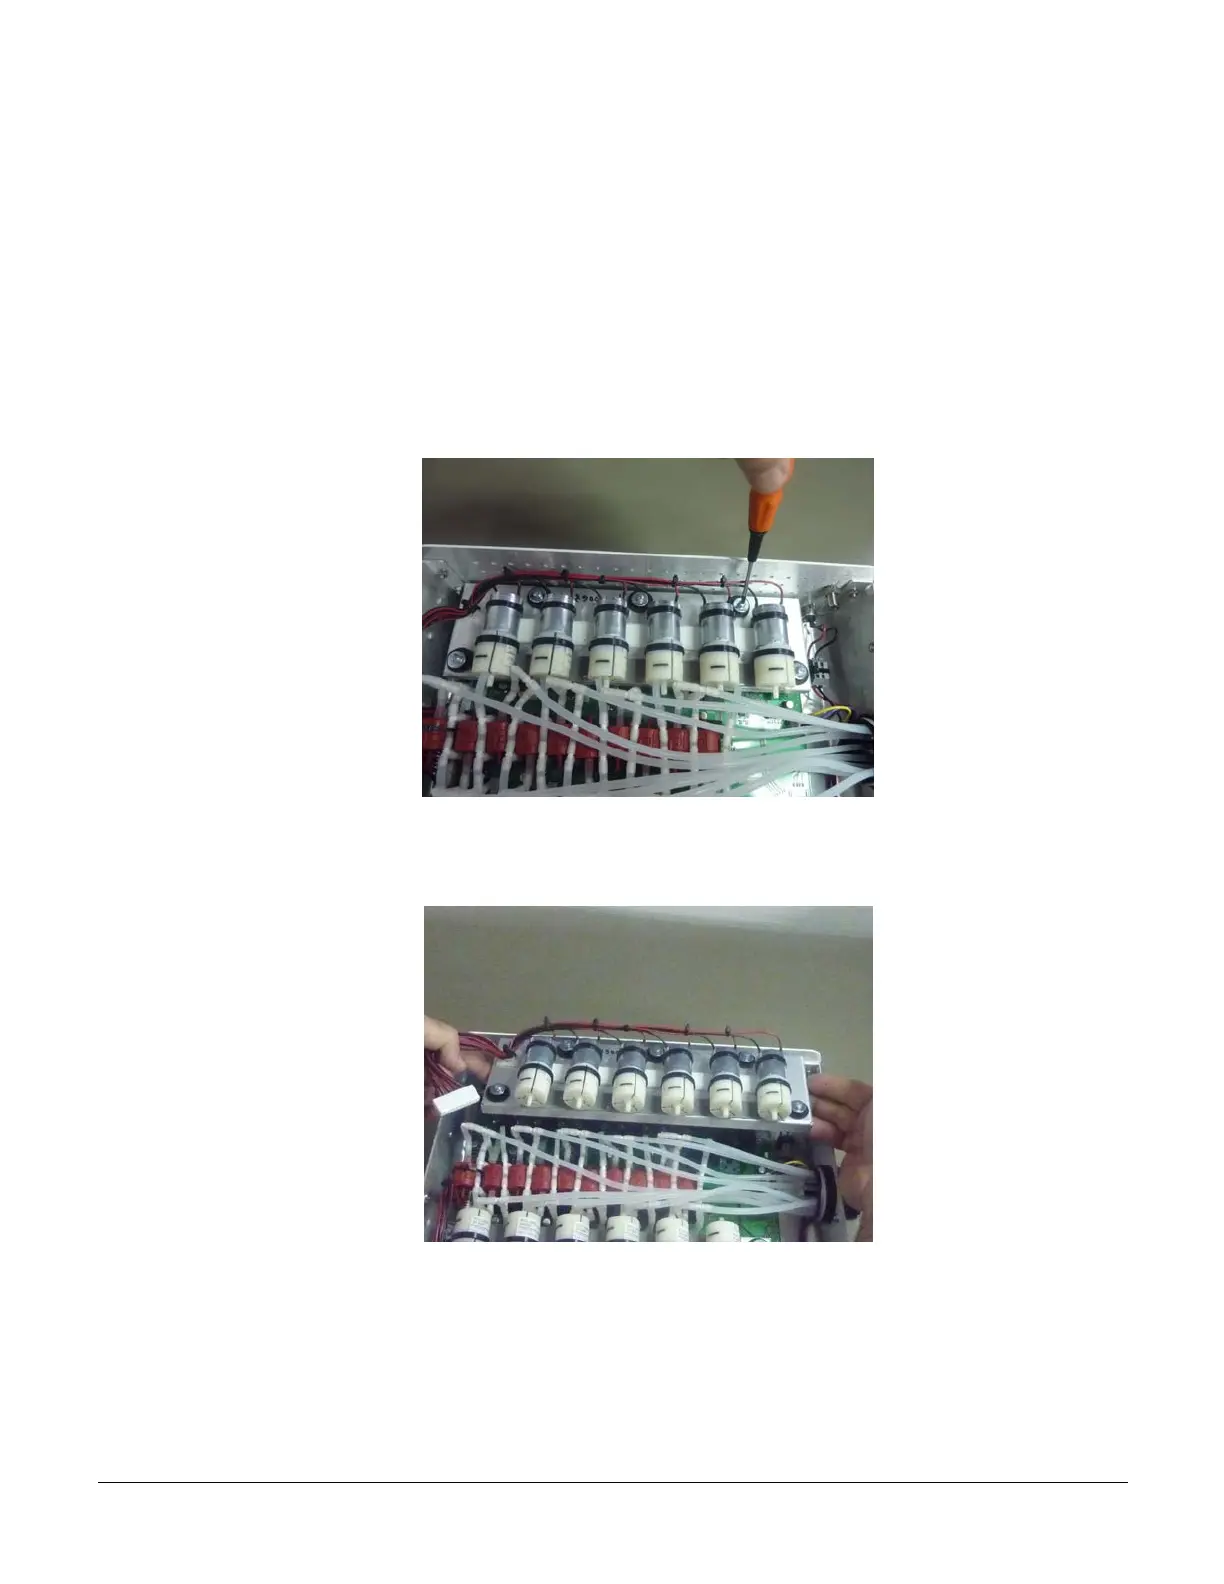
5.4 Release the Pump Sub-assemblies
a) Each pump sub-assembly is connected to the Falcon main body through spacers that pass
through the Falcon main board. There are 5 special shock absorbers on each sub-assembly that are
designed to reduce vibrations when the pumps are active. 3 shock absorbers are located along the
external side of the sub-assembly (along the Falcon wall) and 2 shock absorbers are located at
each of the corners pointing towards the center of the system. With a standard Philips screw
deriver release the 5 screws that are located on each pump sub-assembly. Try not to completely
remove the 3 screws that are on the external row.
b) The pump sub-assembly is a special metal surface with pumps and cables. Lift out each of
the pump sub-assemblies as shown below. Place the sub-assembly aside in a safe location.
5.5 Disconnect the Tubes
A general view of the Falcon after removing the pump sub-assemblies is shown below.
VS0152, rev 1.3 Page