MTS/T-BERD 6000A V2 Getting Started Manual – Ref 76100003200 Rev001 – November 2015 - Copyright© 2015 5 MTS/T-BERD 6000A V2 Getting Started Manual – Ref 76100003200 Rev001 – November 2015 - Copyright© 2015 6 MTS/T-BERD 6000A V2 Getting Started Manual – Ref 76100003200 Rev001 – November 2015 - Copyright© 2015 1
InstallIng and removIng a module In the 6000a v2 plat-
form
The 6000A V2 Platform must be switched off and, if operating on mains, its supply cable
must be unplugged.
Installing a plug-in into a module carrier
1
Slide the plug-in into its slot
2
When the plug-in is fully home, press rmly on the screen-printed face of the plug-in
while tightening the clamping screws. The screen-printed face of the plug-in must be
ush with that of the receptacle.
3
Make sure that the two large captive screws of the plug-in are screwed fully home
Removing a plug-in from a module carrier
1
Unscrew the 2 captive screws of the plug-in completely (up to the stop).
2
Carefully slide the module out of its slot.
Battery management
The battery supplied with the Platform must be fully charged before use.
The instructions below apply to the removable Lithium Ion (LiIon) battery inside the
module pack (reference: E6100 or E6200).
Battery
housing
Battery
Battery cover
Captive screws
Access to the battery
1
Switch off the instrument and disconnect the mains supply.
2
Turn the instrument face down on the work surface.
3
Slacken the two captive screws at the bottom of the instrument with a coin &
unscrew them.
4
Remove the cover of the battery pack.
The battery can then be removed, taking care not to damage the connectors into
which it is plugged
When putting the battery back into its seating, make sure that its connector en-
gages correctly with the one of the module pack. Then t the cover back and lock
the two screws.
Charging the battery
Use only the mains adapter supplied with the 6000A V2 Platform. The adapter for
some other electronic device may appear to be identical, but entails a risk of damage
to the equipment.
Connecting the mains adapter
1
At the top of the 6000A V2 Platform , lift up the power supply socket protector and
plug in the mains adapter.
2
Connect the adapter to the mains.
The indicator lamp starts blinking.
Charging
If the instrument is tted with a battery, on connection to the mains:
- if the user does not press the
On key, the battery will go on to charge. In this case,
the indicator will be lit.
- if the user presses the
On key, the instrument starts up and the battery will be
charged during use.
Once the battery is fully charged, the indicator is lit.
It is essential to wait until charging is complete to ensure maximum independent
operating time, which may otherwise be considerably reduced
technIcal assIstance
If you require technical assistance, call 1-844-GO-VIAVI. For the latest TAC informa-
tion, go to http://www.viavisolutions.com/en/services-and-support/support/technical-
assistance.
6000A V2 PLATFORM
GETTING STARTED MANUAL
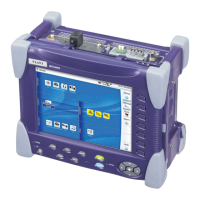
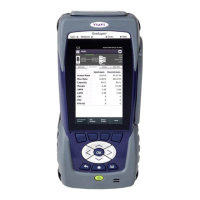
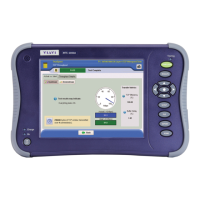
user Interface
The 6000A V2 Platform includes the controls and display needed for measurement
analysis.
1
2
3
5
6
7
8
9
10
11
12
4
Start / Stop the 6000A V2 Platform.
Lit in x green when the Platform is turned
on; in blinking green when the Platform is
turned off and connected to mains.
Lit in x green when charging is in prog-
ress. Not lit if battery is fully charged.
8 inch TFT color touchscreen, high visibility
(optimized for outdoor use)
Lit in blinking red during a test/acquisi-
tion.
(depends of the active function)
Launch the acquisition.
Calls up the page & is used to
analyze results.
(depends of the active
function)
Move the cursors; modify zoom on results
page; scroll through the menu in setup
pages; validate a selection.
(depends of the active function)
Calls up the measurement conguration
menu.
Calls up the le/directory management
menu, used to store les, change the storage
media...
Print a measurement report or a screen-
shot from a results page in jpg, png or
pdf format.
Give access to the conguration menus: of
the instrument (choice of module(s)); of the
system (date, time…). Press
to congure the Platform.
safety recommendatIons
Laser safety (when optical options are provided)
The provisions contained in two standards dene the safety procedures to be observed
both by users and manufacturers when utilizing laser products:
- EN 60825-1: 2001 - Safety of laser products – Part 1: Classication of products,
requirements and user guidelines.
- FDA 21 CFR § 1040.10 - Performance standards for light-emitting products - Laser
product
Due to the range of possible wavelengths, power values and injection characteristics of a
laser beam, the risks inherent in its usage vary.
The laser classes form groups representing different safety thresholds.
- Talkset option: Laser Class 1
- VFL option: Laser Class 2