Do you have a question about the Victor AUTO-CUT 300 XT and is the answer not in the manual?
Explains how notes, cautions, and warnings are used to highlight important information in the manual.
Covers hazards like electric shock, gases and fumes, and plasma arc rays, and necessary precautions.
Lists relevant safety standards and publications for welding and cutting.
Defines the use of 'note', 'attention', and 'avertissement' in French for important information.
French section detailing safety precautions for plasma arc cutting, including health hazards.
Lists reference documents and standards related to safety in welding and cutting.
States product compliance with standards, manufacturer details, and classification.
Details the limited warranty, limitations of liability, and warranty periods for parts and labor.
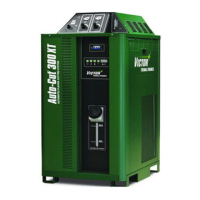
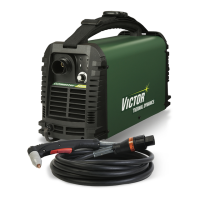
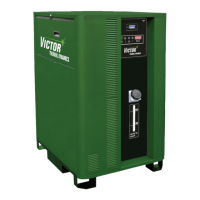
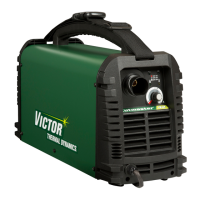
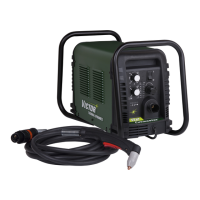
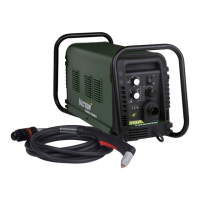
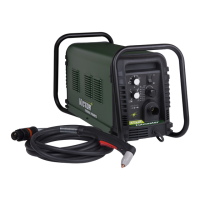
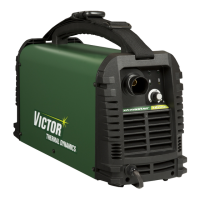
Outlines the typical components of the Auto-Cut 300 XT plasma cutting system.
Describes the function of the power supply in providing current and cooling.
Explains the role of the torch in delivering current for cutting metal.
Illustrates how system components are interconnected.
Lists technical specifications and electrical requirements for the power supply.
Provides physical dimensions and weight of the power supply.
Identifies and labels the connectors and features on the rear panel of the power supply.
Details required gases, purity, pressure, flow, and quality specifications.
Lists recommended gas types for cutting different materials and operations.
Provides dimensions and lead lengths for the XT™-301 torch.
Covers electrical supply, gas supply, and cooling system requirements for installation.
Identifies system cables and leads used for ground connections.
Details the identification, color coding, and type of various cables and leads used in the system.
Provides instructions and warnings for safely positioning the power supply unit.
Details the procedure for connecting input power and system ground cables to the power supply.
Instructs on connecting the work cable to the power supply unit.
Illustrates and describes star ground connections on a cutting table.
Explains grounding procedures to minimize electromagnetic interference (EMI).
Guides on connecting gas and coolant supply lines to the power supply's input ports.
Explains how to connect cables for CNC, Arc Starter, and Gas Control systems.
Details how to set switches on the Command-Control Module for system configuration.
Explains how to connect height control systems to the power supply terminal strip.
Details connecting torch leads and coolant leads to the Gas Control Module.
Provides step-by-step instructions for installing and connecting the torch head.
Guides on selecting and installing consumable torch parts for proper operation.
Instructions for installing the Voltage Divider board for iHC Torch Height Control.
Guides on filling the coolant tank with the correct coolant and checking the system.
Explains the function of various indicators on the power supply like AC, Temp, Gas, and DC lamps.
Describes the features of the control console, including gauges, knobs, and selectors.
Details the system's start-up sequence, including indicator lights and gas purging.
Discusses the selection of plasma gases (Air, Ar/H2, O2, N2) and shield gases (Air, N2, Water).
Lists and explains status codes related to plasma process, indicating faults and conditions.
Discusses factors affecting cut quality like bevel angle, dross, kerf width, and nitride build-up.
Outlines periodic checks for power supply maintenance, including daily, monthly, and six-month tasks.
Provides steps for cleaning the coolant filter to ensure efficient coolant flow.
Details the process for replacing the coolant in the system, including draining and refilling.
A chart that helps diagnose and remedy problems with the arc starter, including ignition failures.
Explains how to adjust the spark gap on the arc starter for proper operation.
Lists the catalog number for a complete replacement power supply unit.
Provides catalog numbers for various leads and cables based on length and type.
Lists catalog numbers for external replacement parts like covers and lifting eye.
Lists catalog numbers for replacement parts on the lower right side of the power supply.
Lists catalog numbers for replacement parts on the upper right side, including PCBs and relays.
Lists catalog numbers for replacement parts on the left side, including suppressor PCB and inverter modules.
Lists catalog numbers for replacement parts specific to the RAS - GCM 1000 XT module.
Lists catalog numbers for replacement parts on the rear panel, such as filters and switches.
Lists catalog numbers for replacement parts on the front of the GCM1000 XT, including gauges and selectors.
Provides the catalog number for the recommended gas supply hose.
Details how to remove the shield cup and consumable parts from the torch cartridge.
Explains the importance of lubricating O-rings on the cartridge and torch head with specific lubricant.
Advises on replacing worn torch parts like the gas distributor, tip, and electrode.
Provides warnings and instructions for installing torch consumables, emphasizing careful handling.
Provides a flowchart to diagnose and troubleshoot coolant leaks from the torch head.
Details the connections for the CNC control PCB, including terminal blocks TB1, TB2, and TB3.
Describes CNC I/O circuits, rear panel CNC connector J15, and duplicated connections on TB1, TB2, TB3.
Diagram showing the layout of the CCM CPU PCB with test points and LEDs.
Diagram showing the layout of the CCM I/O PCB with test points and J connectors.
Diagram showing the layout of the Pilot PCB with test points and LEDs.
Diagram showing the layout of the Relay and Interface PCB with test points and LEDs.
Diagram showing the layout of the Display PCB with test points.
Diagram showing the layout of the System Bias PCB with test points and LEDs.
Diagram showing the layout of the Main Inverter Bottom PCB with test points.
Diagram showing the layout of the Main Inverter Top PCB with test points.
Diagram showing the layout of the Control and Fault PCB with test points.
Diagram showing the layout of the Cap Bias Bottom PCB.
Diagram showing the layout of the Cap Bias Top PCB.
Diagram showing the layout of the Suppressor PCB.
Illustrates the system's liquid cooling circuit, including components like pump, radiator, and tank.
Shows the first part of the system schematic, detailing inverter modules and power connections.
Shows the second part of the system schematic, including wiring from bias PCB to I/O PCB and connectors.
Explains the system structure, inverter modules, unit configurations, and cooling.
Explains code 101, causes, and troubleshooting for disabled plasma enable.
Explains code 102, possible causes for pilot ignition failure, and troubleshooting for spark gap starters.
Explains code 104, causes for lost arc transfer, and troubleshooting related to current and standoff.
Explains code 108, causes for voltage faults between tip and electrode, and troubleshooting.
Introduces plasma power supply fault codes and general LED indicators.
Explains the function of various LEDs on inverter boards for status and fault indication.
Details code 201, causes for missing AC phase, and troubleshooting steps involving fuses and System Bias board.
Explains code 205, causes like shorts, and troubleshooting steps for low DC output voltage.
Details code 207, causes for unexpected work lead current, and troubleshooting sensor issues.
Explains code 208, causes for pilot circuit current, and troubleshooting pilot board and relay board.
Explains codes 210-211 for work lead current sensor errors, indicating high or low output.
Details codes for incorrect output from inverter sections, including causes and troubleshooting.
Explains code 224 for missing inverter 1, causes like loose cables, and troubleshooting steps.
Discusses codes for incompatible inverter revisions or CCMs, and troubleshooting by swapping cables.
Covers codes for incorrect voltage matching, causes, and troubleshooting involving jumpers and voltage signals.
Explains code 237 when fewer than two inverter sections are detected, indicating cable or CCM issues.
Details code 238, causes for invalid voltage identification, and troubleshooting System Bias board.
Explains code 239 for high AC voltage, possible causes, and troubleshooting steps.
Covers code 240 for low AC voltage, possible causes, and troubleshooting power distribution.
Explains codes for input voltage errors, including phase issues and intermittent power.
Details codes for inverter faults, including bias supply issues, capacitor imbalance, and over current.
Covers codes for inverter over temperature, causes like fan failure, and troubleshooting airflow.
Explains codes for over temperature due to high ambient temperature and troubleshooting sensor issues.
Details codes for no input power to inverters, causes like tripped breakers, and troubleshooting contactors.
Explains code 271 for inverter ID reading faults, causes like intermittent cables, and troubleshooting EMI.
Introduces Group 3 codes related to gas control communication, starting with communication faults.
Details code 301 for gas control communication faults, possible causes like fiber-optic problems.
Explains code 302 for communication reply faults and troubleshooting fiber-optic issues.
Details code 303 indicating gas pressure issues, causes, and sensor voltage checks.
Explains code 304 indicating gas control not ready, often related to plasma enable or CCM faults.
Covers code 305 for protocol errors, suggesting firmware updates and checking for EMI.
Introduces Group 4 codes pertaining to the liquid cooling system.
Describes the cooling system components: reservoir, pump, heat exchangers, sensors, and plumbing.
Explains code 401, causes for low coolant level, and troubleshooting the level switch.
Details code 402 for low coolant flow, possible causes, and troubleshooting the flow switch.
Explains code 403 for coolant overheating, causes like fan issues, and troubleshooting airflow.
Details code 404, causes for the coolant system not being ready, and troubleshooting pump operation.
Explains code E405 as a warning for low coolant level, preventing new cuts until corrected.
Details code 406 for low coolant flow detected by a turbine sensor, serving as a warning.
Covers code 407 for coolant overheating due to high ambient temperature, relating to codes 259-264.
Introduces Group 5 codes related to CANBUS (fiber optic) communication errors.
Explains code 501 for CANBUS communication failures, possible causes like fiber-optic problems.
Covers code 502 for CANBUS errors, suggesting troubleshooting similar to code 501.
Details code 503 as a warning for data errors, indicating potential system shutdown.
Introduces Group 6 codes related to CCM and program updates.
Lists internal faults for the CCM CPU board, generally requiring replacement.
Explains code 612 for USB port power faults, causes like shorts, and troubleshooting.
Details code 613 for USB log file creation issues, suggesting formatting or different flash drives.
Explains code 614 for missing USF file, required for program updates, and troubleshooting.
Covers codes for missing update files for CCM, DPC, or DMC, suggesting trying another flash drive.
Lists revision history of the manual, including cover dates, revisions, and changes made.
| Brand | Victor |
|---|---|
| Model | AUTO-CUT 300 XT |
| Category | Welding System |
| Language | English |