EasyManua.ls Logo

Victor CUTMASTER 102 - Service Manual

Victor CUTMASTER 102
112 pages
Print Icon
To Next Page IconTo Next Page
Loading...
100
208/230V
460V 600V
400V
VictorThermalDynamics.com
Art # A-08618_AD
Service
Manual
Revision: AM Issue Date: September 4, 2014 Manual No.: 0-4998
CUTMASTER
102
PLASMA CUTTING SYSTEM

Table of Contents

Questions and Answers

  • J
    Julia PowellAug 18, 2025
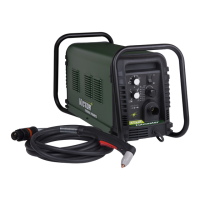
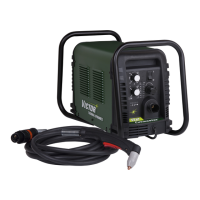
    Why is the torch cutting diminished on my Victor CUTMASTER 102?
    • M
      Mrs. Emily WrightAug 18, 2025
      If the torch cutting is diminished on your Victor Welding System, consider the following: 1. Ensure the current setting is correct and adjust it if necessary. 2. Check the torch consumables for wear and replace them as needed. 3. Verify the work cable connection to the work piece is secure. 4. Reduce the cutting speed if the torch is being moved too fast. 5. Check for excessive oil or water in the torch. If the issue persists, there may be failed components in the unit, requiring you to return it to an authorized service center for repair.
  • R
    Robert CampbellAug 20, 2025
    What to do if nothing happens when the torch switch is closed on my Victor Welding System?
    • S
      Scott IngramAug 20, 2025
      If nothing happens when the torch switch or remote switch is closed (or the CNC START signal is active) and there is no gas flow with the DC LED OFF on your Victor Welding System, it could be due to: * A problem in the torch and leads switch circuit (or remote pendant switch circuit); take the torch and leads (or remote pendant) to an authorized repair facility. * The CNC controller device not providing a Start signal; contact the controller manufacturer. If the problem persists, there may be failed components in the unit, requiring you to return it to an authorized service center for repair or replacement.
  • J
    Juan Campbell MDAug 23, 2025
    What to do if FAULT and 75 PSI indicators are flashing on my Victor CUTMASTER 102?
    • M
      Mary JacksonAug 23, 2025
      If the FAULT and 75 PSI indicators are flashing on your Victor Welding System, it means the start signal is active when the ON/OFF switch is turned on. This can happen if the hand torch switch or hand pendant switch is held closed, or if the CNC START signal is active low. To resolve this, release the START signal source. Alternatively, there may be a problem in the torch and leads switch circuit, or failed components in the unit, requiring replacement or repair at an authorized service center.
  • X
    xariasAug 26, 2025
    Why is the FAULT indicator flashing with 65 PSI on my Victor Welding System?
    • B
      Brian CunninghamAug 26, 2025
      If the FAULT indicator is flashing along with the 65 PSI indicator, and Fan MOT 1 is ON on your Victor Welding System, it could be due to several reasons. First, check if the INPUT VOLTAGE SELECTION SWITCH is set correctly for your primary input voltage; if not, turn off the power and adjust the switch accordingly. Second, a qualified person should check the primary input voltage to ensure it meets the unit's requirements. Lastly, faulty components within the unit could also be the cause, requiring you to return it to an authorized service center for repair or replacement.
  • K
    Kimberly BentonAug 28, 2025
    What to do if the GAS indicator is OFF and FAULT/MIN pressure indicators are flashing on my Victor CUTMASTER 102 Welding System?
    • J
      Jessica McclureAug 28, 2025
      If the GAS indicator is OFF, and both the FAULT and MIN pressure indicators are flashing on your Victor Welding System, it could be due to several reasons: 1. The gas supply might not be connected; ensure it is properly connected. 2. The gas supply might not be turned ON; make sure to turn it ON. 3. The gas supply pressure might be too low; set the air supply inlet pressure to 120 psi. 4. The AIR PRESSURE CONTROL regulator might be set too low. If none of these steps resolve the issue, there may be failed components in the unit, requiring you to return it to an authorized service center for repair or replacement.
  • M
    Morgan MedinaSep 1, 2025
    What does it mean when FAULT and 85 PSI indicators are flashing at 1 cycle per second on my Victor CUTMASTER 102 Welding System?
    • M
      Melissa ThomasSep 1, 2025
      If the FAULT indicator is flashing along with the 85 PSI indicators at 1 cycle per second on your Victor Welding System, it could be due to: * The upper O-Ring on the torch head being in the wrong position; remove the shield cup and correct the O-Ring's position if necessary. * A stuck torch start cartridge; turn OFF the power supply, bleed down system pressure, remove the shield cup, tip, and start cartridge, and check the start cartridge's lower end fitting for free movement, replacing it if it does not move freely. * Worn or faulty torch parts; inspect and replace the torch consumable parts if needed. * A shorted torch. If these steps do not resolve the issue, consider replacing the torch and leads or returning the unit to an authorized service center for repair.
  • E
    Eric MeyerSep 4, 2025
    What does it mean when FAULT and 85 PSI indicators are flashing at 5 cycles per second on my Victor CUTMASTER 102 Welding System?
    • M
      Mr. Luis PaulSep 4, 2025
      If the FAULT indicator is flashing along with the 85 PSI indicators at 5 cycles per second on your Victor Welding System, it may be due to low output voltage during pilot or cut. Check the torch consumable parts for wear or foreign debris. If you are using an automation torch, ensure the tip does not contact the work piece during the cut with the output set above 45 amps; cut with the tip off the plate. For these modes, remove the START signal to reset the machine.
  • G
    gcraneSep 6, 2025
    Why are FAULT and 70 PSI indicators flashing with Fan MOT 1 turning on after 20 seconds on my Victor CUTMASTER 102 Welding System?
    • J
      johnhillSep 6, 2025
      If the FAULT and 70 PSI indicators are flashing and after 20 seconds fan MOT 1 turns ON on your Victor Welding System, it could be due to: * A loose shield cup; hand tighten it until it is snug. * The torch not being properly connected to the power supply; ensure the torch ATC is securely fastened to the unit. * A problem in the torch and leads PIP circuit. If these steps do not resolve the issue, it may be necessary to replace the torch and leads or return the unit to an authorized service center for repair or replacement.
  • L
    Loretta Fisher MDSep 8, 2025
    Why is the TEMPERATURE indicator ON and the FAULT indicator flashing on my Victor CUTMASTER 102 Welding System?
    • B
      browncrystalSep 8, 2025
      If the TEMPERATURE indicator is ON and the FAULT indicator is flashing on your Victor Welding System, it could be due to: * Obstructed air flow through or around the unit. * Exceeding the duty cycle of the unit; allow the unit to cool. If the problem persists, there may be failed components in the unit, requiring you to return it to an authorized service center for repair or replacement.
  • J
    Joseph HarperSep 12, 2025
    Why doesn't the A/C Indicator light up when the ON/OFF switch is ON for my Victor Welding System?
    • S
      Shane GreerSep 12, 2025
      If the ON/OFF switch is ON but the A/C Indicator does not light on your Victor Welding System, consider the following: * Ensure the primary power disconnect is in the ON position. * Have a qualified person check the primary fuses/breakers. * Connect the unit to a known good primary power receptacle. If these steps do not resolve the issue, return the unit to an authorized service center for repair or replacement.

Summary

SECTION 1: GENERAL INFORMATION

Important Safety Precautions

Covers essential safety guidelines for operating plasma arc equipment, including gases, fumes, electric shock, fire, noise, and arc rays.

Statement of Warranty

Details the terms and conditions of the product warranty.

SECTION 3: SYSTEM INSTALLATION

Primary Input Power Connections

Instructions for connecting single-phase and three-phase power.

SECTION 3: TORCH INSTALLATION

SECTION 4: SYSTEM OPERATION

Front Panel Controls and Features

Overview of the controls and indicators on the power supply's front panel.

Preparations for Operation

Steps to take before starting operation, including torch and power checks.

SECTION 4: TORCH OPERATION

Torch Parts Selection and Cut Quality

Guidance on selecting torch parts and understanding cut quality.

SECTION 5: SYSTEM SERVICE

Common Faults and Troubleshooting

Identifies common problems, causes, and solutions.

Fault Indicators and Circuit Isolation

Explains fault indicators and provides procedures for isolating circuit issues.

Power and Pilot Arc Problems

Addresses issues related to input power, internal power, and pilot arc.

Main Arc, Controls, and CNC Interface Issues

Troubleshooting for main arc, controls, and CNC interface errors.

Test Procedures

Step-by-step instructions for testing electrical components and circuits.

SECTION 5: TORCH SERVICE

Torch Consumable Parts Inspection and Replacement

How to inspect and replace worn torch parts.

SECTION 7: REPLACEMENT PROCEDURES

APPENDICES

System Schematics

Electrical schematics for 208/460V and 600V units.

Victor CUTMASTER 102 Specifications

General IconGeneral
ProcessPlasma Cutting
Open Circuit Voltage (OCV)300 VDC
Weight28 kg (62 lbs)
Cutting Capacity (Recommended)25mm
Gas SupplyDry, Oil-Free Air or Nitrogen

Related product manuals