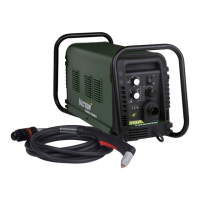
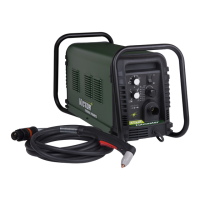
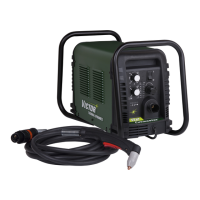
CUTMASTER 102
Manual 0-4998 SERVICE
5-19
J. Fans MOT 2 & MOT 3 do not turn ON after
START signal is activated.
1. Open connection between Main PCB 1 J13 to 40A PCB
5 J4.
a) Verifyconnectorsarepluggedin.Checkcontinuity
.
b) MeasurevoltageatJ4-2toJ4-10on40AMPPCB
5 for 12VDC. The voltage should drop to less than
2VDC after a START signal is active. If the 12VDC
is not present or does not drop to less than 2VDC
after a START signal is activated, then replace the
ribbon cable.
2. Defective 40AMP PCB 5
a) MeasurethevoltagebetweenJ1-1toJ1-2onthe
40AMP PCB 5 for 12VDC after the START signal is
activated. If 12VDC is present replace 40AMP PCB
5.
3. Defective Fans MOT 2 and 3.
a) If12VDCispresentonJ1andJ2connectorson
40APCB5,replacefansMOT2&MOT3.
5.09 Main Arc and Controls Problems
A. Main arc will not establish, LED D59 on Main
PCB remains ON while pilot arc is striking the
work piece.
1. Work Cable not connected.
a) Connectcabletoworkpiece
2. Work cable open / broken.
a) Checkcontinuityofworkcable.Insureconnection
of cable to clamp is secure.
B. When Pilot Arc is brought to the work piece,
the arc goes out immediately or extinguishes
while cutting. ERROR indicator and 85 PSI
indicator flashing.
a) FerritelteronribboncablebetweenJ1onLogicPCB
3 to J2 on Main PCB 1 is broken, loose or missing.
b) FerriteonwireharnessbetweenJ13connectoronMain
PCB 1 to J4 connector on 40A PCB 5 is broken, loose
or missing.
c) WiresSEC1andSEC2routedtooclosetocomponent
U2on40APCB5.Re-routetospacealeast1inch
(25mm)away.
d) Olderrevision40APCB5.ReplaceifPCB5revisionis
"AC" or earlier.
C. Main arc transfers but current cannot be
adjusted.
1. Defective Logic PCB 3.
a) Whilemainarcistransferred,measurevoltageon
MainPCBbetweentestpointsGND1toI_DMD1.
b) Adjust CURRENTCONTROL POTENTIOMETER
from maximum to minimum. Voltage should vary
from 4VDC at max to 1 VDC at min
IfvoltagedoesnotvarywithCURRENTCONTROLPOTEN-
TIOMETER, replace Logic PCB 3.
2. Defective Main PCB 1.
a) ReplaceMainPCB1.
D. In LATCH mode, when the START signal is
released the arc shuts OFF immediately.
1. Defective Logic PCB 3
a) ReplaceLogicPCB3
E. With CURRENT CONTROL POTENTIOMETER
set at maximum, output current is only 60
amps.
1. Tip is touching the work piece, Drag mode.
a) Lifttipoffworkpiece
2. Defective Pilot IGBT on Main PCB 1
a) Checkpersection4.10-I
3. Open Sync cable between J14 on Main PCB 1 and
40Amp PCB 5.
a) Checkcontinuityandreplaceifopen.
4. Open connection between J13 on Main PCB 1 to J4 on
40A PCB 5.
a) Checkcontinuity.
5. Defective 40Amp PCB 5.
a) Replace40AmpPCB5
F. With CURRENT CONTROL POTENTIOMETER
set at maximum, output current is only 70
amps.
1. Open Sync cable between J14 on Main PCB 1 and
50Amp PCB 5.
a) Checkcontinuityandreplaceifopen.
2. Open connection between J13 on Main PCB 1 to J4 on
50A PCB 5.
a) Checkcontinuity.
3. Defective 50Amp PCB 5.
a) Replace50AmpPCB5
 Loading...