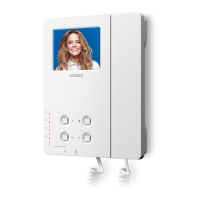
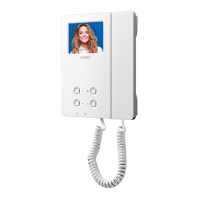
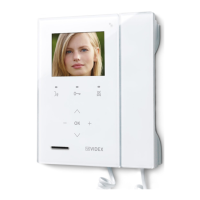
LEDS FIG. 1
LED
Privacy on LED
It illuminates when the privacy service is enabled,
when pressing the service button or during pro-
gramming mode.
LED
Generic use LED
It is controlled from the terminal DOL.
Normally used to signal the door status (open or
closed).
CONTROLS FIG. 1 AND FIG. 2
PT1
Contrast adjustment trimmer*
Rotate anticlockwise to increase or clockwise to
decrease.
*Not available in some LCD versions.
PT2
Hue adjustment trimmer
Rotate anticlockwise to increase or clockwise to
decrease.
VR1
Microphone volume adjustment trimmer
Rotate anticlockwise to decrease or clockwise to
increase.
PT3
Brightness control sliding wheel
Rotate anticlockwise to increase or clockwise to
decrease (when videophone is closed).
SW2
Call tone volume switch
3 levels: low, medium and high.
PROGRAMMING
The programmable settings are:
• Privacy service duration (from 15 minutes to 20 hours or innte);
• Melody (9 available);
• Number of rings (3 or 6);
• Video mode (coax or balanced);
• Videophone address (Phone ID).
TO SET PRIVACY SERVICE DURATION
1. Press and keep pressed
button for 10 seconds to enter privacy service duration programming mode: the LED turns on and
the unit emits a “beep“;
2. Press button as many times as required. Each press is equal to 15 minutes: the unit emits a “beep“ every time the button is
pressed. I.E.: press 4 times for 1 hour, 12 for 3 hours. Default: innite. Max value: 20 hours. To program innite privacy time don’t
press any buttons;
3. Wait for some seconds: the LED turns o and the unit emits a “beep“ that conrms the new setting is properly stored;
4. The unit returns to stand-by mode.
TO SET MELODY
1. Press and keep pressed button for 10 seconds until the unit plays the current programmed melody and emits a “beep” at the end.
2. Press again button to listen to the available melodies (maximum 9);
3. Once the selected melody has been reached, wait 5 seconds for a “beep”;
4. The new melody will be stored.
Note: To set the melody it is required that the videophone is connected in a system where the +20Vdc voltage from Art.893N1 is
always enabled.
TO SET THE NUMBER OF RINGS 6 OR 3:
Default setting is 6, to set 3 proceed as follows:
1. Turn o the videophone by unplugging the connector from the PCB;
2. Make a short between terminals GNDV and LB on the connector;
3. Plug the connector in and wait for a beep before removing the short;
4. To go back to 6 rings, do the same but two “beeps” will be emitted.
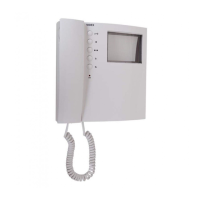
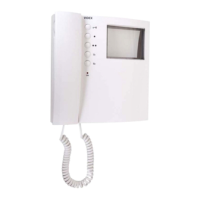
Art.6276 3.5" colour display videophone

 Loading...