EasyManua.ls Logo

View Quest Retro DAB User Manual

View Quest Retro DAB
5 pages
To Next Page IconTo Next Page
Page #1 background imageLoading...
Page #1 background image
1
Retro DAB Operation Guide
Where to put your radio
It is important that you consider carefully in advance where your radio will be situated and make sure
that it is:
* On a flat and stable surface
* Within 1.4metres of a power socket (if using mains power)
* Where you can fully extend the telescopic aerial
* Away from bright sunlight or heat sources, such as a radiator
* Not in a humid or very damp place such as a bathroom
Setting up
Connect the mains power lead into the socket on the back of the radio (DC IN) and plug the power
adaptor into the mains power wall socket and switch on.
Fully extend the radio aerial in a vertical position to obtain the maximum signal strength.
When switching on for the first time, slide the power switch on the back of the radio to “ON”, “Welcome
to Digital Radio” will be displayed. Then it will show the clock. If don’t do further operation, the backlight
will turn off and it enters into Standby Mode. Press button, it starts working.
Functions
1. Mode: DAB (BAND
5A-13F), FM (87.5MHz-108MHz), IPOD, AUX_IN.
2. LCD:2x16 dots matrix; black background white fonts, negative LCD
3. Power Supply: AC INPUT 100-240V ; DC_OUTPUT 5V/2A
4. Output Power: 1.5W X2
5. STANDBY MODE Show Clock
Keys and controls
1. --- Standby Power ON or OFF
2. ---Scan stations
3. PRE ---Store stations selected
4. ---Scroll up
5. --- Confirm and pause
6. ---Scroll down
7. MODE ---Switch among different modes
8. INFO --- Information
9. ---Alarm/snooze//sleep
multifunction button
10. VOL- --- Decrease volume
11. VOL+ --- Increase volume
DAB Operation
1. Connect the mains power lead into the socket on the back of the radio (DC in 5V) and plug the
Question and Answer IconNeed help?

Do you have a question about the View Quest Retro DAB and is the answer not in the manual?

View Quest Retro DAB Specifications

General IconGeneral
BrandView Quest
ModelRetro DAB
CategoryRadio
LanguageEnglish

Summary

Where to Put Your Radio

Setting Up the Radio

Radio Functions and Specifications

Available Modes

Lists available input modes: DAB, FM, iPod, and AUX.

LCD Display Details

Describes the 2x16 dot matrix display with negative LCD.

Power Supply Information

Details AC input voltage and DC output specifications.

Output Power Rating

Specifies the audio output power of the unit.

Standby Mode Clock

Indicates the clock display feature in standby mode.

Keys and Controls Overview

Standby Power Control

Button function for turning power on or off.

Station Scanning

Button function for scanning radio stations.

Station Presets

Button function to store selected radio stations.

Navigation Controls

Buttons for scrolling up and down through options.

Play/Pause Function

Button function to confirm selections or pause playback.

Mode Switching

Button function to switch between different operating modes.

Information Display

Button function to show additional information.

Alarm/Snooze/Sleep

Multifunction button for alarm and sleep settings.

Volume Adjustment

Buttons for decreasing and increasing volume.

DAB Radio Operation

Initial DAB Scan

Automatic quick scan for DAB stations on first use.

Station Selection

Switching between available stations using navigation buttons.

Scan Modes

Options for Quick SCAN and FULL SCAN.

Seeking Stations

Using PREV/NEXT buttons to find preferred stations.

Storing Preset Stations

Saving current stations to preset memory locations.

Time Synchronization

Radio automatically synchronizes time with DAB station.

Displaying Station Info

Accessing detailed information like DLS, frequency, and signal quality.

Manual Station Tuning

Manually selecting DAB channels and stations.

FM Radio Operation

Switching to FM Mode

Selecting FM band using the MODE button.

Manual Frequency Tuning

Adjusting FM frequency in small increments.

Automatic Station Scanning

Scanning for available FM stations automatically.

Quick Frequency Search

Rapidly tuning to a specific FM frequency.

Storing FM Presets

Saving desired FM stations to preset memory.

Displaying FM Information

Viewing RDS data, audio type, and signal quality.

Audio Output Selection

Switching between Stereo and Mono audio modes.

RDS Time and Date Sync

Automatic time synchronization from RDS data.

iPod Mode Operation

Connecting an iPod/iPhone

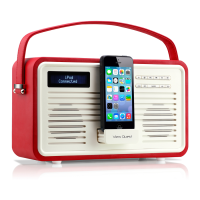
Instructions for connecting devices via the 30-pin connector.

Playback Control

Managing track playback, pause, and resume.

High-Speed Search

Using buttons for fast forward and rewind.

Auxiliary Input (AUX-IN) Operation

Connecting External Audio

How to connect audio sources using the AUX-IN jack.

System Operations

Factory Reset Procedure

Restoring the radio to its default factory settings.

Checking Software Version

How to view the current software version.

Alarm Clock Functionality

Setting Alarms

Configuring up to two alarms in standby or working mode.

Alarm Wake-Up Behavior

How the radio wakes up to different sources (DAB, FM, iPod, Beep).

Alarm Volume Level

The default volume level for alarm sounds.

Snooze Functionality

Using the snooze feature for temporary alarm silencing.

Sleep Timer Setting

Setting a timer for automatic power-off.

Battery Powered Operation

Environmental Disposal Information

Related product manuals