11
Only use UL Cered wall mount kits.
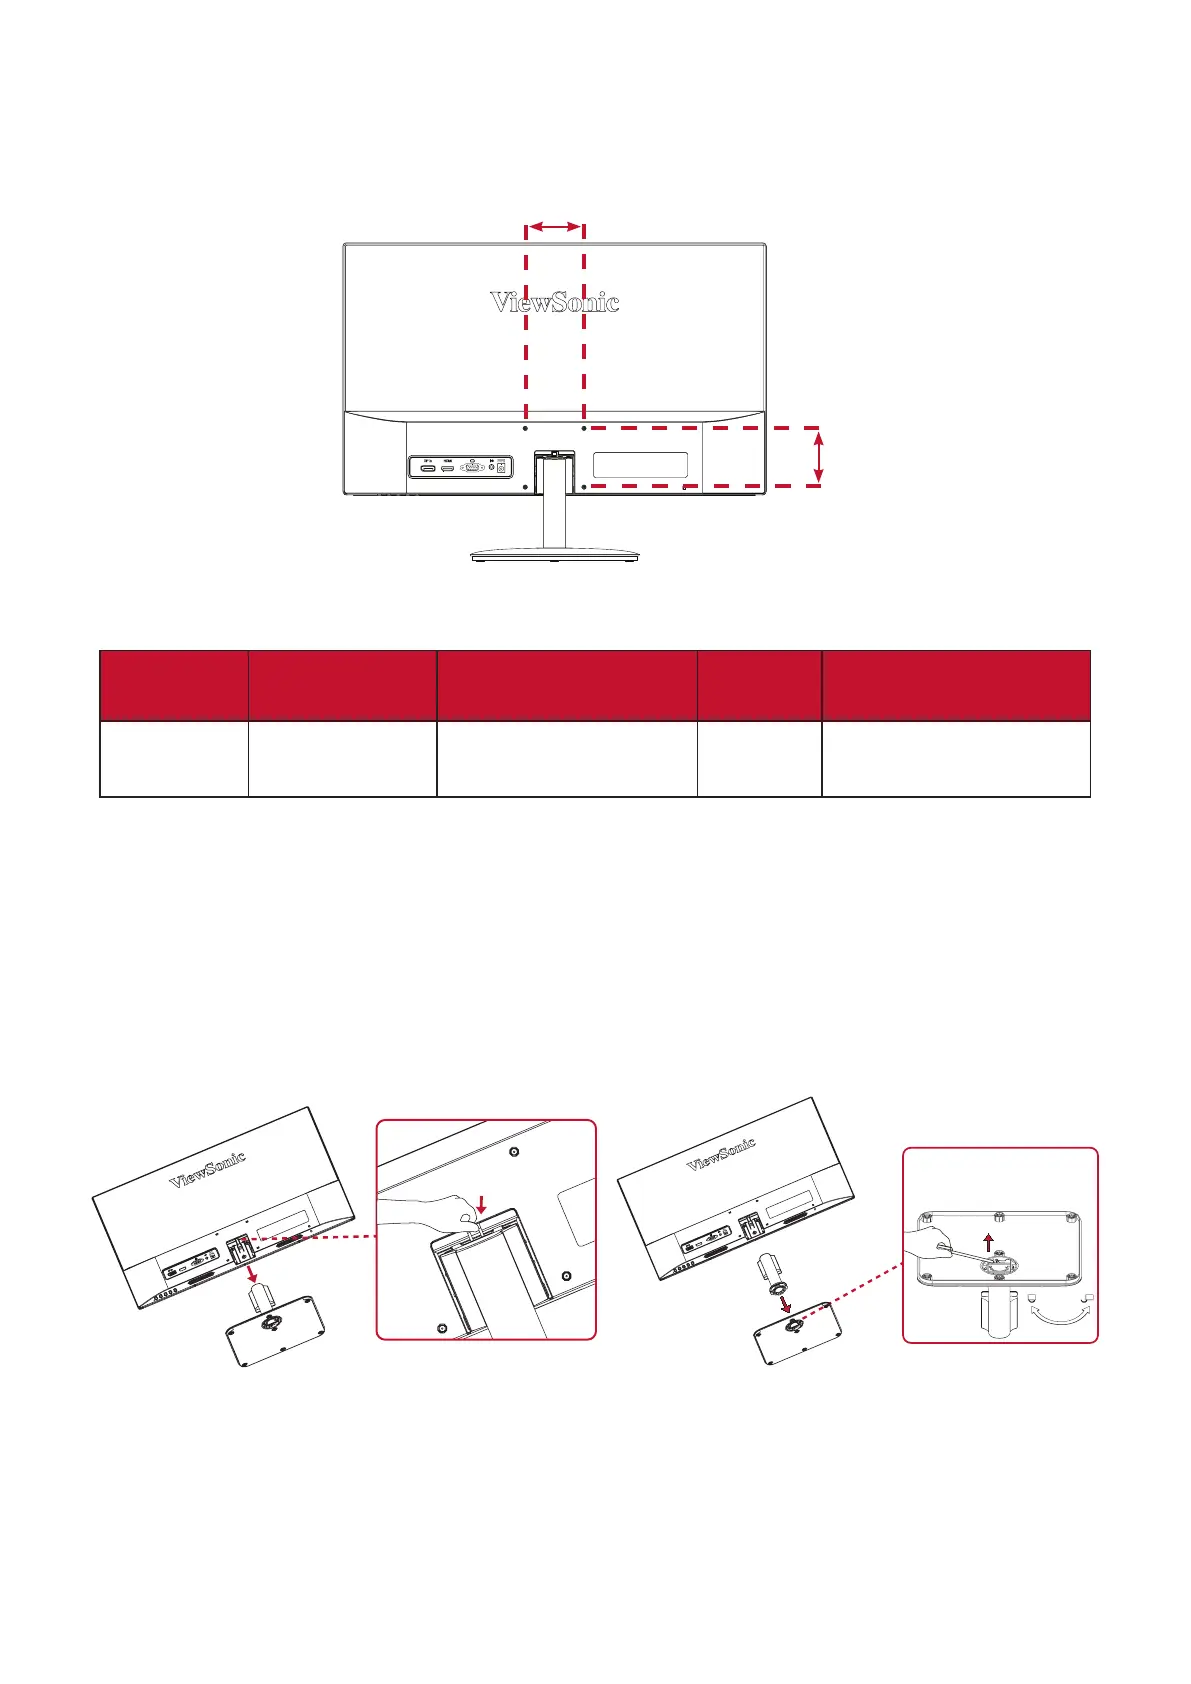
75 mm
75 mm
Refer to the table below for the standard dimensions for wall mount kits.
Maximum
Loading
(W x H)
Interface Pad
(W x H x D)
Pad Hole
14 kg 75 x 75 mm 115 x 115 x 2.6 mm Ø 5 mm
M4 x 6 mm
4 pieces
Wall mount kits are sold separately. To obtain a wall mounng kit,
contact ViewSonic® or your local dealer.
1. Turn o the device and disconnect all cables.
2. Place the device on a at, stable surface with the screen facing down.
3. Remove the monitor stand.
1
2
H
DMI
H
DMI
4. Aach the mounng bracket to the VESA mounng holes at the rear of the
device. Then secure it with four (4) screws (M4 x 6 mm).
5. Follow the instrucons that come with the wall mounng kit to mount the
monitor onto the wall.
 Loading...