4949
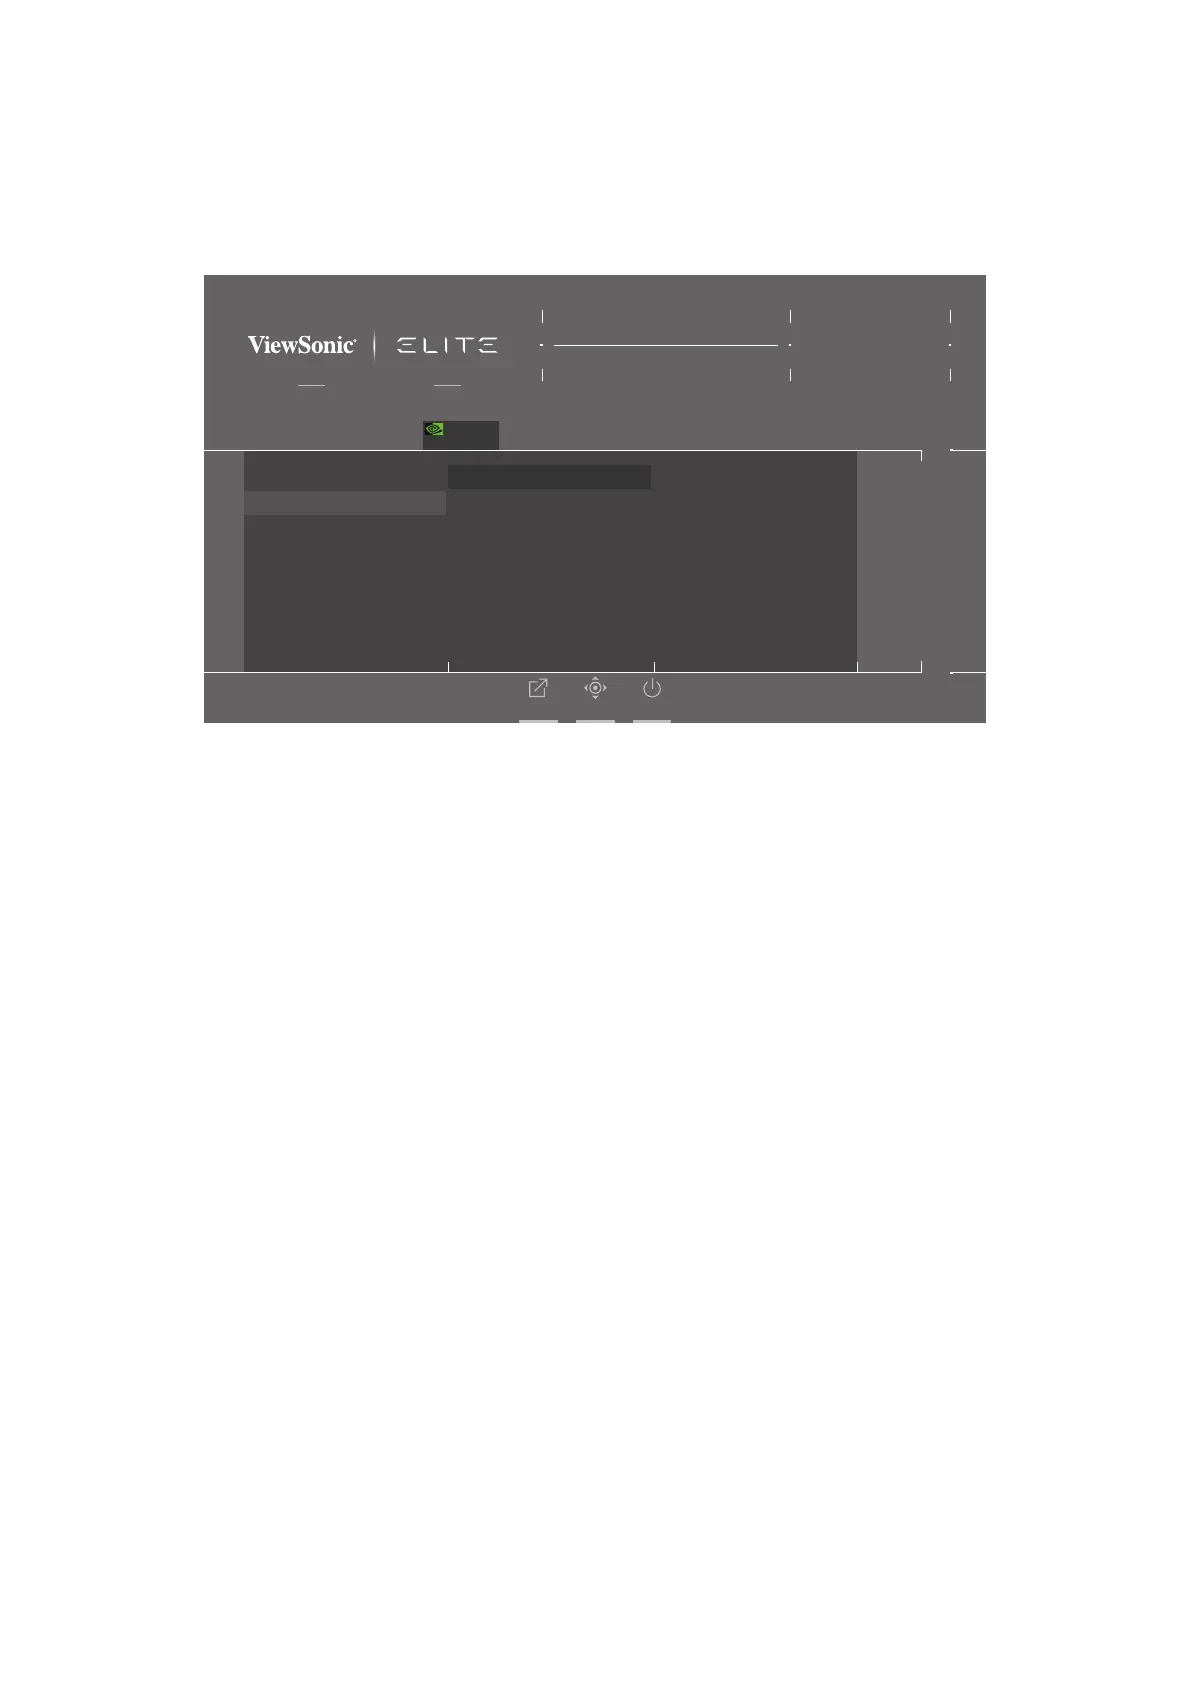
4. Turn on the NVIDIA Reex Latency Analyzer in the monitor’s OSD Menu:
Press the [●] key or move the joy key [◄] or [▲] or [▼] to display the On-
Screen Display (OSD) Menu.
Using the joy key, go to: G-SYNC Processor > NVIDIA Reex Latency
Analyzer > PC + Display Latency > On.
G-Sync
Game Modes
ON
G-SYNC Esports
NVIDIA Reflex Latency Analyzer
FPS
HUD Location
HUD Color
PC + Display Latency
Monitoring Sensitivity
Show Monitoring Rectangle
Rectange Preset
Rectangle Location
Rectangle Size
On
Off
Hz
Custom 1
Max. Refresh Rate
Exit Navi. Power
Game Modes Display Input Select Audio Adjust Setup Menu
144
XG321UG
G-SYNC®
Processor
5. Setup the Monitoring Rectangle.
The NVIDIA Reex Latency Analyzer measures ashes or bright changes on the
screen. The measurements are taken within the Monitoring Rectangle.
To measure latency, the Monitoring Rectangle will need to be moved over a
locaon on screen where a ash or change in brightness will occur when the
le mouse buon is pressed (e.g, placed over the muzzle of a rearm in an FPS
game).
In the OSD Menu:
Press the [●] key or move the joy key [◄] or [▲] or [▼] to display the On-
Screen Display (OSD) Menu.
Using the joy key, go to: G-SYNC Processor > NVIDIA Reex Latency
Analyzer > Rectangle Locaon to adjust the locaon of the Monitoring
Rectangle.
NOTE:
• A preset locaon can be chosen under Rectangle Preset.
• The Monitoring Rectangle’s size can be adjusted under Rectangle Size.
6. Now the PC + Display Latency will be able to be measured by pressing the le
mouse buon.
To learn more, visit: hps://www.nvidia.com/en-us/geforce/news/reex-latency-
analyzer-360hz-g-sync-monitors/.