Do you have a question about the Vikeri 4K and is the answer not in the manual?
Details service centers and contact information for the 4K model.
Outlines the 30-day replacement/refund and one-year warranty policy.
Explains the different functions of the power switch: OFF, TEST, and ON modes.
Guide for opening the camera, inserting batteries, and setting the power switch to test mode.
Instructions for formatting the SD card, resetting the camera, and changing photo resolution.
Details on setting video resolution, modes, video length, time/date, and language.
Instructions for turning the camera to ON mode and testing motion detection.
How to use the REPLAY button to view recorded videos.
Instructions for playing, pausing, and stopping videos during playback.
Details on using 4 or 8 AA 1.5V alkaline batteries, compatibility, and recommendations.
Information on using an external 6V DC adapter and avoiding overcharging.
Detailed functions of each button: MENU, REPLAY, navigation, SHOT, and OK.
Specifies operating modes: Photos, Videos, or Photos & Videos.
Allows selection of different photo resolutions (5MP to 32MP).
Sets the number of photos taken in one shooting (1, 2, 3, or 10).
Enables selection of various video resolutions from 640*480P to 3840*2160P.
Choose resolution for Time-Lapse videos (3MP, 5MP, 8MP).
Adjusts the duration of individual video recordings (3s to 10 min).
Option to enable or disable audio recording.
Sets the interval between consecutive triggers (2s, 30s, 60min).
Adjusts the sensitivity of the motion detection sensor (Low, Middle, High).
Allows scheduling the camera to operate during specific time periods.
Changes camera mode to interval photo or video capture.
Sets the user interface language for the camera.
Determines if the camera overwrites old files when the SD card is full.
Sets the current time, date, and format for the camera.
Configures whether to display date and time on photos.
Enables setting a 4-digit password to protect the camera.
Controls the audible beep sound for button presses.
Formats the SD card, erasing all data; requires careful decision.
Assigns a 4-digit serial number to the camera for identification.
Resets all camera settings to their factory defaults.
Displays the current firmware version of the camera.
Procedure for booting the camera via USB when it fails to turn on.
How to view photos and videos directly on the camera's LCD screen.
Instructions for deleting single files or all files via the menu.
Automatically cycles through photos with a 2-second display per photo.
Protects individual files or all files from accidental deletion.
Steps to connect the camera to a computer via USB to transfer files.
Instructions for mounting the camera on a wall using the fixation kit.
Guide for attaching the camera to a tree using the installation belt.
Important notes on SD card usage, formatting, power, water, temperature, and batteries.
Answers to frequently asked questions regarding video playback, photo display, freezing, connectivity, and battery issues.
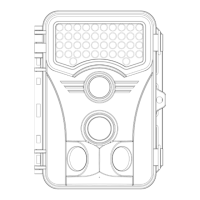
The Vikeri 4K Trail Camera is a versatile device designed for hunting, wildlife monitoring, or farm surveillance. It offers a range of features for capturing photos and videos, with various modes and settings to suit different needs.
The camera operates in three primary modes:
The camera supports both photo and video capture, or a combination of both. Users can select different photo resolutions (5MP to 32MP) and video resolutions (VGA to 4K). It also offers a "Photo Series" setting to capture multiple photos in a single shooting event.
Motion detection is a key feature, with adjustable sensitivity (Low, Middle, High) to suit various environments. The "Shot Lag" setting allows users to define the interval between triggers, preventing excessive recording.
For specific monitoring periods, the "Target Recording Time" feature enables the camera to operate only during user-defined hours (e.g., PM 9:00 to AM 6:00).
The "Time Lapse" function transforms the camera from motion detection mode to interval photo mode. In "Normal" time lapse, the camera takes photos or records videos at set intervals. "TL video" mode automatically stitches these interval photos into a video. It's important to note that infrared (IR) functionality is disabled when Time Lapse is active.
Getting started with the Vikeri 4K Trail Camera involves a few simple steps:
The camera can be mounted on a wall using a metal plate, bolts, and stoppers, or on a tree using the provided installation belt. The belt can be shortened by passing it through multiple holes on the support. For added security, both the fixation kit and installation belt can be used together.
| Resolution | 4K |
|---|---|
| Trigger Speed | 0.2s |
| Waterproof Rating | IP66 |
| Night Vision | Yes |
| Power Source | 8 AA batteries |
| Photo Resolution | 30MP |
| Battery Life | 6 months |
| Storage | Micro SD card, up to 256GB |
| Detection Range | 65ft |
| Display | 2.4 inch LCD |
| IR Flash Range | 65ft |
| Detection Distance | 65ft |