32
UNIT INSTALLATION (Cont’d)
Before moving the unit in place, confirm the finished dimensions, electrical location, minimum door and shelf
clearances, and door panel instructions.
1. Position unit in front of cutout.
2. Remove the top air grille assembly.
a. Remove the center grille louver by lifting up and pulling forward.
b. Remove the grille/end cap assembly by removing two (2) screws.
3. Verify operation by plugging power cord in receptacle.
PPoowweerr sswwiittcchh wwiillll bbee sshhiippppeedd iinn tthhee ““OONN”” ppoossiittiioonn aanndd
sshhoowwrroooomm sswwiittcchh wwiillll bbee iinn tthhee ““OONN”” ppoossi
ittiioonn..
(If showroom switch is switched to the “OFF” position, showroom
mode is engaged and power is shut-off to the compressor. This mode is for showroom display only).
PPoowweerr
SSwwiittcchh
SShhoowwrroooomm
SSwwiittcchh
4. Roll unit into cutout to within 3” (7.6 cm) of being flush with cabinets. To avoid kitchen cabinet damage, place
cardboard between cabinets and unit. Push cardboard back with unit and remove cardboard when unit are in place.
Remove power cord slack by pulling nylon cord straight out while pushing unit completely into place. Power and
nylon cord will rest along unit side.
NNOOTTEE:: WWhheenn mmoovviinngg tthhee uunniitt iinnttoo ppoossiittiioonn,, bbee ccaarreeffuull nnoott ttoo ccrriimmpp,, kkiinnkk oorr
ccrruusshh tthhee ccooppppeerr wwaatteer
r ssuuppppllyy lliinnee..
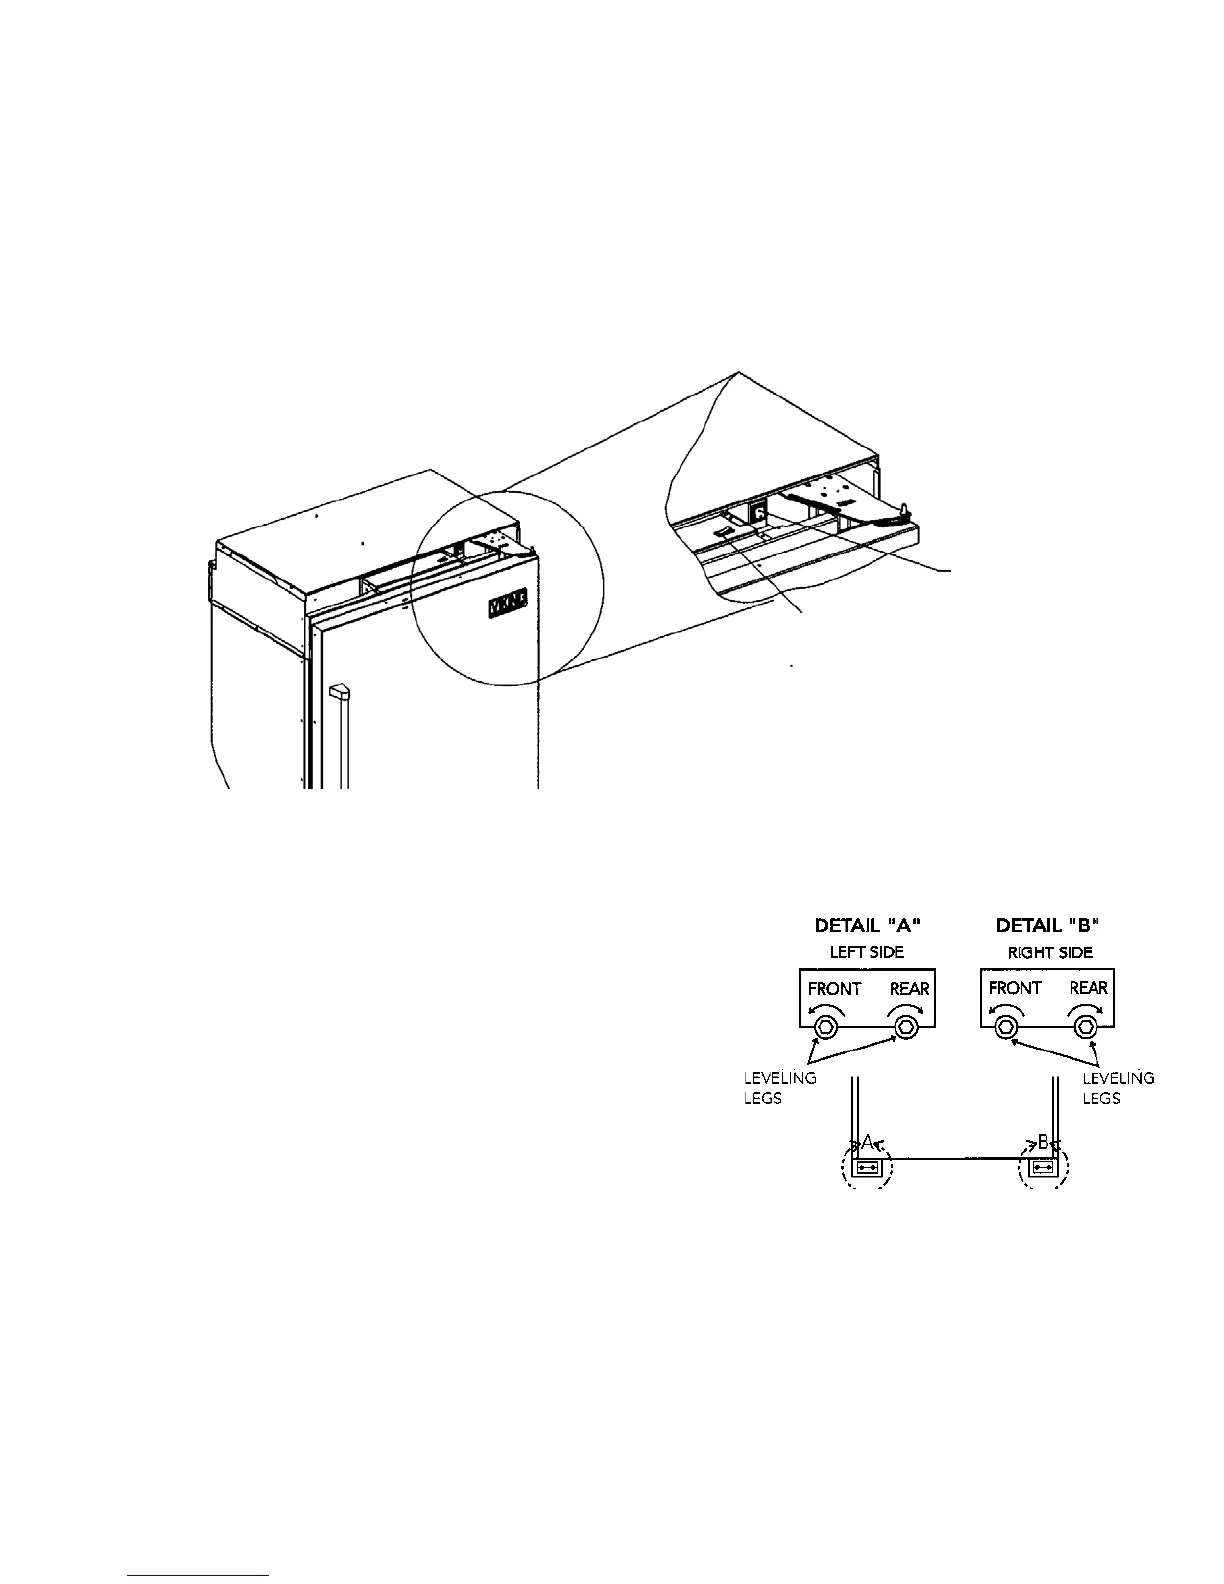
5. Lift the unit off the rollers, adjust to desired height and level unit
by using a 5/16” hex head wrench. (Refer to Figure at the right)
a) To raise (clockwise)/lower (counterclockwise) right side
rear, rotate the right side rear hex rod.
b) To raise (clockwise)/lower (counterclockwise) the left side
rear, rotate the left side rear hex rod.
c) To raise (clockwise)/lower (counterclockwise) the right
side front, rotate the right side front hex rod.
d) To raise (clockwise)/lower (counterclockwise) the left side
front, rotate the left side front hex rod.
NNOOTTEE:: DDOO NNOOTT uussee aann eelleeccttrriicc ddrriivviinngg ddeevviiccee.. OOvveerrttiigghhtteenniinngg ccaann
ccaauussee ddaamma
aggee..
6. To secure unit, raise unit until compartment cover is firmly seated under the soffit or anti-tip boards. Refer to
“Securing the Unit” section on page 31 for more information.
7. Open door. Display should flash. Press Display On pad. There is a 6 minute delay before the unit starts. Verify the
position of the power on/off and showroom switch if there is no power to unit.
VVIIEEWW SSHHOOWWNN WWIITTHH KKIICCKKPPLLAATTEE RREEMMOOVVEEDD