17
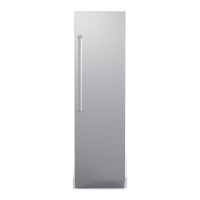
Note: If the unit is to be installed fl ush with
the cabinets, the fl ush mount side trim must
be installed fi rst. If not, skip to “Installation”.
Step 1 - Locate the necessary parts: Two (2)
fl ush mount trim pieces and a hardware kit
with twenty-two (22) screws.
Step 2 - Remove the side trim on the
refrigerator and discard the trim and screws.
Step 3 - Align the top of the fl ush mount
side trim with the top of the unit's machine
compartment. Using the screws included in
the hardware kit, attach the side trim to the
unit, only using the holes visible through
the side trim. Note: DO NOT use the screw
holes in the machine compartment.
1
2
3
4
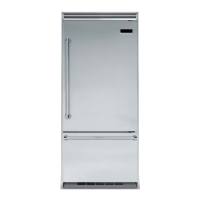
Place unit in front of cutout. Pull the center grille louver up at an angle and pull out.
Using an 8” (20.3 cm) magnetic nut driver, remove
the two 1/4” (0.6 cm) screws.
Remove grille assembly.
Installation
Flush Mount Side Trim Installation
(Sold Separately)