Page 8 For technical questions, please call 1-888-866-5797. 59491
SAFETY OPERATION MAINTENANCESETUP
Operating Instructions
Using the Work Light
1. Press and hold the Power Button for 3
seconds to illuminate Work Light.
2. Press (short press) the Button repeatedly
to cycle through the light modes:
Work Light, SOS, and Strobe.
3. Pressing and holding down the Power
Button again will turn the Work Light off.
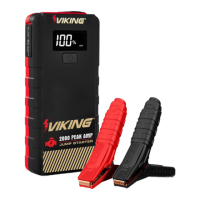
Jump-Starting a Vehicle
Note: Read the vehicle owner’s manual pertaining
to jump-starting prior to using the Jump Starter.
Note: Use ONLY the clamp set
included with this Jump Starter.
1. The Jump Starter must be fully charged.
Recharge as needed, according to Charging
the Jump Starter section on page 7.
2. Turn off the vehicle ignition switch and all
accessories (lights, radio, climate control, etc.).
WARNING! TO PREVENT SERIOUS INJURY:
DO NOT TOUCH POSITIVE AND NEGATIVE
BATTERY CLAMPS TOGETHER.
3. Insert Jumper Cable into ‘Jump Start’ port
on Jump Starter. If properly connected to the
Jump Starter, the Clamp’s LED light will start
flashing green, indicating ‘Standby’ mode.
4. Connect the red Positive Battery Cable to
vehicle’s positive battery terminal. Connect the
black Negative Battery Cable to the vehicle
chassis. The Clamp’s green LED light will turn
to solid green, indicating ‘Ready’ mode.
WARNING! TO PREVENT SERIOUS INJURY:
DO NOT CONNECT TO THE NEGATIVE
TERMINAL OF THE BATTERY.
Note: If improperly connected, the Red Error
LED on the Clamp will illuminate and alarm will
sound. Adjust connections to clear error. When
error is cleared, the LED will illuminate green.
5. Start the vehicle.
Note: Cold weather may affect performance of the Jump
Starter’s Lithium Battery. If you hear only a click and the
engine does not turn over, try the following:
With the Jump Starter connected to the car battery,
turn on all vehicle lights and electrical accessories
for one minute. This draws current from the jump
starter and warms the battery. Now try to crank the
engine. If it does not turn over, repeat the procedure.
Extremely cold weather may require the battery to
be warmed repeatedly before the engine will start.
Note: Some vehicles may need to be connected to the
Jump Starter for at least 30 seconds before starting.
6. After the vehicle is started, first remove
Cable from the Jump Starter, then remove
the black Negative Battery Cable, and
lastly the red Positive Battery Cable.
7. Recharge the Jump Starter if battery level
is below 50%, or every 3-6 months.
Charging/Powering USB Devices
1. Plug USB Cable into Jump Starter’s USB Port.
Attach other end of USB Cable to device.
2. Press ‘Battery Status / Work Light’ Button.
3. When finished, remove device from the USB Port.
Note: The USB-C port is input and output, and
can also be used to charge the device with a
C-to-C Cable by first plugging in the cable and then
pressing the Battery Status / Work Light Button.
 Loading...