This document is a Use & Care Manual for a 5 Series 15"W. Undercounter/Freestanding Nugget Ice Machine, specifically models FGN1515/CFGN1515 and FPN1515/CFPN1515. It provides comprehensive instructions for the safe and effective operation, maintenance, and troubleshooting of the appliance. The manual emphasizes the importance of reading and following all instructions carefully to ensure proper use, longevity, and to maintain warranty coverage.
Function Description
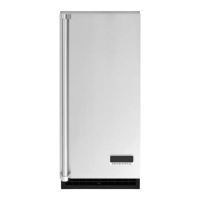
The device is an undercounter/freestanding nugget ice machine designed to produce nugget ice for household use. It is engineered to provide years of reliable service, with attention to detail in its design and construction. The machine automatically produces and stores nugget ice, replenishing the supply as ice is used or melts. It features an ultrasonic sensor for ice level control, which automatically activates the ice-making system when the ice level drops below a preset distance and turns it off when the preset level is reached. The machine is designed for quiet operation, though some noise during the ice-making cycle is normal. It can operate within a wide range of air temperatures, though optimal performance is achieved at specific air and water temperature ranges. The ice produced is suitable for human consumption, and the machine is designed to handle various water qualities, with specific recommendations for RO water and warnings against deionized water.
Usage Features
To start the ice machine, users must first turn on the water supply and switch on the electrical power. A simple push and release of the On/Off switch initiates the ice-making process, indicated by a blue "Ice Making" light. The machine takes approximately 10 minutes to begin dropping ice, and it will take about 6-7 hours to fill the 20 lb storage bin. The ice level control is fully automatic, requiring no user adjustment. A scoop is provided for ice retrieval and can be stored within the machine. The machine can be shut off at any time by pressing the ON/OFF button. It's important to note that the ice drops into the bin at an irregular rate, and some water drops may accompany the ice, both of which are normal. The manual advises against storing anything other than ice in the storage bin to prevent unsanitary conditions and drain blockages. For outdoor use, the machine should be kept from freezing, kept dry, and provided shade to maintain efficiency and prevent damage. A proper water supply with UV protection for plastic tubing (copper tubing is recommended) and backflow prevention are built-in features. Drainage should not be directed into swimming pools or onto grounds.
Maintenance Features
Regular maintenance is crucial for the longevity and efficient operation of the ice machine. The manual suggests a maintenance schedule of every 6 months, or more frequently depending on water conditions and environmental factors (e.g., carpets, pets). Key maintenance tasks include scale removal, water seal checks, water reservoir checks, bin drain checks, air-cooled condenser cleaning, and storage bin sanitation.
Condenser cleaning involves removing the kickplate and front service panel, vacuuming the condenser surface to remove dust and lint, and then reattaching the panels. A caution is given to avoid denting the fins during this process.
Winterizing the machine involves cleaning the ice-making system, turning off the machine and water supply, removing the back wall of the ice storage bin, removing the drain plug and draining the water reservoir, and then pouring about 1/2 gallon of RV antifreeze (propylene glycol) into the ice storage bin drain for drain pump models. Automotive antifreeze must not be used. Finally, the machine should be switched off and unplugged.
Scale removal from the ice-making system is a detailed process. It requires scooping out all ice, pressing the On/Off button, and then removing the back panel of the bin and the reservoir cover. Users must locate the blue float valve on/off lever and move it halfway to shut off the water. The drain plug is then pulled to drain the reservoir and evaporator, and replaced once draining is complete. A solution of cleaner and warm water (1.25 ounces of cleaner with 16 oz of warm water) is mixed, and 8 ounces (half a squirt bottle) is poured into the reservoir. A warning is provided regarding the acidic nature of the scale remover and precautions for skin contact or ingestion. After filling the reservoir, both the "Clean-Reset" and "On/Off" buttons are pressed and held for 5 seconds, causing the "Time to Clean" light to blink. The auger motor operates for 10 minutes, followed by the compressor starting and ice production beginning within 5-8 minutes. The "Time to Clean" light glows steadily until the clean cycle is complete. During the ice-making phase of the cleaning cycle, additional scale remover solution should be continuously added to keep the reservoir half full. Once all 16 oz of the solution is used, the float valve lever is moved to the "On" position. After 40 minutes, the machine and control panel lights will shut off. The system is then drained again, the reservoir cover and back wall are replaced, and a gallon of hot water is poured into the bin to flush the drain and melt any remaining ice. The bin liner should be scrubbed for mineral scale using any leftover scale remover solution (or a newly mixed solution of 2.5 ounces of Clear 1 Scale Remover and 1 quart of water), rinsed with hot water, and sanitized. Finally, the On/Off button is pressed to restart ice making. The ice scoop should also be regularly washed like any other food container.
Other maintenance includes wiping up any loose lime scale that may form on the gear reducer cover and occasionally checking the top bearing for wear. The top panel must be removed to access the bearing for this check.