12
Connect: Located in the “Event Programming” screen’s “Tools” pull down menu. This is used if you want to connect to
a different CTG-2A or are programming “Off Line” (CTG-2A not connected to PC) then want to connect to the unit and
upload the updated programming data.
Unit Name: Located in the “Event Programming” screen “Tools” pull down menu, this is useful if you have several units
in multiple locations with the same “dat” file. For single unit applications we recommend using the “dat” file name for the
unit name.
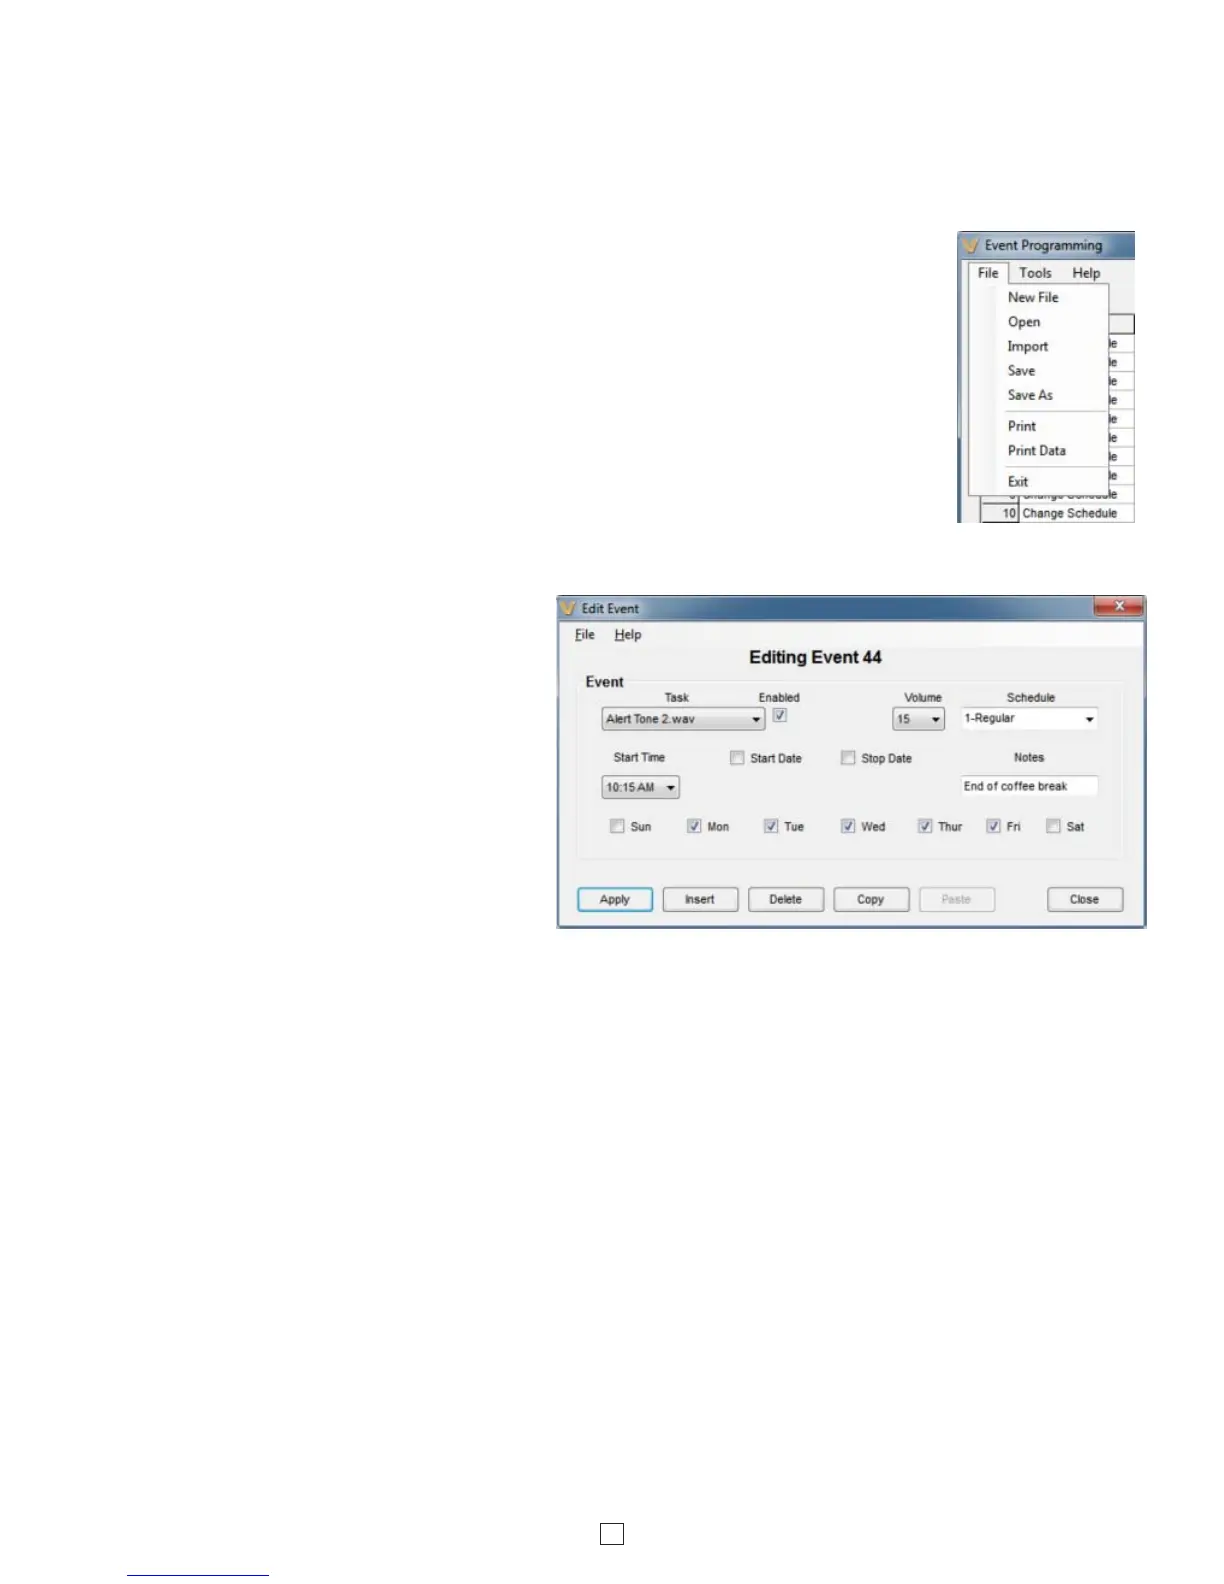
New File: Select this to create a new Event Programming dat file (right).
Open: Select this to open an existing Event Programming dat file (right).
Import: Select this when opening an existing Event Programming dat file that was previously
programmed from a different PC (right).
Add/Edit Event: Add each of your events by double clicking on any field in the next available
event (except the event number field). This opens the “Edit Event” screen that is used to
program or edit the one specific event (below right). If using multiple schedules and you wish
to copy a complete schedule, see “Block Edit” on page 14. If using multiple schedules and the
Calendar mode, you can disregard the “start date” and “stop date” when programming your
events. Once all of your events and schedules are programmed, you can use the Calendar
screen to decide which schedule is running each day and to disable tones on weekends,
holidays, etc.
Task: This pull down menu allows you to
program a specific event such as to play a
preprogrammed (uploaded) wave file, Change
Schedule, turn the Aux relay on or off, activate
a timed Aux relay, activate an automatic Time
Sync on a specific time and/or date or Start a
System Disable/Enable at a specific time
and/or date.
Time Sync: Located under “Task” pull down
menu. This is for programming an automatic
NTP synchronization event. This requires an
internet connection or local time server. The
CTG-2A’s internal clock accuracy is +/- 2ppm
or approximately +/- 63 seconds per yr. This
accuracy can be greatly increased by
programming Time Sync events daily or weekly. We recommend programming the Time Sync Start Time for after hours
and at an odd time to help minimize server load. Do not perform time syncs more frequent than twice an hour.
Duration: For a timed Relay event, this box sets the length of time the auxiliary relay will be actuated.
Time Dly (sec): For an Aux Relay On or Off event, this box sets the length of delay time (0.5 to 59.5 sec) before the
auxiliary relay will be turned on or off.
Start Date/Stop Date: The easiest way to program start and stop dates is to program them in the “Calendar” screen.
The start and stop times cannot be programmed and are fixed to 12:00am. Start and stop dates can also be programmed
in the event programming screen. Double click in the event row to open the “Edit Event” screen. The Start and Stop pull
down menus allow you to program Start and Stop dates for that specific event. Example: You would like to let your
employees off work an hour early during the week before Christmas. Simply program an event to play your normal 5:00
end of shift tone at 4:00 with start and stop dates for the week before Christmas.
Notes: This field in the “Edit Event” screen is useful for entering notes explaining what the event is signaling such as
“Period 2 Start”, “Lunch End”, “Shift 3 Start”, etc. The “Notes” field is only used for the convenience of the user and is
stored in the PC dat file. The CTG-2A does not make use of this information. Note: The first character in the “Note” field
should NOT start with a number as it will right justify the text.
System Disable: This task allows you to program a specific date and/or time to disable all timed events. This is useful
in schools for disabling all events during spring break, holidays, etc. Triggered inputs 1-4 will remain functional during
“System Disable” times. Note: If programmed using the “Calendar” screen, start and stop times will take place at
12:00AM. If specific times other than 12:00AM are required, the “Edit Event” screen must be used. When the CTG-2A
is in the “System Disable” Mode, the LED display will state “dS”.

 Loading...
