K
Kristen BakerSep 10, 2025
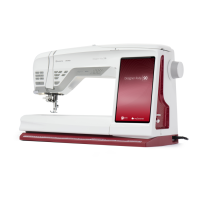
What to do if the screen of my Viking Sewing and Embroidery Machine does not respond to touch?
- LLisa SullivanSep 10, 2025
If the screen of your Viking Sewing and Embroidery Machine does not respond to touch, turn the machine OFF and then ON again.