65
64
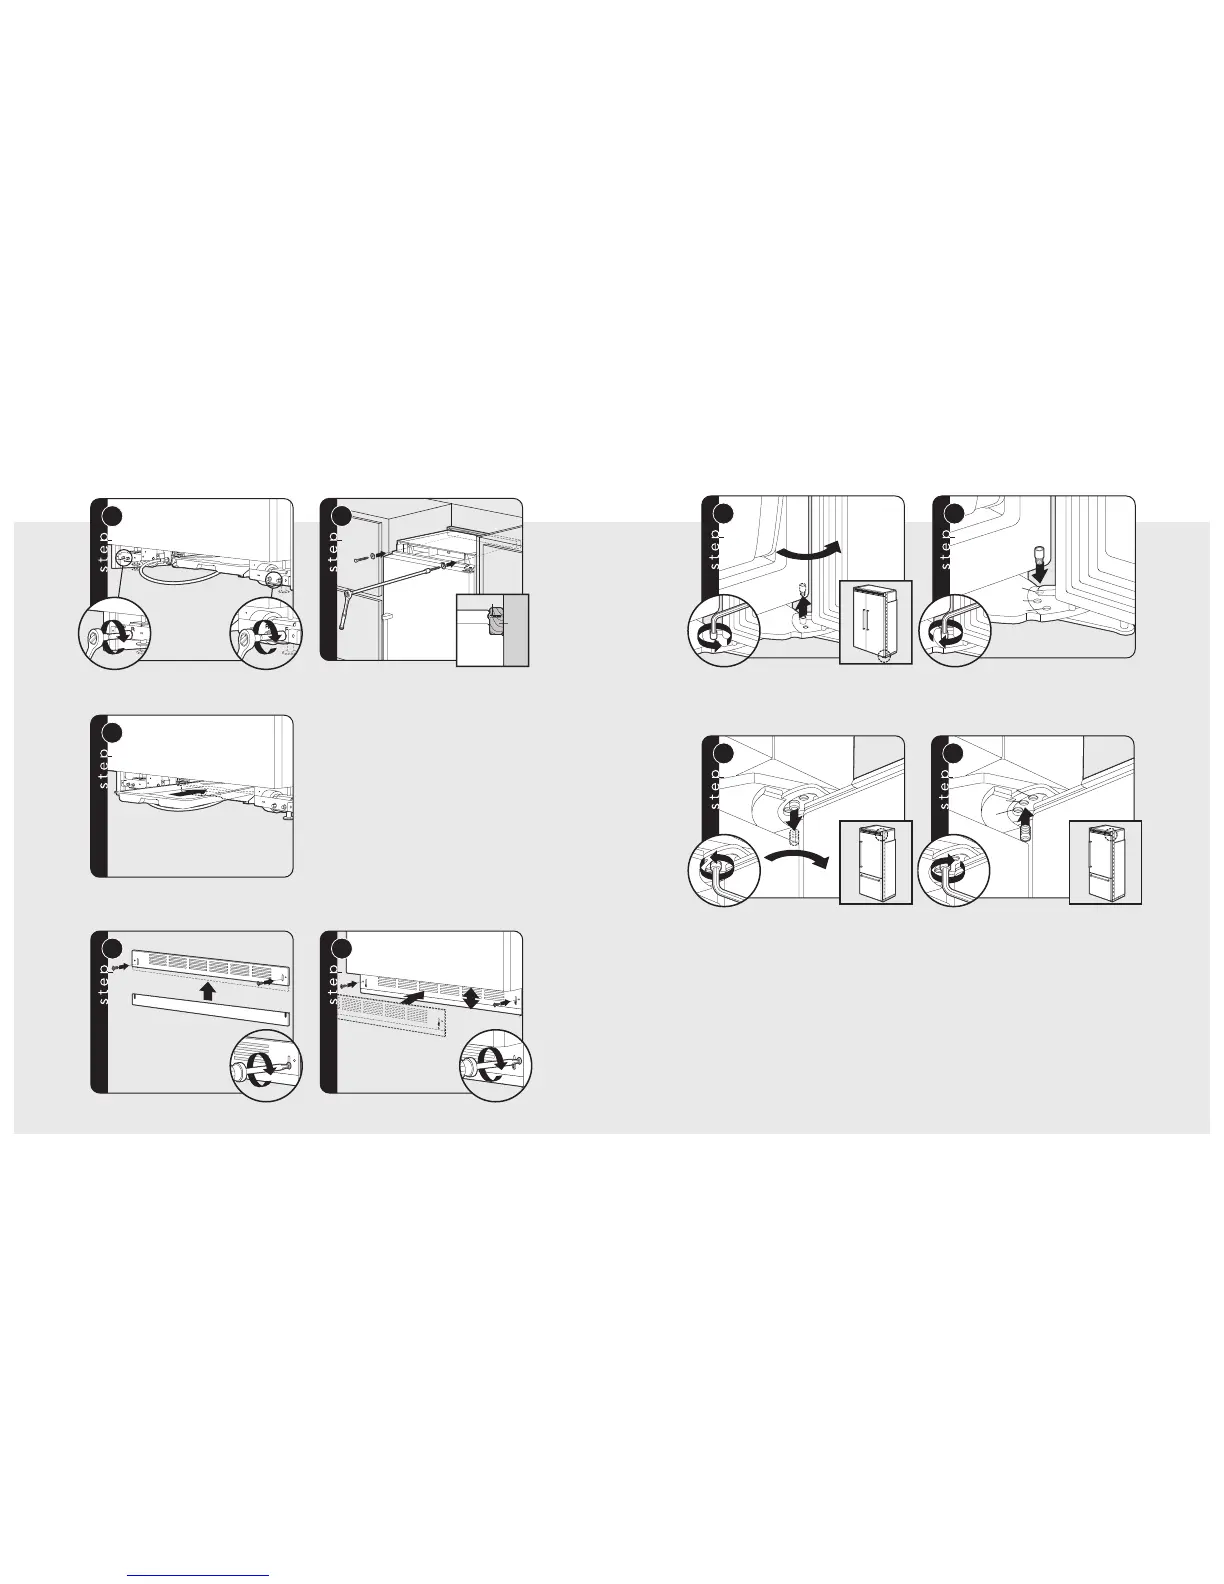
Lift unit off rollers to desired height
and level unit using a 5/16” head wrench.
Note: DO NOT use an electric device.
Overtightening can cause damage.
Attach positive secure self-tapping bolts
to 2 x 4 using a 22” extension.
Verify that drain pan is installed and aligned.
Align holes on both ends of louvered panels
and insert screws.
Using a phillips screwdriver, attach the
kickplate to the unit and adjust to desired height.
Open refrigerator door so door stop and
shoulder screw are accessible.
Note: Shoulder screw should be in 110˚ door opening position.
Remove shoulder screw and place in 90˚
or 120˚ position.
Open refrigerator door so door stop and
shoulder screw are accessible.
Note: Shoulder screw should be in 110˚ door opening position.
Remove shoulder screw and place
in 90˚ or 120˚ position.
Door Stop Adjustment (Side-by-Side/All Refrigerator/All Freezer)
Door Stop Adjustment (Bottom-Mount)
Hinge Adjustment (cont.)





 To Next Page