5
BBeeffoorree mmoovviinngg tthhee rreeffrriiggeerraattoorrss iinn ppllaaccee,, ccoonnffiirrmm tthhee ffiinniisshheedd ddiimmeennssiioonnss,, eelleeccttrriiccaall,, aanndd pplluummbbiinngg llooccaattiioonnss,, mmiinniimmuumm
ddoooorr cclleeaarraanncceess,, aanndd ddoooorr ppaanneell iinnssttaallllaattiioonnss aarree aaccccuurraattee.. ((SSeeee IInnssttaallllaattiioonn I
Innssttrruuccttiioonnss pprroovviiddeedd wwiitthh rreeffrriiggeerraattoorrss))..
1. Position refrigerators in front of cutout.
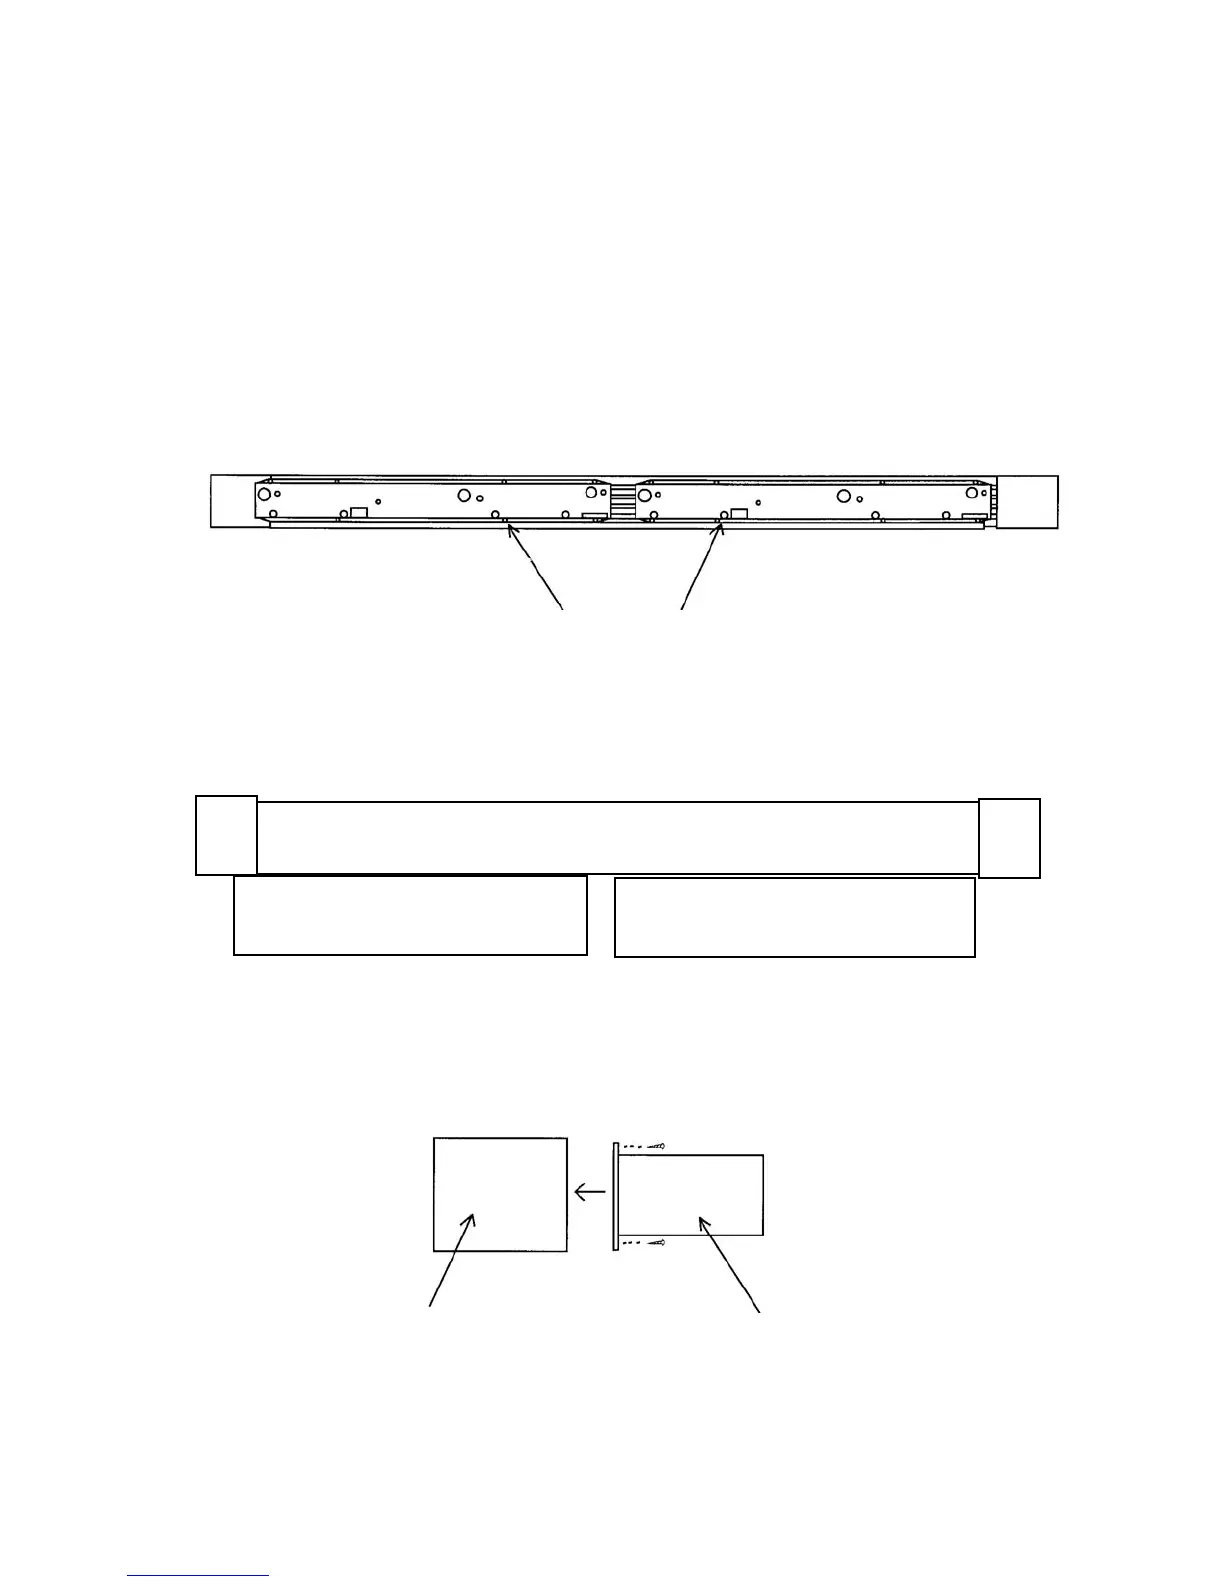
2. Remove the top air grille assemblies from both of the refrigerators.
a. Remove the center grille blades by lifting up and pulling forward.
b. Remove the grille/end cap assembly by removing the four (4) screws in each black air duct.
c. Remove the black air ducts by removing the eight (8) screws on the right hinge model and the seven (7)
screws on the left hinge model. Save the air ducts for the 72” grille installation.
GRILLE ASSEMBLY/INSTALLATION
PROFESSIONAL MODEL
BRTGK72SS
(FOR PBRTGK72SS INSTALLATION - SKIP TO PAGE 9)
SCREW HOLES
(4 Screws on top - 3 Screws on bottom)
(4 Screws on top - 4 Screws on bottom)
TOP VIEW OF GRILLE ASSEMBLY
TOP
EXPLODED SIDE VIEW OF GRILLE ASSEMBLY
(15 Screws Used)
FRONT GRILLE ASSEMBLY
BLACK AIR DUCTS



 To Next Page