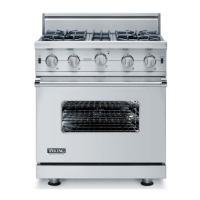
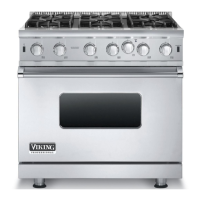
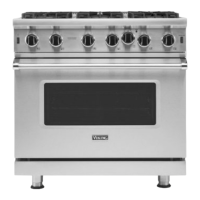
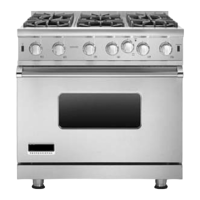
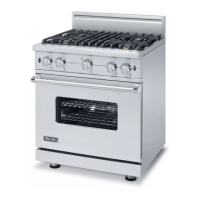
This document is a Use & Care Manual for Viking 5 Series Professional Freestanding Open Burner Gas Ranges, specifically models VGIC5302, VGIC5362, and VGIC5482.
Function Description
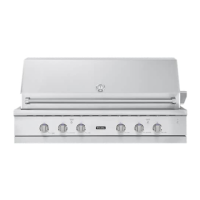
The Viking 5 Series Professional Freestanding Open Burner Gas Ranges are state-of-the-art appliances designed for baking, roasting, broiling, dehydrating, and defrosting. They feature open surface burners for rangetop cooking and an oven cavity with multiple cooking modes. The ranges are engineered to provide reliable service and superior cooking performance.
The oven cavity offers several performance modes, including conventional bake, convection bake, broil (infrared broil), and convection broil (infrared convection broil). These modes provide versatile cooking options for various dishes. The convection baking and broiling functions utilize air circulation for shorter cooking times and even results. The hidden 30,000 BTU burner in convection bake ensures fast and even baking, while the 1500°F closed-door infrared broiler delivers intense heat for searing meats. Two lights illuminate the oven cavity for better visibility.
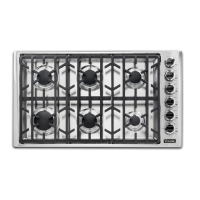
The rangetop features open burners with porcelain/cast iron caps and an automatic ignition/re-ignition system. This system ensures that burners ignite reliably and automatically reignite if the flame goes out. The burners are equipped with a Vari-Simmer™ setting, which provides a variable range of simmer flame heights, allowing for precise control over simmering, melting, and low-temperature cooking.
Usage Features
Oven Operation
The oven offers six rack positions, numbered from bottom to top, with three tilt-proof racks for easy arrangement. For optimal conventional baking, it's recommended to use only one rack. For two-rack baking, positions 2 and 4 or 3 and 5 are suggested.
BAKE (Natural Airflow Bake): This mode uses full power heat radiated from U-shaped bake burners at the bottom of the oven, circulated by natural airflow. It's ideal for single-rack baking, roasting, and casseroles, especially for dishes requiring high temperatures. To use, arrange the oven rack, set the temperature control knob, and close the door.
CONVECTION BAKE: This mode circulates heated air from the U-shaped bake burners using a motorized fan at the rear of the oven, ensuring even heat distribution. It's suitable for multi-rack baking and cooking large loads, offering quicker cooking times and less shrinkage when roasting. To activate, arrange the oven rack, set the temperature, and turn on the convection fan switch. When converting conventional recipes to convection, it's generally recommended to reduce the temperature by 25°F (10°C).
BROIL (Infrared Broil): The GourmetGlo™ infrared broiler at the top of the oven radiates intense heat. This setting is best for broiling small to average cuts of dark meats, 1 inch thick or less, where rare to medium doneness is desired. Rack position determines broiling speed, with higher positions for faster broiling.
CONVECTION BROIL (Infrared Convection Broil): Similar to regular broiling, but with the added benefit of air circulation from the motorized fan, which reduces smoke and peak food temperatures. This mode is ideal for broiling thick cuts of meat, producing better searing and retaining more juices with less shrinkage. To use, arrange the oven rack, center food on a cold broiler pan and grid, set the temperature control knob to "Broil," and turn on the convection fan switch. The door should be closed during operation, though the broiler element might cycle on and off during extended broiling times.
Convection Dehydrate: This function dehydrates fruits and vegetables by circulating warm air with a motorized fan, removing water through evaporation. It's important to use fresh, top-quality foods. Set the temperature control to 200°F (93.3°C) and turn on the convection fan switch.
Convection Defrost: This mode uses a motorized fan to circulate air, accelerating natural defrosting without heat. Place frozen food on a baking sheet, set the oven temperature control knob to "OFF," and turn on the convection fan switch.
Surface Operation
Lighting Burners: All burners are ignited by electric ignition; there are no standing pilots. To light, push and turn the appropriate control knob counter-clockwise to any "ON" position. The electric igniters will spark, producing a "clicking" sound. Once the burner lights, adjust the flame size using the control knob.
Vari-Simmer™: This feature allows for precise control over simmering, offering a variable range of flame heights to suit different food types and quantities.
Cooking Vessels: Any cooking vessels in good condition, free from excessive dents on the bottom, are suitable. For large pots or high flames, using front burners is recommended to minimize discoloration at the rear of the appliance.
Maintenance Features
General Cleaning: Before cleaning, ensure all controls are in the "OFF" position and the appliance is cool. Disconnect power if cleaning thoroughly with water.
Open Surface Burners: Wipe up spills immediately after they occur and cool down. Remove burner grates, bowls, and grate supports for cleaning in warm, soapy water. If burner ports are clogged, clean with a straight pin, being careful not to enlarge or distort them. Ensure burner caps are level when replaced.
Burner Caps: Routinely remove and clean burner caps with warm, soapy water and a soft cloth after each use. For cooked-on foods, use a non-abrasive cleanser and a soft brush or pad. Dry thoroughly to prevent rusting. Do not clean in a dishwasher or self-cleaning oven.
Control Panel: Clean with hot, soapy water and a soft clean cloth. Avoid cleaners containing ammonia or abrasives, as they can damage graphics.
Oven Surfaces: Never use ammonia, steel wool pads, abrasive cloths, cleansers, or abrasive powders, as they can permanently damage the oven. For non-self-cleaning ovens, a fume-free oven cleaner can be used following manufacturer's directions.
Control Knobs: Ensure knobs point to "OFF" before removal. Pull them straight off, wash in detergent and warm water, dry completely, and push firmly back onto the stem. Avoid ammonia or abrasive cleaners.
Stainless Steel Parts: Wipe regularly with hot, soapy water. For stubborn marks, use a liquid cleaner designed for stainless steel. Do not use steel wool, abrasive cloths, cleansers, or powders. For encrusted materials, soak the area with hot towels and use a wooden or nylon spatula. Do not use metal knives or spatulas. Wipe up citrus or tomato juice spills immediately to prevent permanent discoloration.
Glass Surfaces: Clean with detergent and warm water. Glass cleaner can be used for fingerprints, ensuring it doesn't run onto the exterior door surface.
Oven Racks: Clean with detergent and hot water. For stubborn spots, use a soap-filled steel wool pad.
Replacing Oven Lights: Disconnect electric power at the main fuse or circuit breaker. Unsnap the glass light cover using a screwdriver in the access groove. Firmly grasp and pull out the old bulb. Replace with a halogen bulb matching the specified volt and wattage requirements. Replace the glass light cover and reconnect power. Avoid touching the new bulb with bare hands; clean any oil signs with a soft cloth.