EasyManua.ls Logo

Viking VWUI5151 - User Manual

Viking VWUI5151
16 pages
Print Icon
To Next Page IconTo Next Page
Loading...
Install / Use & Care
MANUAL
5 SERIES
Professional Undercounter Wine Cellars
VWUI5151

Other manuals for Viking VWUI5151

Questions and Answers

  • J
    jayramirezSep 5, 2025
    Why is there water in the defrost pan of my Viking Refrigerator?
    • H
      Heidi SanchezSep 5, 2025
      The presence of water in the defrost pan of your Viking Refrigerator is normal in hot, humid weather. Ensure the pan is level to prevent overflow.
  • A
    ashley41Sep 4, 2025
    Why does the ice from my Viking Refrigerator have an off-taste or odor?
    • P
      Patrick WattsSep 4, 2025
      New plumbing connections can cause discolored or off-flavored ice in your Viking Refrigerator. Discard the first three harvests of ice. If cubes are stored too long, throw them away and make a new supply. Ensure food is wrapped properly, and clean the freezer and ice bin. If the water contains minerals, a filter may be needed to remove them.
  • J
    John NormanAug 25, 2025
    Why is my Viking Refrigerator ice maker not working or making ice slowly?
    • M
      Monique FowlerAug 25, 2025
      If your Viking Refrigerator's ice maker isn't working, first ensure the freezer is cold enough. It might take up to 24 hours to reach the correct temperature. Also, check if the on/off lever is in the OFF (up) position; lower it to the ON (down) position. If the freezer isn't cold enough, adjust the temperature controls and wait 24 hours.
  • A
    Adam HuntSep 3, 2025
    Why does the motor in my Viking Refrigerator seem to run too long?
    • K
      Kristine EllisSep 4, 2025
      Your Viking Refrigerator motor may run longer than usual on hot days, if the room is too warm, after adding a large amount of food, or due to frequent door openings. This is normal.
  • P
    potterbethanySep 3, 2025
    How to increase ice production in my Viking Ice Maker?
    • R
      Robert VegaSep 3, 2025
      To address low ice production in your Viking Ice Maker, start by checking for any restrictions in the drain or standing water in the bin. Next, clean the air-cooled condenser fins. Finally, clean the entire ice machine system.
  • S
    Shelby HuertaSep 3, 2025
    What to do if Viking VWUI5151 oven is not clean after self-clean cycle?
    • M
      mmcdonaldSep 3, 2025
      If your oven isn't clean after running the self-clean cycle, make sure that the temperature control knob is rotated all the way past the 'clean' setting until it stops. This ensures the cycle runs correctly.
  • D
    Dr. Matthew GordonSep 2, 2025
    Why Viking VWUI5151 oven does not operate in self-clean?
    • J
      jamie58Sep 2, 2025
      If the oven isn't operating in self-clean mode, it could be that the door isn't shut tight enough. The automatic door latch needs to engage to start the cycle, so ensure the door is firmly closed.
  • A
    Anne JohnsonSep 2, 2025
    Why my Viking Ranges door will not open?
    • E
      Erik PhillipsSep 2, 2025
      If the door won't open, it's likely because the oven is still in self-clean mode. You'll need to wait until the oven cools down. The door latch will automatically release once a safe temperature is reached.
  • M
    Mr. Adam GarnerSep 1, 2025
    What to do if the temperature display does not match the set point on my Viking Refrigerator?
    • M
      Michelle BeckerSep 2, 2025
      If the temperature display on your Viking Refrigerator doesn't match the set point, especially after just plugging in the unit, adding hot food, or frequently opening the door, allow the unit to stabilize for 24 hours.
  • G
    Gwendolyn SalasSep 1, 2025
    What to do if the Viking VWUI5151 Ranges door will not open after self-clean cycle?
    • J
      Jeffery ThompsonSep 1, 2025
      If the oven is still in self-clean mode, the door latch will release once a safe temperature is reached.

Overview

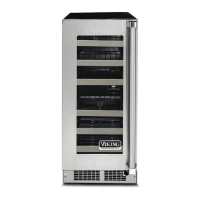
This document is the "Install / Use & Care MANUAL" for the Viking Range 5 Series Professional Undercounter Wine Cellars, specifically model VWUI5151.

Function Description

The Viking Range 5 Series Professional Undercounter Wine Cellar (model VWUI5151) is an appliance designed for the professional storage and preservation of wine. It is intended for built-in, undercounter applications and features an electronic control system for precise temperature management. The unit is equipped with shelving configurations optimized for wine bottles and includes interior lighting. It is designed to operate within a recommended installation location temperature range of 55 to 100°F (13 to 38°C) to ensure optimal performance. The appliance is designed for residential use, with a specific "Residential Plus" warranty for certain non-commercial applications like bed and breakfasts or private clubs, but is not intended for full commercial use in restaurants or institutional food service locations.

Important Technical Specifications

  • Model: VWUI5151
  • Door Style: (G)
  • Rough-in Opening Dimensions:
    • "A": 15" (38.1 cm)
    • "B": 34" to 35" (86.4 to 88.9 cm) (Minimum rough-in opening required is to be larger than the adjusted height of the cabinet.)
    • "C": * (Depth dimension may vary depending on installation. To recess entire door "F" dimension plus 1" (2.5 cm) for power cord plug thickness is required.)
  • Cabinet Dimensions:
    • "D": 14 7/8" (37.8 cm)
    • "E": 33 3/4" to 34 3/4" (85.7 to 88.3 cm)
    • "F": 23 23/32" (60.2 cm)
    • "G": 26 7/32" (66.6 cm)
    • "H": 37 13/32" (95 cm)
    • "J": 17 7/16" (44.3 cm)
  • Minimum Clearance: 3 1/2" (8.9 cm) from the bottom of the unit to the floor.
  • Electrical Requirements: A grounded 115 volt, 15 amp dedicated circuit is required (115V/60HZ/15A).
  • Product Weight: 105 lbs (47.6 kg).
  • Refrigerant: R600a (Isobutane), a flammable hydrocarbon.
  • Test Pressure: 140 PSI Low Side, 300 PSI High Side.
  • Shelving Configuration (VWUI5151): (6) 4-bottle wire racks.

Usage Features

  • Electronic Control: The appliance features an electronic control panel for managing various functions.
    • ON/OFF: Pressing the power button immediately turns the unit ON or OFF.
    • Temperature Adjustment: Users can adjust the set point temperature when the display is flashing by pressing the '+' or '-' buttons. The display shows the actual temperature inside the unit.
    • Temperature Units: Toggle between °F and °C by holding the '+' and '-' buttons for 5 seconds.
    • Interior Light Control: Pressing the light bulb icon turns the interior light on for 12 hours; pressing it again deactivates it. After 12 hours, the factory default (light turns on when the door is open) is restored.
    • Adjust Light Color: While holding the light bulb icon, press and release the power button to scroll through lighting options (White, Blue, White). The light is set at full intensity when the door is open and 50% intensity when closed.
    • Sabbath Mode: Enable Sabbath Mode by pressing and holding the light bulb icon for 5 seconds and releasing. The °F / °C symbol will flash briefly, and the interior light and display will go dark, remaining so until the user resets the mode. The unit continues to operate during this mode. Disable by pressing and releasing the light bulb icon.
  • Door Alert Notification: If the door is left open for more than 30 minutes, a tone will sound every minute, and "dr" will appear on the display. Closing the door silences the alert and resets the system.
  • High/Low Temperature Notifications: "HH" (High Temp) or "LL" (Low Temp) will appear on the display if the compartment temperature exceeds the control setting for an extended period.
  • Door Reversal: The door can be reversed to open from the opposite side, providing flexibility for installation. Instructions are provided for this process, involving loosening screws, removing the door, relocating the magnet actuator, and reinstalling components.

Maintenance Features

  • Front Grille Cleaning: It is crucial to keep the front grille area open and clear of obstructions to ensure proper airflow for the condenser. At least once or twice a year, lint and dirt should be brushed or vacuumed from this area. Obstructing the grille can lead to increased energy usage and reduced cooling capacity.
  • Cabinet Cleaning: The painted cabinet can be cleaned with a mild soap and water, followed by a thorough rinse with clear water. Abrasive scouring cleaners should never be used.
  • Interior Cleaning: The interior compartment should be washed with mild soap and water. Abrasive cleaners, solvents, polish cleaners, or undiluted detergents should NOT be used.
  • Appliance Care:
    • Avoid leaning on the door to prevent bending hinges or tipping the appliance.
    • Exercise caution when sweeping, vacuuming, or mopping near the front of the appliance to prevent damage to the grille.
    • Periodically clean the interior and check/clean the front grille as needed.
  • Power Failure Management: In the event of a power failure, correct it as soon as possible. Minimize door openings while the power is off to maintain the appliance's temperature.
  • Light Assembly Replacement: All models use an LED for interior illumination. If the LED fails, a qualified service technician should be contacted for replacement.
  • Energy Saving Tips:
    • Avoid installing the appliance near heat sources or in direct sunlight.
    • Ensure front grille vents are unobstructed and clean.
    • Plug the appliance into a dedicated power circuit.
    • Minimize door openings, especially when initially loading or after placing warm contents inside.
    • Maintain a relatively full storage compartment for better efficiency.
    • Allow hot items to reach room temperature before placing them in the unit.
    • Use the warmest temperature control setting that meets personal preference.
    • When on vacation, set the appliance to the warmest acceptable temperature for stored contents.
    • Turn the control to "off" if cleaning requires the door to be open for an extended period.
    • For wine storage, if serving temperatures are not required, return the compartment set temperature to the ideal red and white wine long-term storage temperature of 13°C / 55°F.
  • Troubleshooting Guide: The manual provides a troubleshooting guide to help users identify and resolve common issues such as the appliance not being cold enough, being too cold, interior light problems, noise/vibration, or the appliance not running. It suggests possible causes and remedies, advising users to contact a qualified service technician if problems persist.
  • Warranty Information: The product comes with a Two Year Full Warranty covering defective materials or workmanship in normal residential use. There's also a Ninety (90) Day Cosmetic Warranty and a Ninety (90) Day Warranty for "Residential Plus" applications. Additionally, a Six Year Full Warranty covers sealed refrigeration parts (compressor, evaporator, condenser, connecting tubing, dryer/strainer), extending to a Twelve Year Limited Warranty for these parts, covering the part itself from the seventh through twelfth year. Warranty service must be performed by a Viking Range LLC authorized service agent.

Viking VWUI5151 Specifications

General IconGeneral
BrandViking
ModelVWUI5151
CategoryRanges
LanguageEnglish

Related product manuals