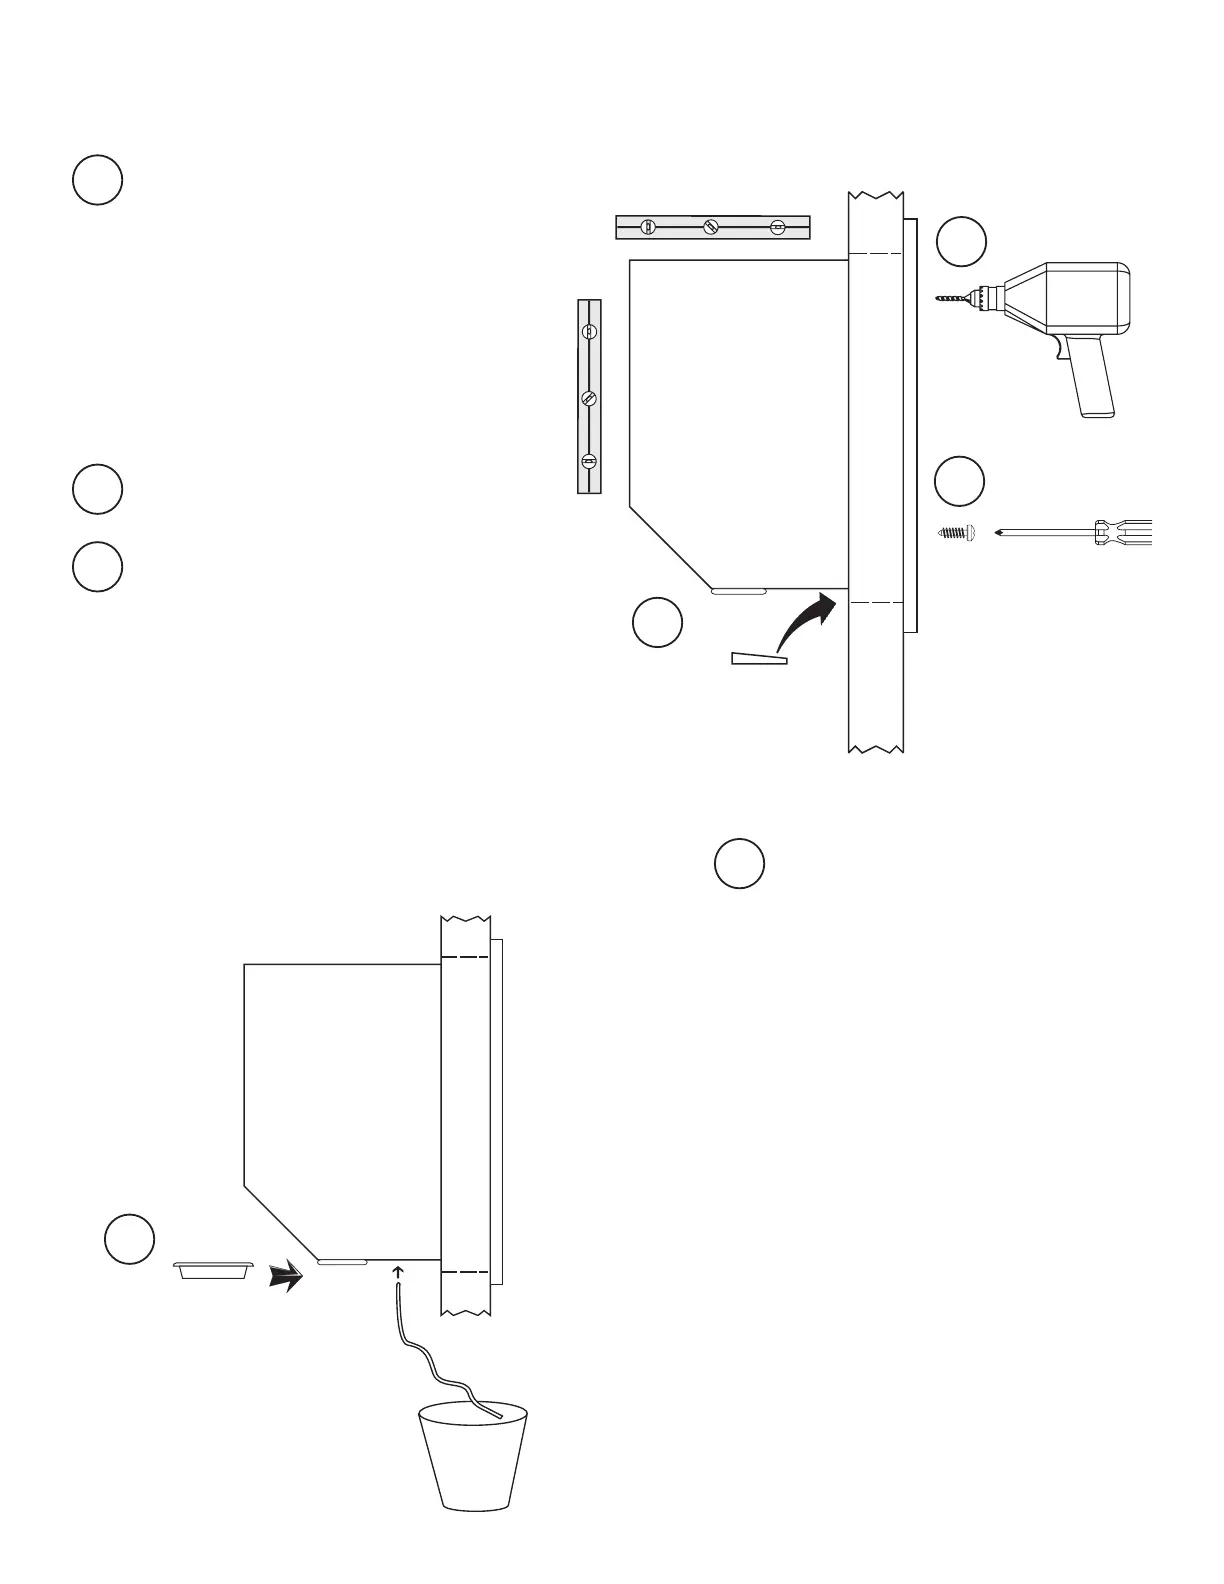
~ 5 ~
For Models 300, 600 and 900, slide the
accessory drain pan into tabs on underside
of unit. Check pan periodically and empty
if necessary.
NOTE: Model Slimline does not require an
accessory drain pan.
Substitute the supplied vinyl tubing for
the drain pan only if you observe a little
water in the pan. Our units are designed
to evaporate the condensate internally.
Only if your room is not designed accord-
ing to our specications should you
require a drainage tube attached to an
exterior container. If you are in doubt -
use the tubing.
NOTE: If the unit DOES produce excess
condensation, that’s a sure sign that the
enclosure is NOT adequately insulated,
the air seal is not sufcient and/or
the ambient conditions are too extreme.
Failure to correct these conditions will
result in shortened life expectancy for
the unit, excessive power consumption,
continued dripping, and will void the
warranty.
! Use a wedge under the
unit while moving into
position, to keep it up
off the rubber bumpers !
Drain Pan
Lift unit , tightly to the top of the cutout,
and move fully into position, resting on
the rubber bumpers.
Use a wedge or shim under the unit
Check that all bumpers remain in position,
as required, after moving.
Level the unit carefully from side to
side and from end to end, using shims if
necessary.
Pre-drill 1/16” holes through faceplate
holes into studs.
Partially install one upper screw through
faceplate into stud, then adjust the side-
to-side level again.
Partially install a second upper screw,
then adjust the back-to-front level.
Install the remaining screws, re-check all
levels and adjust if necessary.
Insulating tape on inner edges of faceplate
will compress to seal gap between cooling
unit and wall cutout.
Do not tighten the mounting screws
excessively !
5
HOW TO INSTALL YOUR COOLING UNIT
6
7
8
5
6
7
8